I'm getting close to needing a new clutch on the KA so I decided to do some learning and documenting about the process. See below!
I figured I would write a little bit about balancing for everyone's light reading over coffee albeit on a relatively technical subject.
For those of you that don't know, I spend my days at work in charge of the reliability of a lot of rotating equipment. I have learned a lot so far in my career and one of those subjects is balancing. In a nerdy sense, balancing changes either the mass distribution of a rotating item so that the mass centroid and centre of rotation coincide (adding or removing balancing weights) or by changing the axis of rotation so that it coincides with the centre of mass. Sounds pretty abstract, right? Generally this looks like mass addition or subtraction at a specific angle on the part to alter the mass distribution. Balancing is very important for high-speed machinery to reduce vibration. In fact, balance is actually measured by permissible residual unbalance rather than balance. Like most other technical items, absolute zero is tough to achieve so an achievable value must be chosen! For us at the mill, “over” balancing rotating equipment leads to better reliability because of the reduced vibrations in the machine. An 1800rpm pump running 350 days/year for 7 years will spin 6.3 billion cycles so every little reduction in vibration counts.
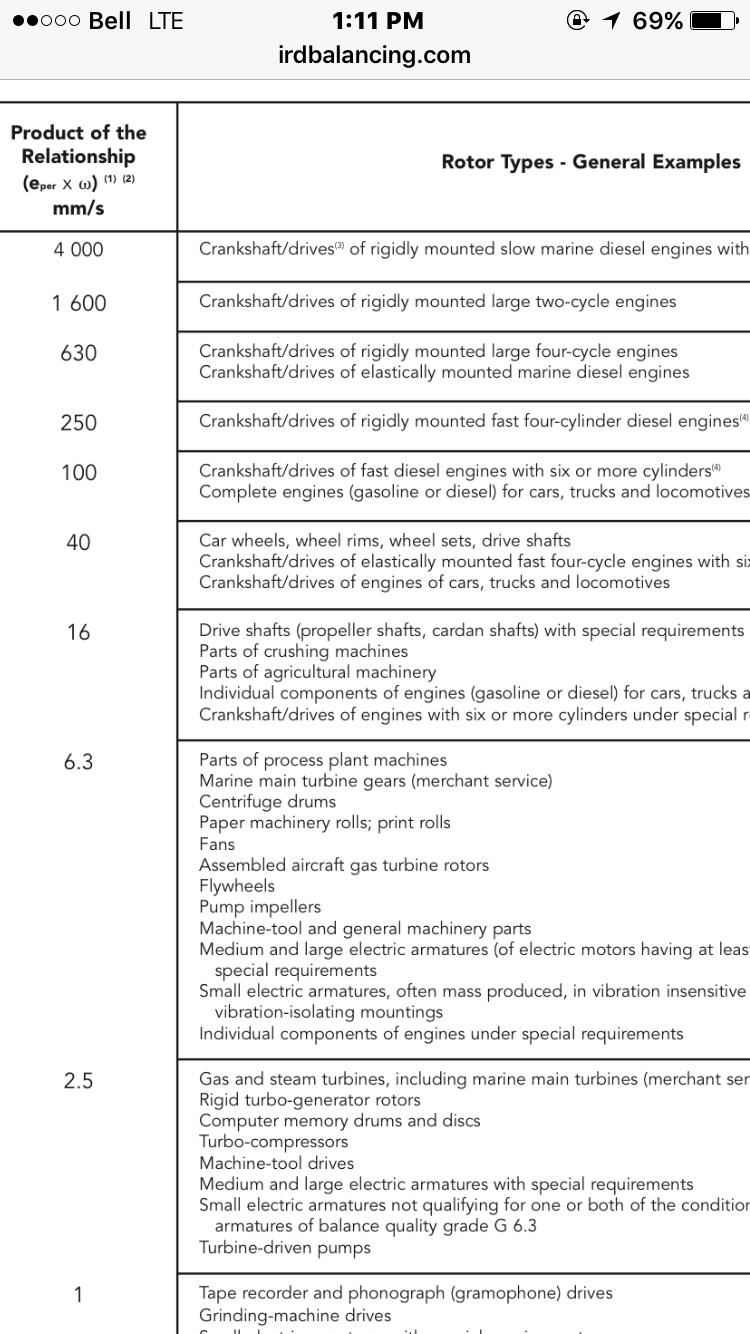
ISO publishes a balancing standard, ISO 1940, that outlines minimum recommendations for balance of rigid rotors. The balance standard uses the desired level of machine vibration at operating speed to determine the permissible level of unbalance in the part. For example, a fan that operates at 3600rpm with a desired vibration level during operation of 1mm/s would be balanced to ISO G1 at 3600rpm. The standard publishes maximum permissible residual unbalances (minimum balance) in common machines (see below). Unfortunately for us consumers, this has been perceived as the standard and not the minimum standard. Note the very low precision balance levels for automotive components: G40 for wheels, prop shafts, and crankshafts; G6.3 for flywheels (if you’re lucky). In contrast, every fan, impeller, and belt sheave at the mill is balanced to ISO G1 spec—an “over” balanced spec in reference to the minimum above.
The balancing spec is one piece of the puzzle but there is also another piece of the puzzle and that is single or 2 plane balancing. Single plane balancing removes the radial unbalance whereas 2 plane balancing removes both the radial unbalance and the “wag” by adding or removing weight from 2 separate planes on the rotor. This is a good question to ask anyone who is doing balancing for you: “One plane or 2 plane?”. It’s very easy to tell on wheels since a 2 plane balance will have correction weights on the inside and outside rim lip (or nearby it) whereas single plane will only have weights at the center of the rim barrel.
Balancing requirements for general automotive components are rather lax due to 2 things: 1) vehicles don’t encounter all too high of rotational speeds (apart from turbos) compared to other machines (9000rpm for AP1 Honda S2000), and 2) vehicles don’t need the ultra high reliability of plant processing equipment. For example, a Honda Civic operating for the same 7 years as the pump above (assuming an average speed of 50km/h) would accumulate ~3,000,000 kilometers!! For someone like myself, the option to reduce noise, vibration, and harshness (NVH) by over-balancing components is something I would like to exercise. For my own vehicles, the reliability benefits are obviously good as well but are much less tangible.
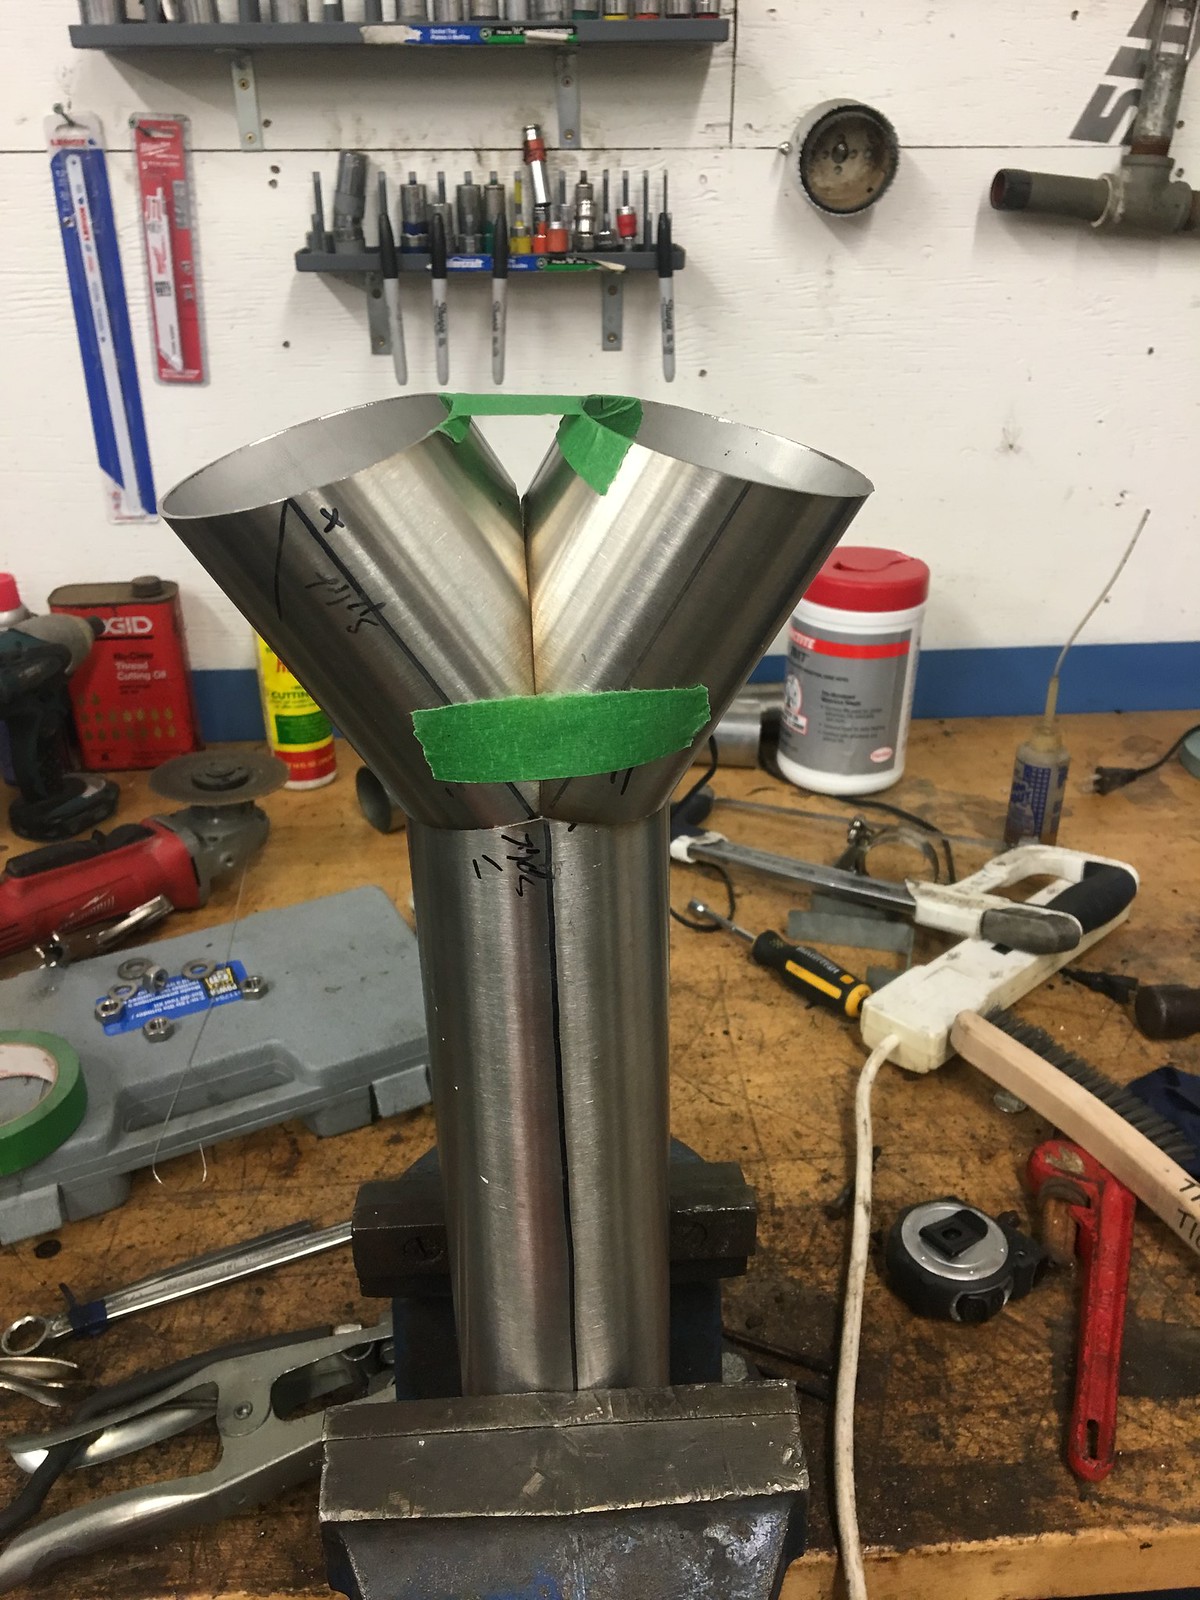
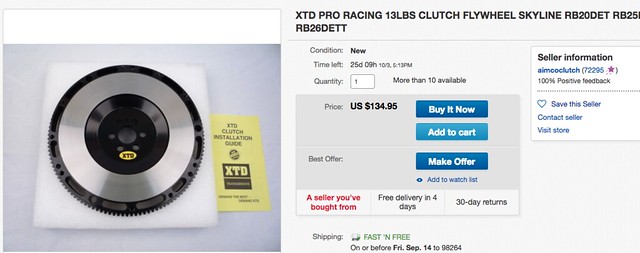
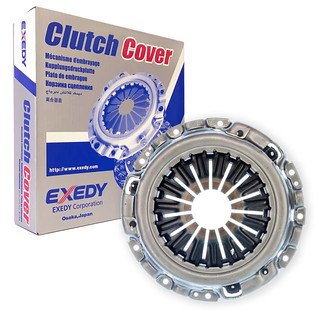
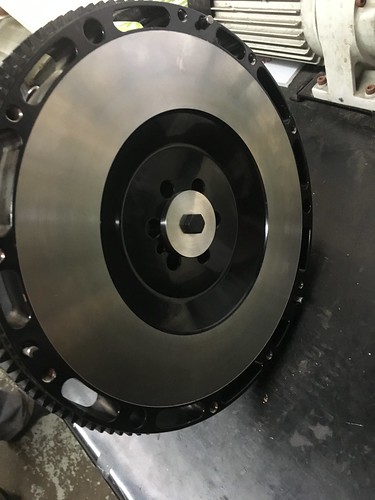
Last year, I purchased a new somewhat lightweight flywheel (13 pound chromoly) for the KA in my car. It is be paired with a 350Z OEM replacement clutch/pressure plate (Exedy NSC633). For those that have heard of the “White Bunny” clutch upgrade, this one is sort of the newest generation of that.
I will systematically walk through the balancing details of the clutch and flywheel assembly along with any other comments.
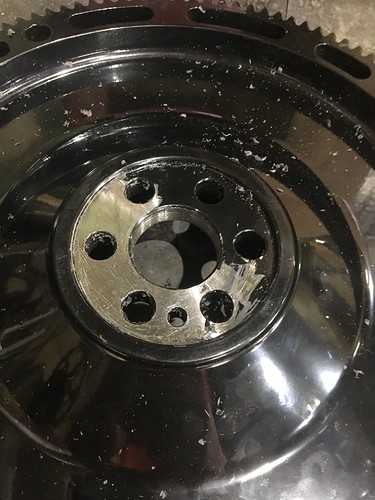
1) As found flywheel details
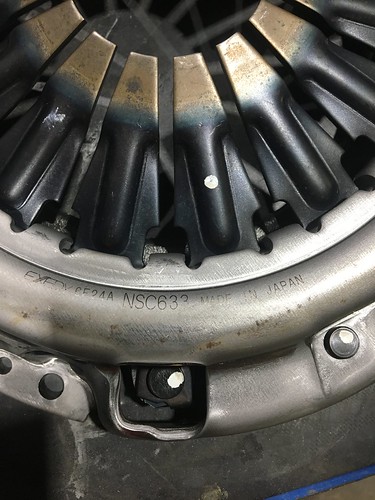
2) As found pressure plate details
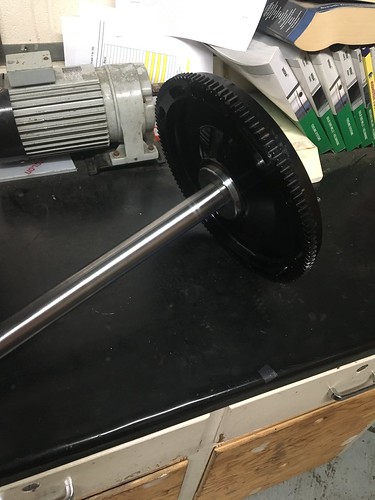
3) Flywheel mandrel balanced to G1
4) Flywheel runout check
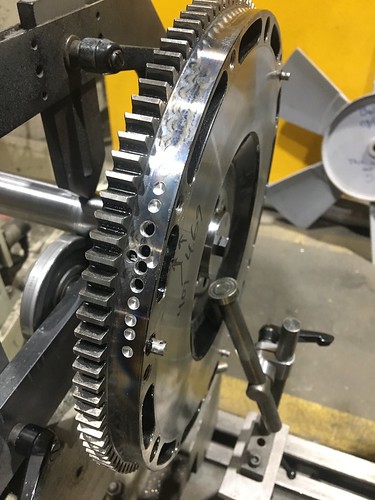
5) Flywheel as found (2 plane)
6) Flywheel as found (single plane)
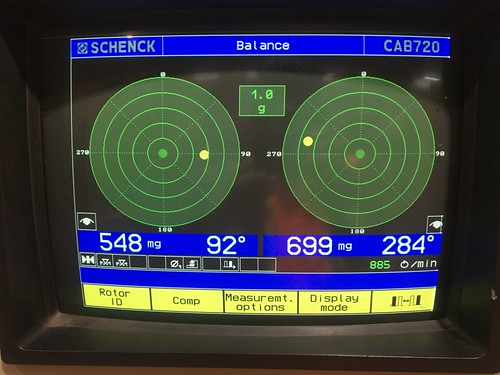
7) Flywheel as found (2 plane, again)
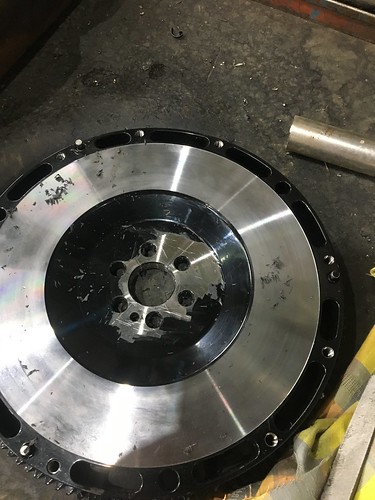
8 ) Flywheel corrected
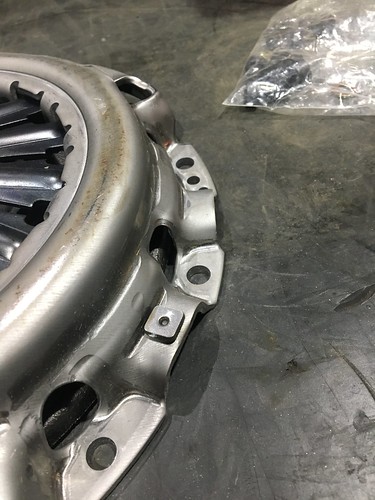
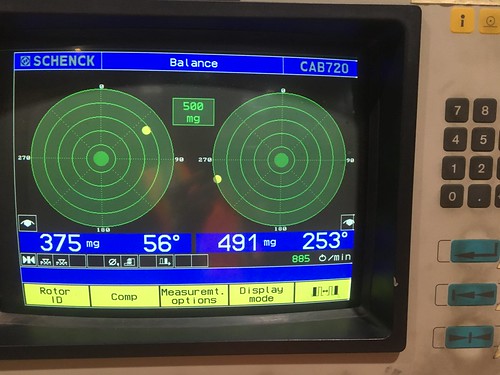
9) Pressure plate as found (2 plane)
10) Pressure plate corrected
1)
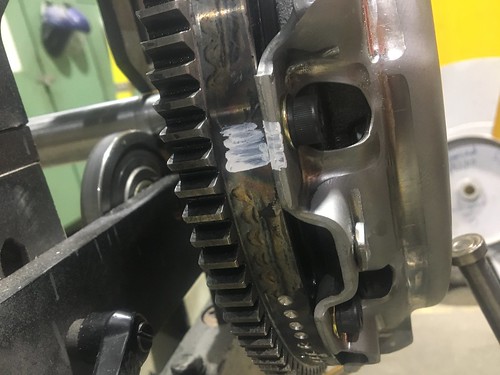
The flywheel as found has been painted heavily everywhere except the pilot diameter for the crank. This thick paint will likely induce runout once bolted to the crank and must be removed. I removed the paint from both sides of the bolted flange and I removed the paint from the flywheel teeth and all the loose paint off the OD in preparation for balancing. I also chased the paint from the 9 threaded holes for the pressure plate to ensure the bolts could be installed and torqued properly. I purchased new class 12.9 socket head cap screws for the pressure plate since they are the strongest readily available and cheap metric fasteners. There are no telltale signs on the flywheel such as balance weights or weight removal scars indicating a balance was completed on the flywheel post machining. For $135 what can you expect anyways?!
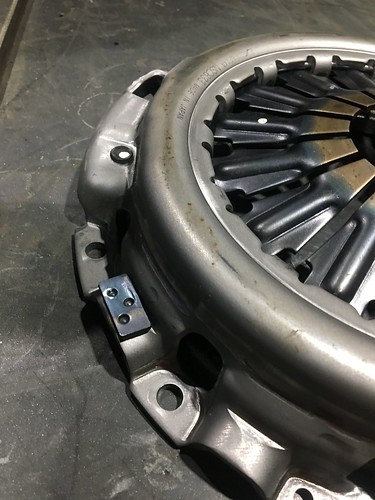
2)
The Exedy pressure plate has 2 balance weights of different sizes affixed near the OD indicating that it was balanced. I don’t know how well it was balanced yet, however.
3)
The 8lb mandrel was machined and balanced to G1 with 60mg and 47mg residual unbalance in the 2 correction planes respectively.

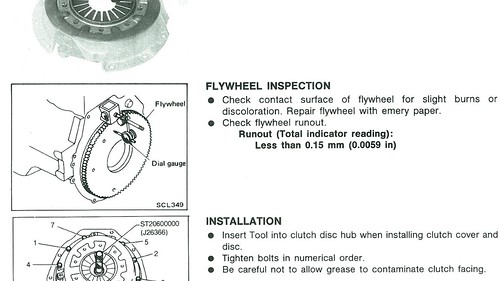
4)
The Nissan FSM (300ZX Z32) lists the below specifications for flywheel runout of 0.0059” TIR or less. The XTD flywheel measured approximately 0.003” so not bad on that measure.
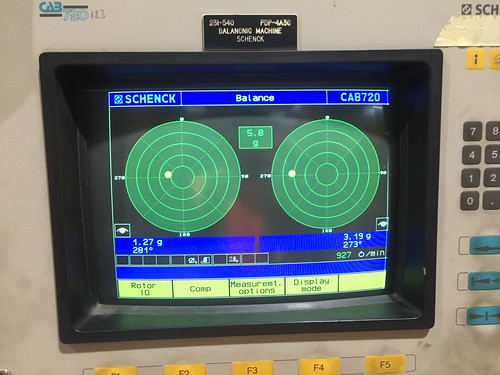
5)
The ~20lb mandrel and flywheel together were checked against 2 plane balance specifications of G1 at 8000rpm resulting in a target residual unbalance per plane or 0.2g-in. The mass correction required in the 2 planes was 1.27g @ 281* and 3.19g @ 273* in each of the planes.
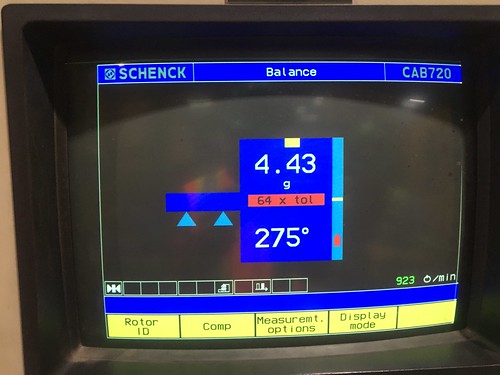
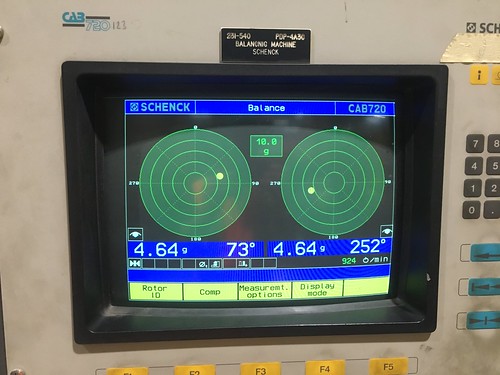
6)
The tolerance specification was changed on the balancer to reflect a single plane balance with target of 0.4g-in total. The photo below outlines the findings quite well with 4.43g of weight to remove at 275*. Note the weights from above sum to the single plane mass correction.
Since the result is 64X higher than G1, the flywheel as purchased came balanced to ~G64, well above the minimum standard of G6.3 or G16 from the table above. Cliff notes: remove the paint from the critical fit zones of your flywheel and have it balanced!
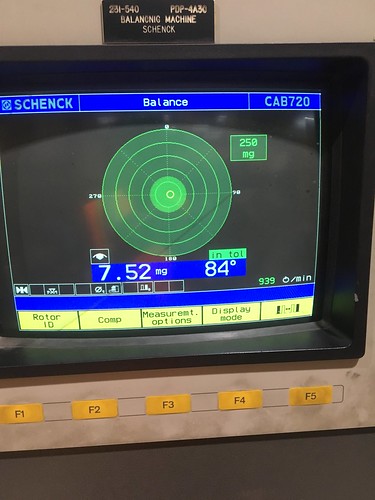
After balancing in single plane, the resultant unbalance was 7.5mg which significantly surpasses G1 (69mg permissible residual unbalance). At this point, the flywheel begins to look like swiss cheese!
As Found!
As Left
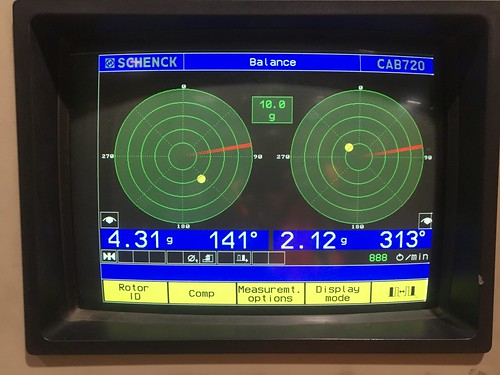
7)
After single plane balancing the flywheel to ISO G1, the 2 plane balance was checked. Interestingly, the magnitude of unbalance on each plane increased due to the changes caused by the single plane balance. It’s worth noting that the magnitude is approximately equal and 180* apart meaning it has achieved single plane balance.
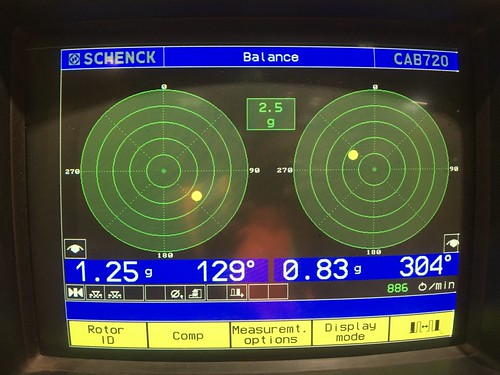
8 )
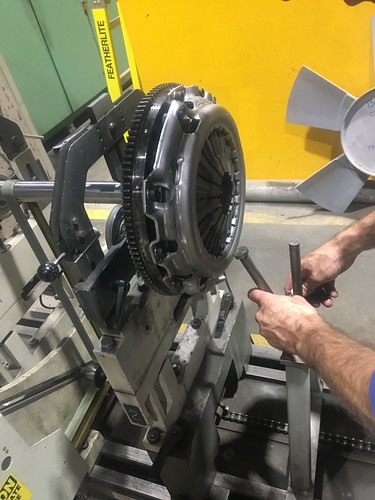
Correcting the flywheel in 2 planes proved to be rather difficult due to the uneven mass distribution. Performing a mass correction on one plane affected the other. After hours of work, we resigned ourselves that this was pretty much good enough since we had reduced the 2 plane unbalance by about 90%.
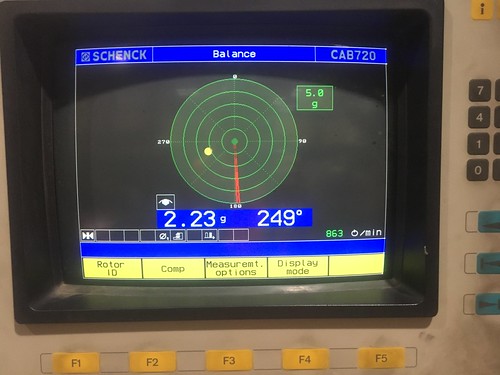
9)
Once the pressure plate was installed, the positioning of clutch/pp was marked. The 2 plane balance as found was quite even at 3.37g @ 186* and 3.57g @ 327*. To avoid the 2 plane tail chasing and due to time constraints, we balanced the pressure plate in single plane by removing some material from its OD. As found balance was 2.23g at 249*.

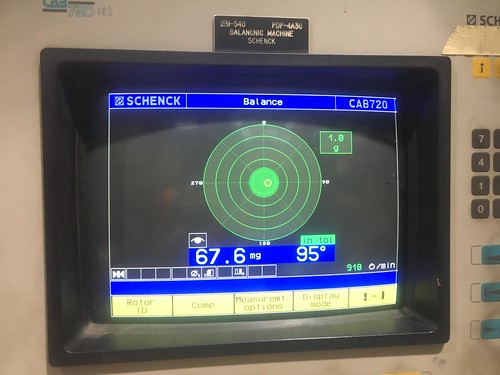
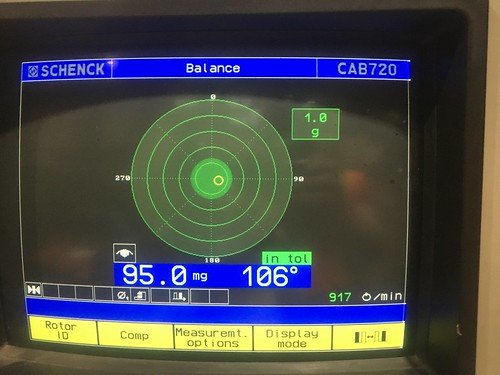
10)
After single plane balancing of the pressure plate, the residual unbalance was once again down at 67mg @ 95*. As an exercise, we loosened half of the pressure plate bolts and repositioned their washers to see the effect on the overall balance. Once checked, it revealed 95mg of unbalance, about 50% more than when all washers were positioned furthest outboard (by tightening all bolts at the bottom of flywheel).
Unfortunately I haven’t had a chance to install this setup. One day I would like to check the stock parts that are removed to see where their balance is.
I believe it would be very interesting to take a set of rims/tires, have them road force balanced, and then precision balance them to ISO G1 compared to ~G40 that your friendly neighborhood tire shop would do. I think that vehicle OEMs “over” balance parts during manufacture so that new vehicles are very nice and smooth. I think this is part of the reason that “nothing drives like a new car”. If you inspect high quality brake rotors, there is evidence of material removed indicating that they were balanced. Cheap rotors will have no such telltales.
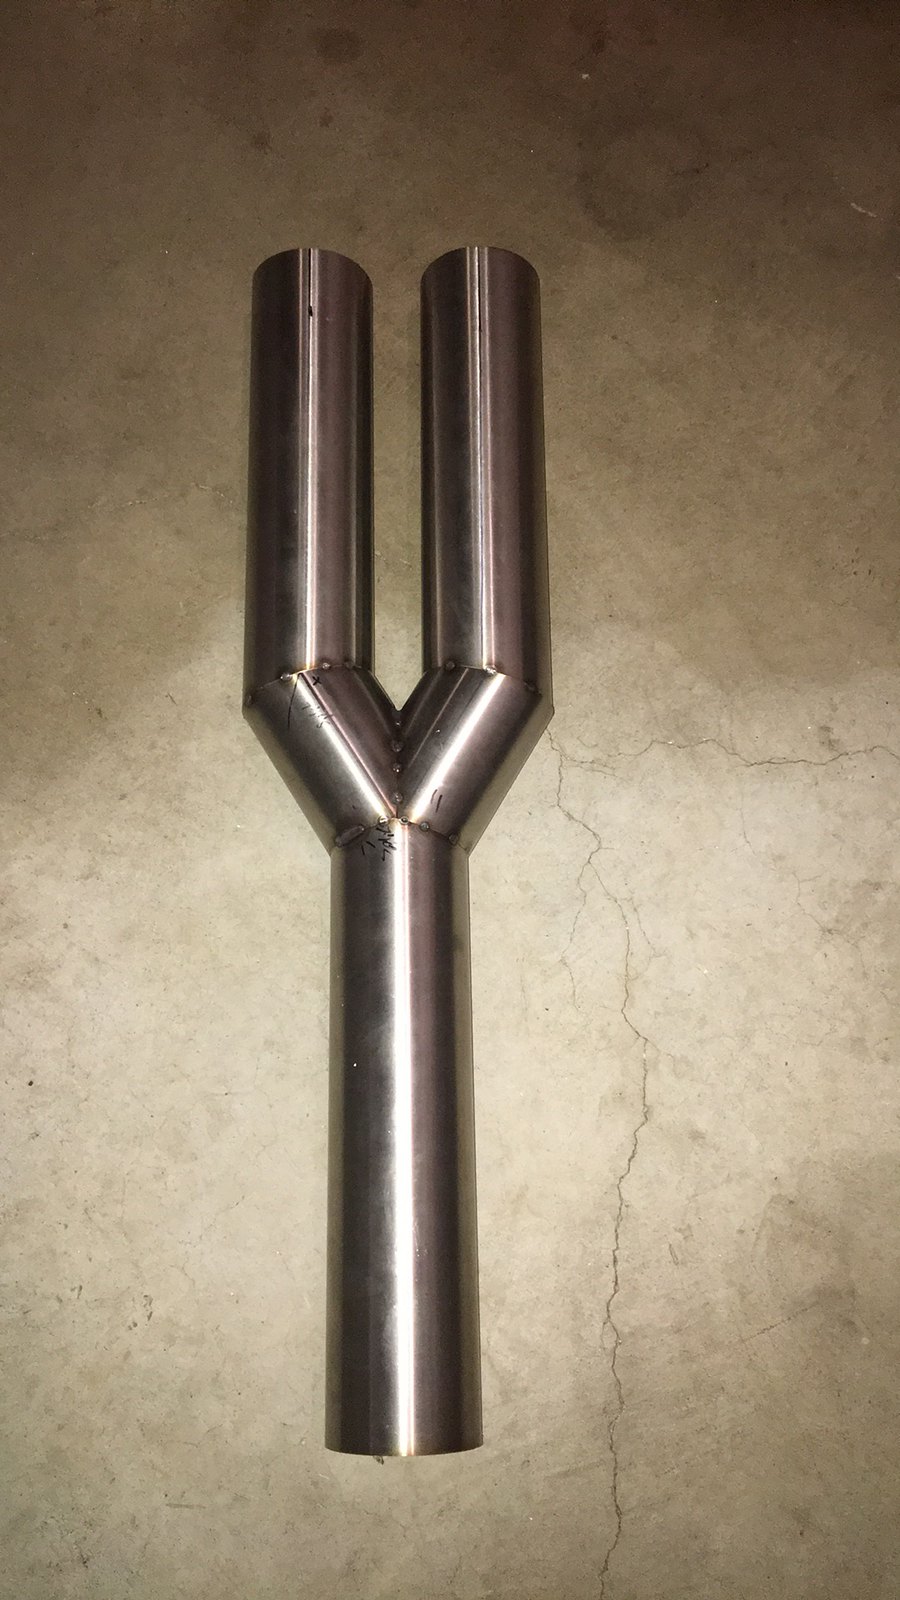
I recently quit my job up north and moved to the Kootenays so that required a lot of moving shop stuff, 510 etc.
Here's a shot of Datsun stuff etc. headed south. After the photo I fixed the tongue weight. You would not believe how much stuff you can can fit in a chemical tote. It's like a watertight, stackable, 800L industrial moving box!

Air quality at 1pm the day I left.

That's it for now!
'72 2 door KA project | S14 Silvia RB25DET | S14 RB26DETT (sold) | '90 Audi 90Q20V (sold)