Page 30 of 42
Re: Jordan's '72 2 door KA project
Posted: 25 Mar 2014 23:05
by JordanTr
Track Junky wrote:Wait a minute, those arms look extremely similar to my design!
Nice work.
Scott.
Scott, I only copy the best!

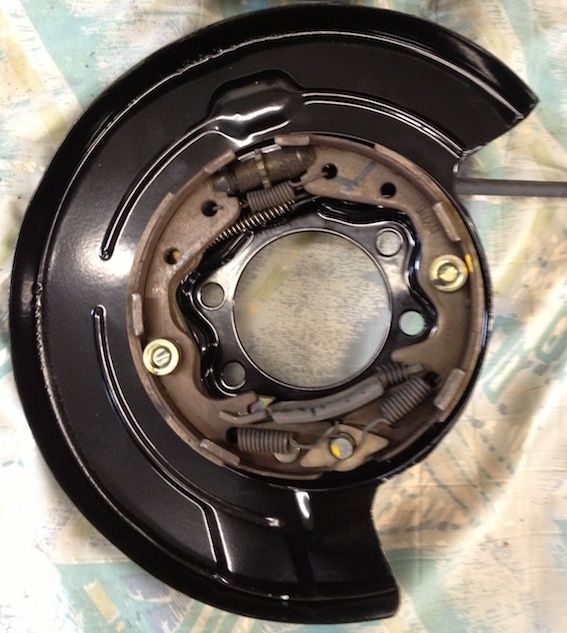
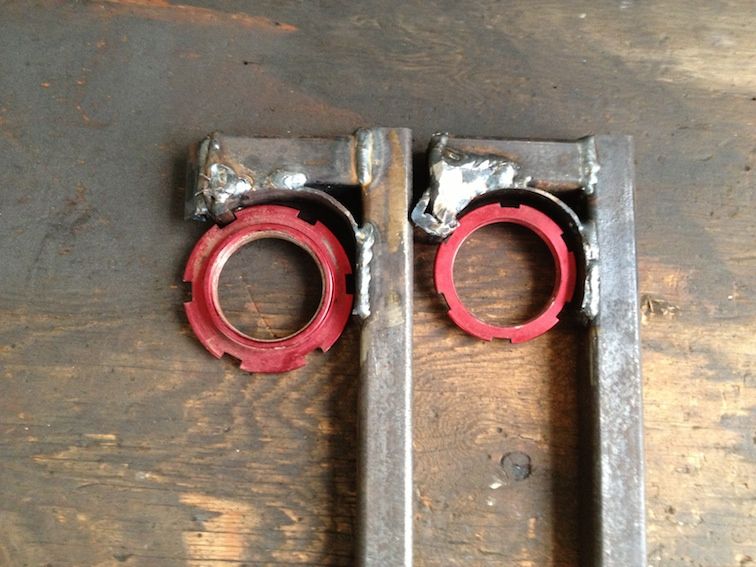
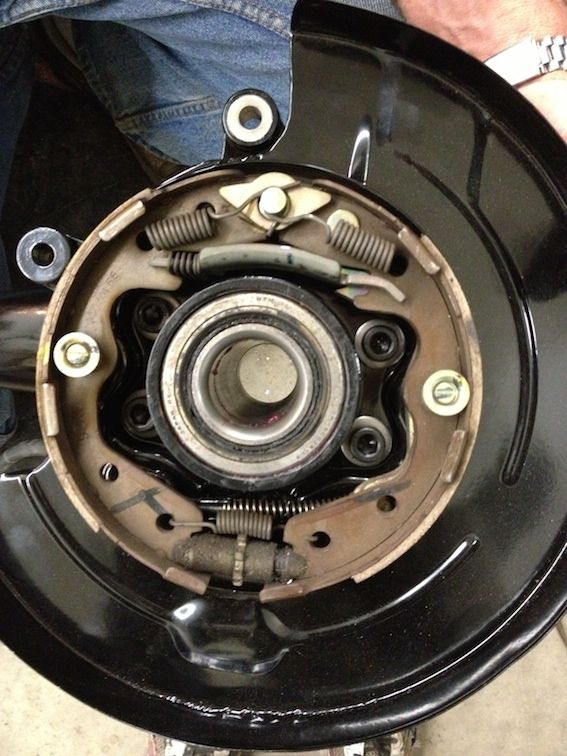
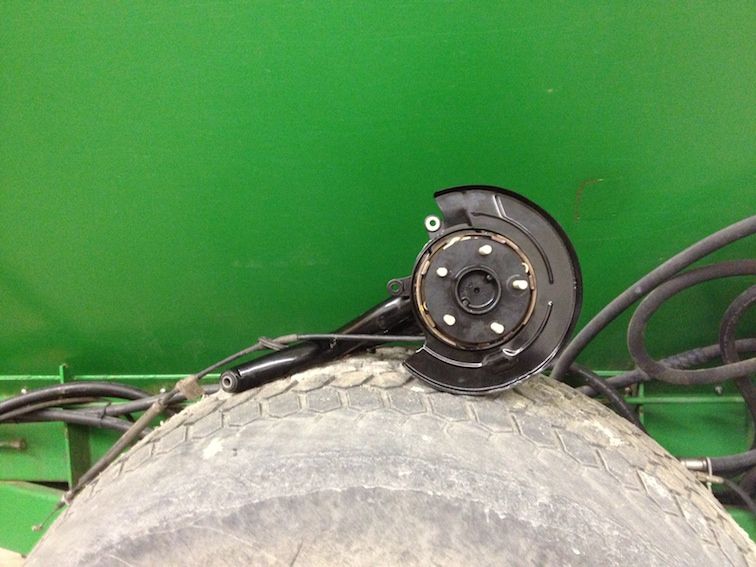
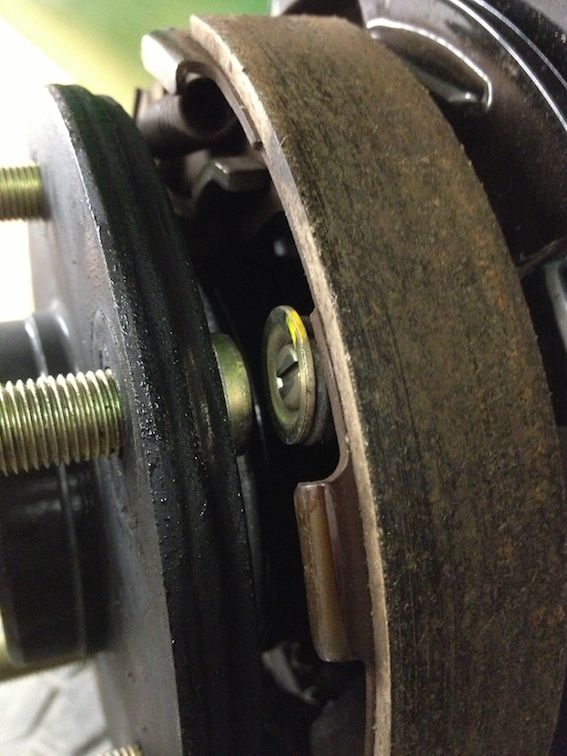
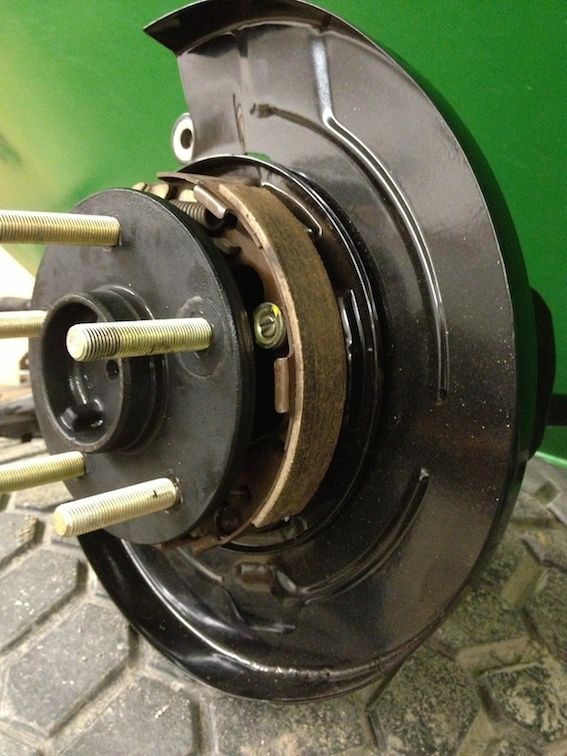
Yesterday I modified the Z32 backing plates due to the rotated calipers on the 510 arms. After using the grinder, horse cock, and flap wheel, I blasted and powdercoated the backing plates. I think they look pretty sweet! I replaced the goofy OEM factory bolt that holds the drum assembly to the backing plate with stainless SHCS.

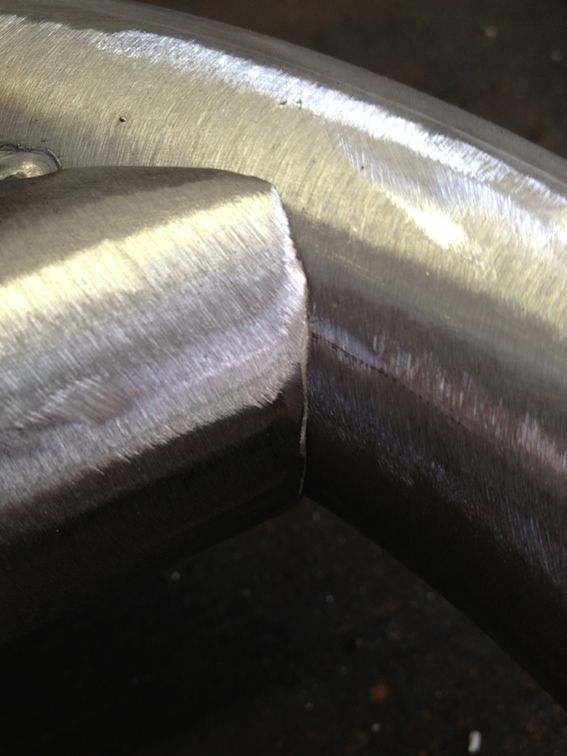
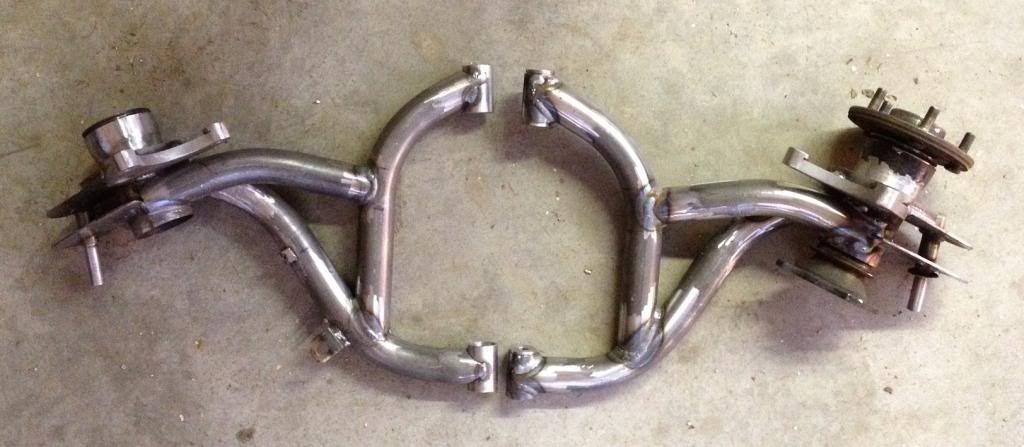
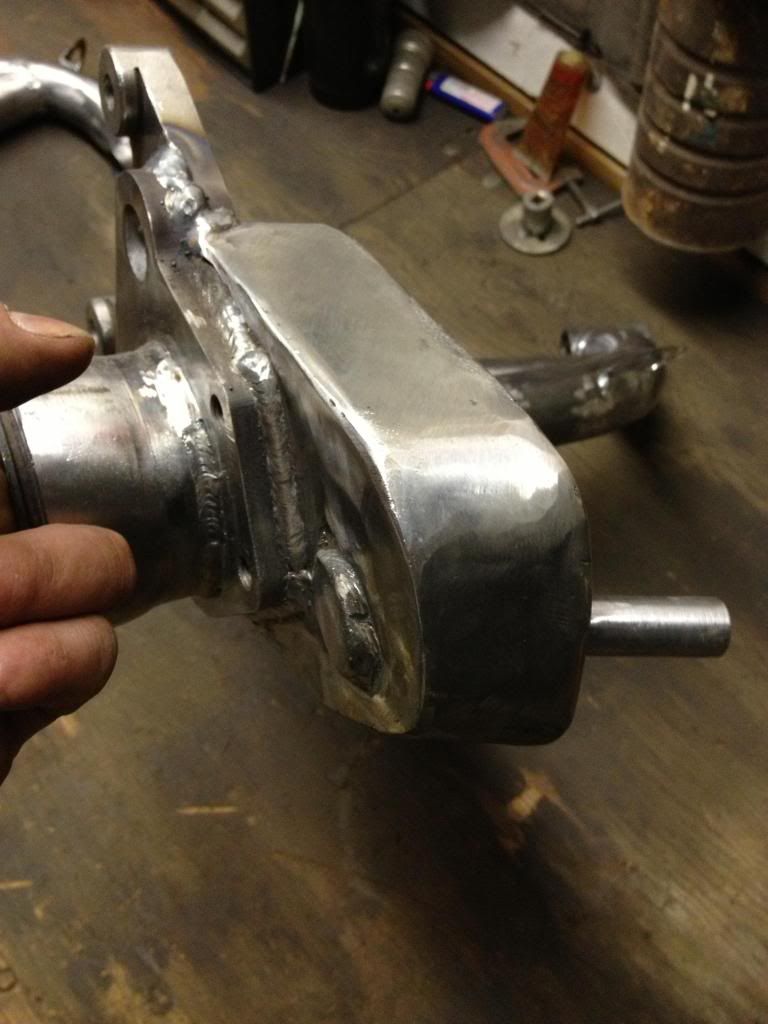
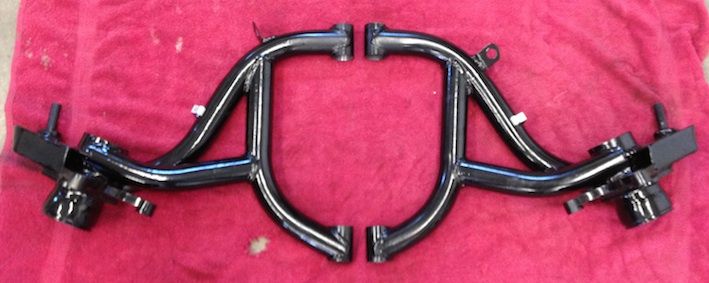
I finished off the last of the tubing on the control arm today. I still have some boxing in to do on the shock mount area and final welding but they are mostly complete and hanging in the car right now.
Coping skills are improving!
If you guys are interested in control arms... you should check out these
crazy control arms. These gave me some motivation.
Time to get my ebrake cable and brake line mounts and final welding done. Once that's done, these'll get powdercoated and then I can press in the bushings and assemble some stuff!!
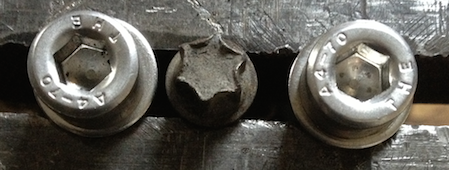
I still need to order some hardware for the ebrake assy bolts (M10x1.25x15mm SHCS) and caliper bolts (M10x1.25x35mm hex head).
Tomorrow I'll mock up some "brake lines" so I can order some stainless flex lines to go straight from the hardlines on the car to the calipers. I figured this is a lot easer than an excessive amount of fittings.
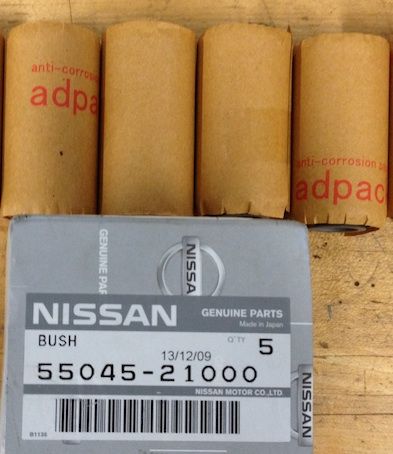
Should have bushings by Friday.
Things are getting exciting!! Once all this crazy business is done I can get this thing on the road!

Oh hello there...

Time crunch!
Posted: 28 Mar 2014 19:47
by JordanTr
Been making some progress lately.
Ordered new hardware for brake caliper bolts and ebrake backing plates. I also ordered a pair of 1-3/4" split shaft collars for my rear coilovers. All should be at Fastenal/in my hands on Monday.
Took my arms totally apart today (man, I'm getting sick of pressing bearing in and out). I'll be doing the final welding tonight. I also discovered that they fit in my oven so I can powdercoat em

Goal is to hit the Oregon coast in 2 weeks in the 510 so I need to get crackin here! T-minus 13 days!
Picked up some OEM CABs today so I have those ready to go.
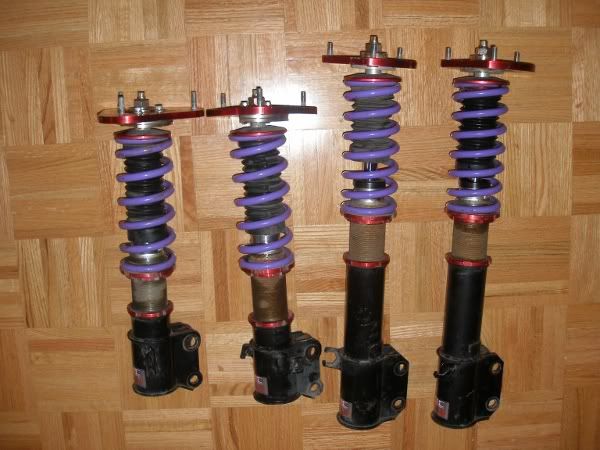
No work means that there isn't much $$ in the budget for rear coils so I'm building my own. I was very happy with my shocks when I had them in with conventional rear springs at ~240 lb/in wheel rate. I'm building coilovers on these same shocks and planning to use 250lb/in springs to preserve the nice ride quality I had before. The shocks are old KYB rally shocks; exactly the same as
the ones Qwik 510 is/was trying to flog.
For the threaded sleeves, I am reusing ones I got from the wrecker in a blown set of JIC coilovers for a Subaru Imprezza. I thought the sleeves would fit the front when I went to build my first coilovers back in spring 2012 but the ID is 1.75" instead of 2" required for all the Nissan struts. I used the 6kg/mm springs on my
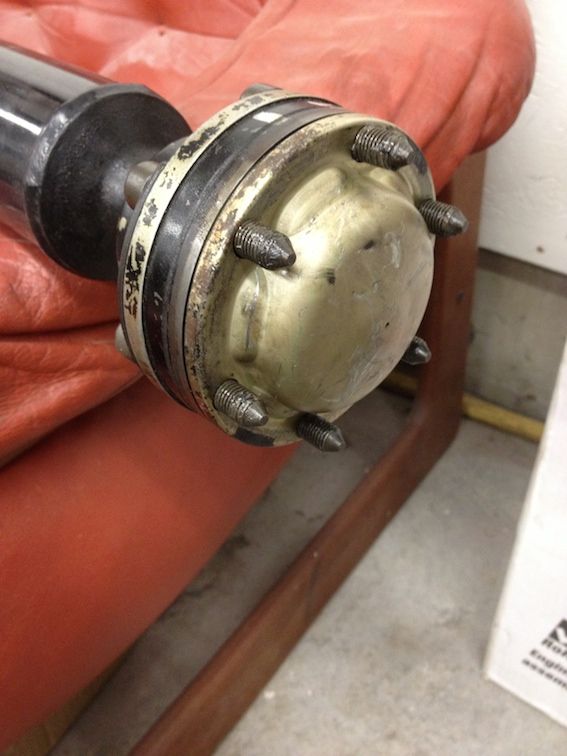
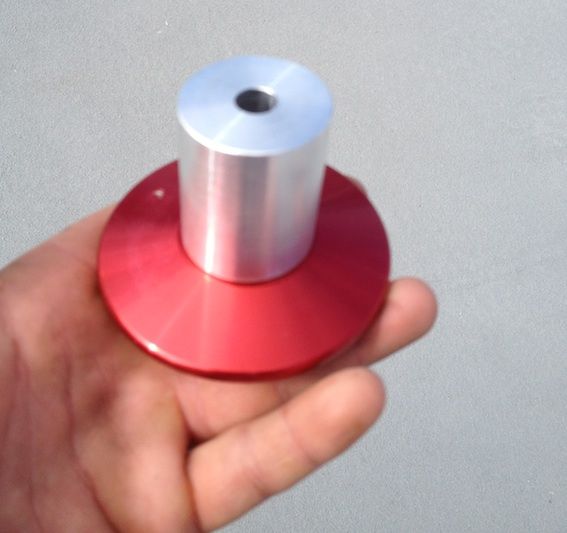
first 510 coilovers and the rest just sat in a box until now. They were terribly rusted and the aluminum perches/lock rings + salt + steel threaded body = mega galvanic corrosion. With a little help from my friends (homemade coilover wrenches, WD-40, torch, and a cheater bar) I was able to get all the coilover assemblies disassembled. The 1.75" threaded sleeves fit beautifully over the shocks and will sit on the aforementioned shaft collars. I will be boring out the top hats and machining a riser out of aluminum which will press in similar to what you see below except made in 2 pieces.
This is what the JIC coilovers were supposed to look like.
Homemade spanners...
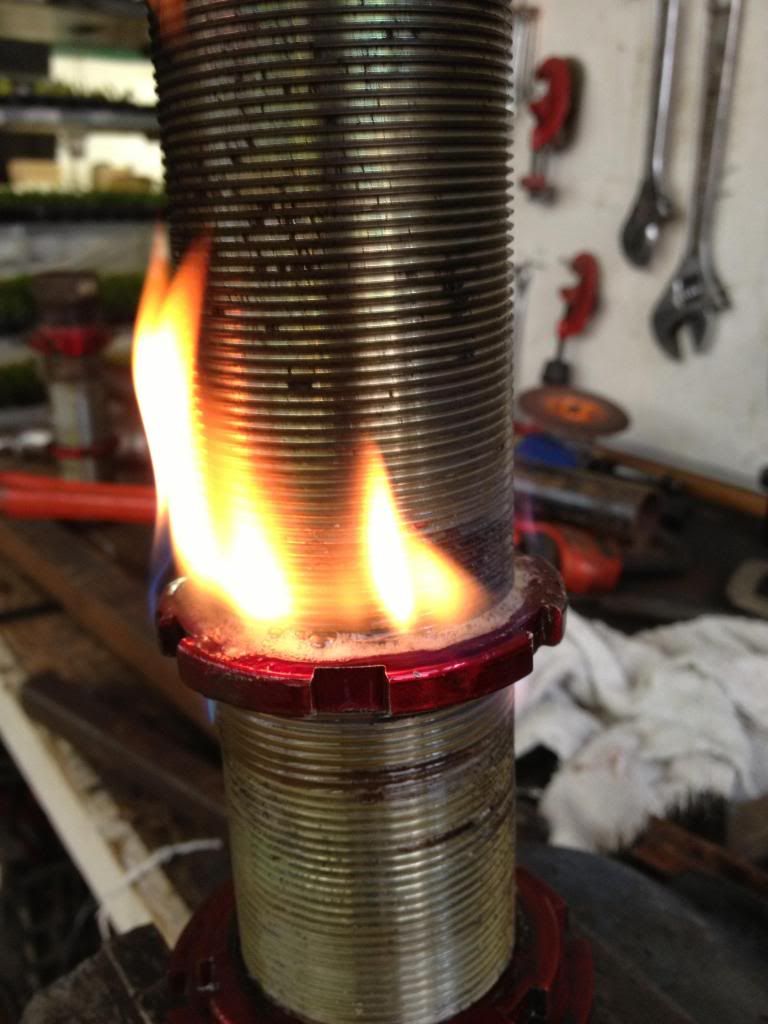
When the WD-40 is on fire and bubbling out the corrosion you have a fighting chance of getting the ring off!
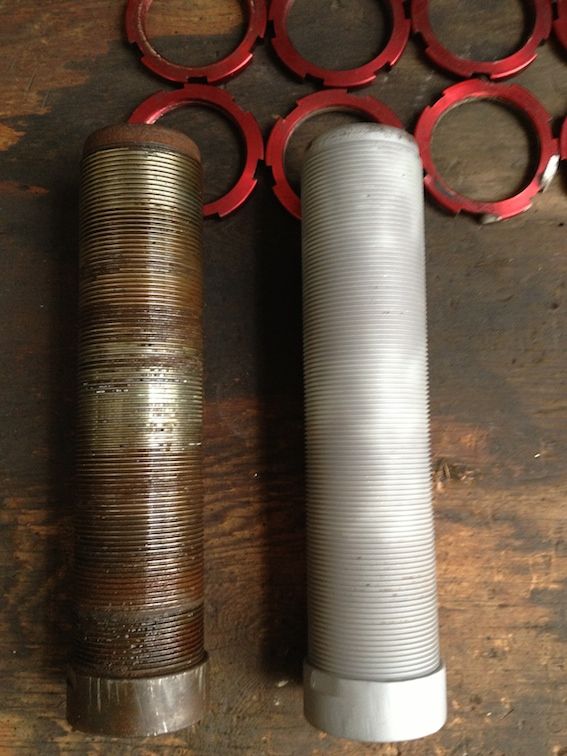
One sleeve blasted and success getting all 4 perches and 8 lock rings off!
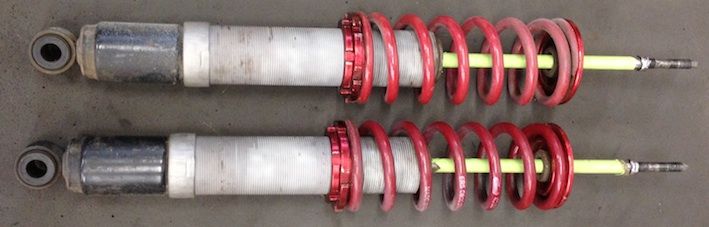
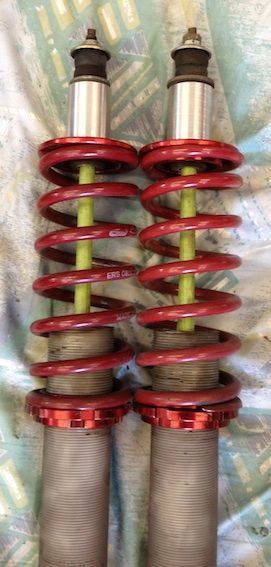
Looks like coilovers. Still awaiting sleeve perches (shaft collars) and some machine shop time for the upper standoffs.
The goal. (T3 rear coilovers). My upper perch won't be one piece though.

Re: Jordan's '72 2 door KA project
Posted: 28 Mar 2014 22:07
by two_68_510s
Must be like a wizards workshop up there!! cool stuff Jordan.
12 days
Posted: 29 Mar 2014 23:12
by JordanTr
Haha thanks Joel. I'm just a kid with too much time on my hands.
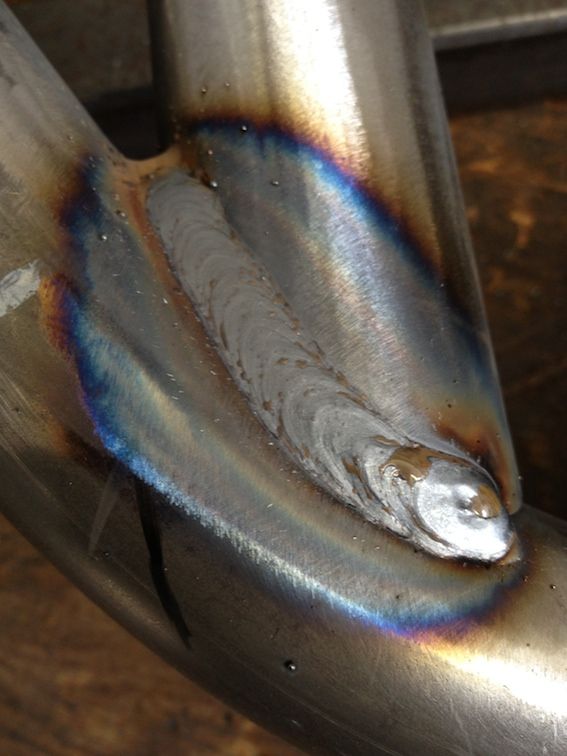
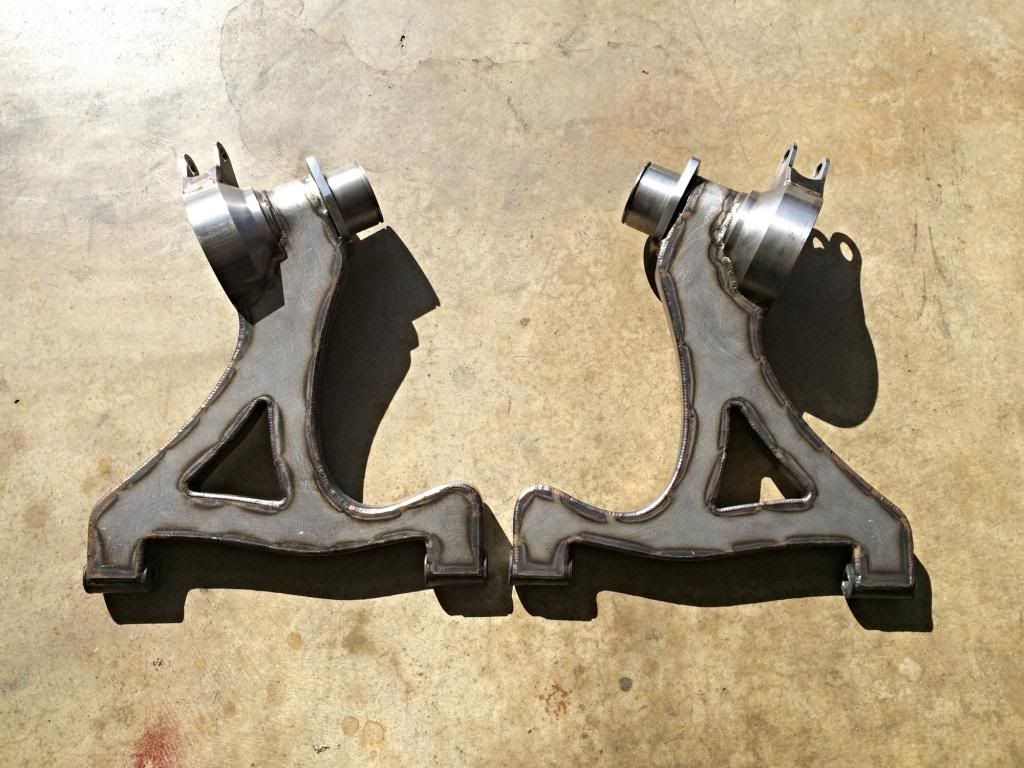
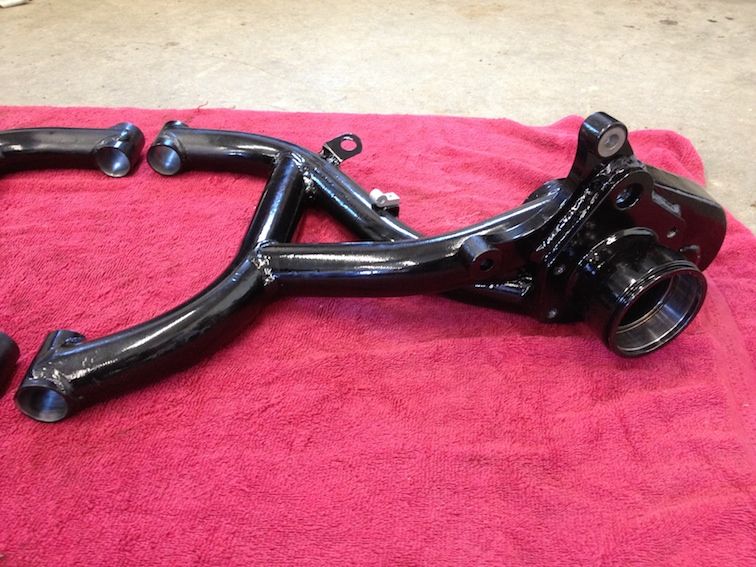
Made some progress today! Finished boxing in the shock mounts and did final welding and cleanup. I put fresh glass beads and aluminum oxide into my blast cabinet and replaced the glass protector so I can see what I'm doing.
Should be blasting and powdercoating on Monday. Since I'm done welding the control arms, I'll swap out the 0.035" for skinny wire in the MIG and tackle the inner fenders on my car tomorrow.
Boxed in and cleaned up
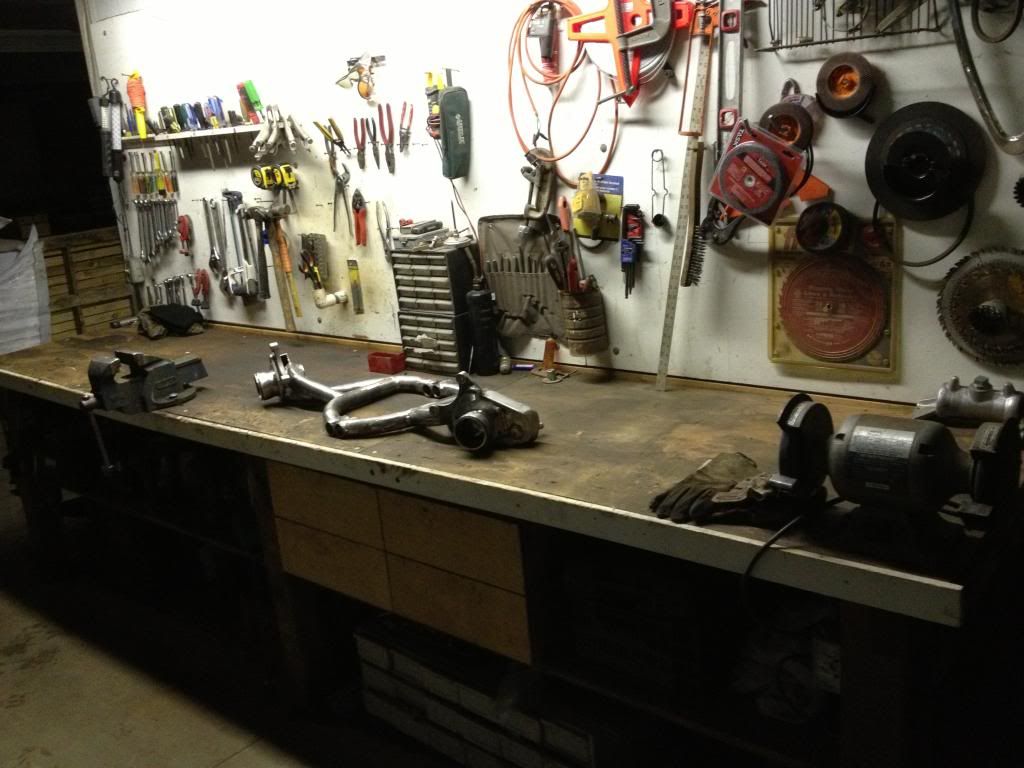
Finished grinding and making a mess on the workbench so I cleaned it all up
10 days
Posted: 31 Mar 2014 22:53
by JordanTr
Made some serious progress today!
Had a big PITA time with the welder yesterday since we don't have 0.023" feed wheels for the 0.023" wire I was running to patch the inner fenders. I used the 0.030" wheels but the feed was intermittent which made welding pretty much unbearable. Today I picked up the proper feed wheels so we shall try welding again tomorrow.
Feed wheels

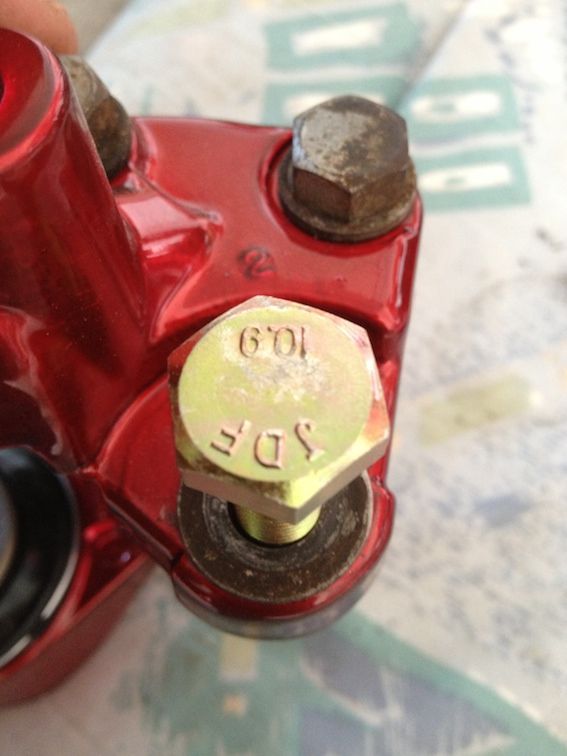
Picked up my hardware and shaft collars from Fastenal today and threw them on my rear coils. New bolts are on the calipers to account for the thicker mounting ears to correct the caliper offset. Also got some M10 SHCS to bolt the ebrake backing plate on. While in town, I got some GM trans fluid (ACD #10953509)
as recommended by Sir Chickenman.
Yesterday and today I powdercoated the control arms. They didn't turn out super amazing but they're smoothish, coated, cured, and under the car so I'm not too concerned.
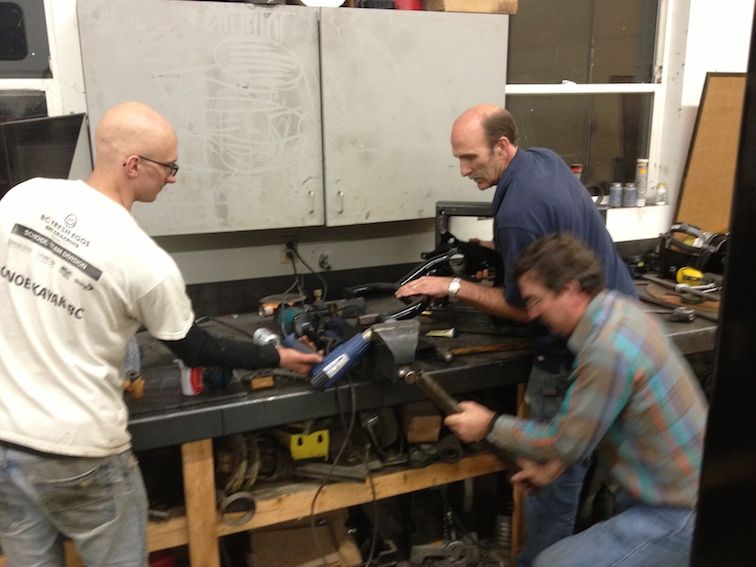
Spent the evening with my dad, uncle, and cousin pressing in the CABs, extended studs, bearings and axles into the arms. Success on nearly all fronts. I managed to mangle up a stud in the process so I pillaged one from one of the front hubs. Thankfully I don't need the extended studs to get the car rolling and going. Just gotta replace the front stud with OEM for now to get rolling and search for an orphan 12x1.25 50mm extended stud.
We used the vice for the first 3 CABs but the final CAB was not going in with the vice + cheater bar. After seriously "bananaing" the handle, we opted to try a little harder at fitting the arm into the press. Once in the press, the stubborn CAB went in like gravy. The axle and bearings were all done with a real press.
New hardware
SHCS and Belleville washers
Action!
Arms
Woooo!! Not too much left on the list!
Re: The List!
Posted: 31 Mar 2014 23:06
by JordanTr
Time for an updated list:
Done
- Z32 rear pads to match the PBR pads up front
Jet cut ebrake brackets
Cleaned up Z31 bearing housings
Fitted seatbelt buckles
Z32 caliper rebuild kit
Assembled CVs for test fitment
Got tall hex brake fittings for brake lines
Ordered copper/Nickel brake line to plumb rear brakes and proportioning valve
Ordered Tilton lever proportioning valve
Got rear gasket for R200
Got 2 qt of Redline 75W90 synthetic (nothing special for viscous)
Cut 2 segments off R200 companion flange
Jet cut and machine Z32 brake brackets
Assemble stub axle/companion flange/ bearings in Z31 housings for control arm mockup
Grind down R200 case
Clean up R200 case
Paint R200 case
Ordered/installed new seals for diff
Cut out inner fender ledge
Re-test extreme wheel fitment at height with -0.5* camber
Bought green poly powder for CV joints. (RAL 6002 leaf green)
Custom driveshaft made up and fitted
Run hydraulic brake lines
Install prop valve
Fabricate seatbelt drops for new seatbelts
Powdercoat seatbelt drops
Install R200
Powdercoat CV centers
Powdercoat CV joints
Powdercoat comp flanges
Powdercoat Z32 rear calipers
Rebuild Z32 rear calipers
Order D+S Z32 rotors
Mount inertia reel behind door panel
Modify door panel for belt access
Bore out DOM for stock CA bushings
Modify rear x member/ fab diff shims
Install center pull ebrake assembly
Paint crossmember
Assemble CV shafts
Build control arm jig
Order stock CABs
Bend tubing
Tack control arms
Test fit control arms/CVs/R200
Weld up control arms
Powdercoat control arms
Modify/powdercoat backing plates
Control arm hardlines
Powdercoat other 2 BBS rims
Diff oil
Trans rear seal
Trans oil
Machine standoffs for rear coilovers
Weld and cold galv inner fender
To do
- 1. Route ebrake cables
2. Seal inner fender
3. Tweak exhaust/install flex pipe and hanger
4. Paint rear coilover bits
Time flies when you're having fun.. Can't wait to have this baby on the road!
9 days
Posted: 01 Apr 2014 22:55
by JordanTr
Spent too much time playing with skyline stuff and doing real work today...
Amid work this morning I got my companion flanges on and torqued up. Good thing I ate my wheaties this morn!
Put the 0.023" feed wheels into the welder and fed the wire through to the gun but didn't get to any welding just yet.
I was able to get the MT90 drained out of my tranny and the seized fill plug out. It took a good deal of heat and a cheater bar but it's out. Last time I did the trans fluid I just dumped it in from the top during the short shifter install. This time we will fill it conventionally with the OEM specified 2.4L. I also replaced the rear seal on the trans. I was happy to discover very little ground up bits on the magnetic drain plug.
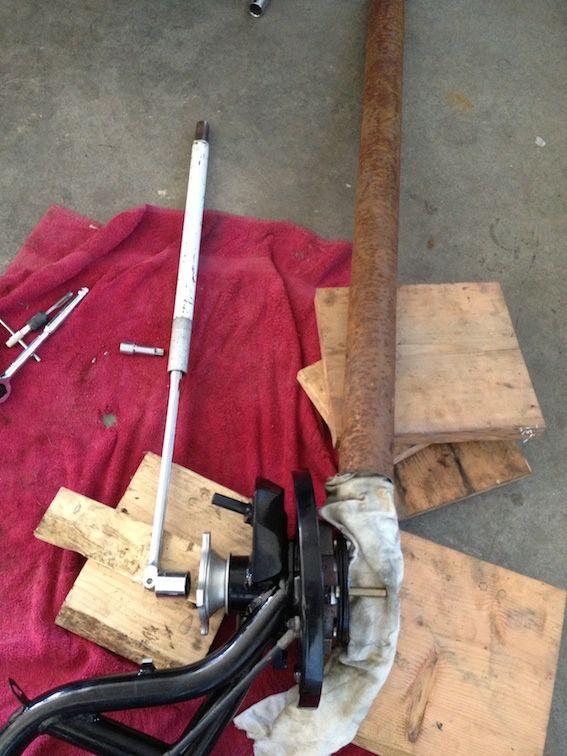
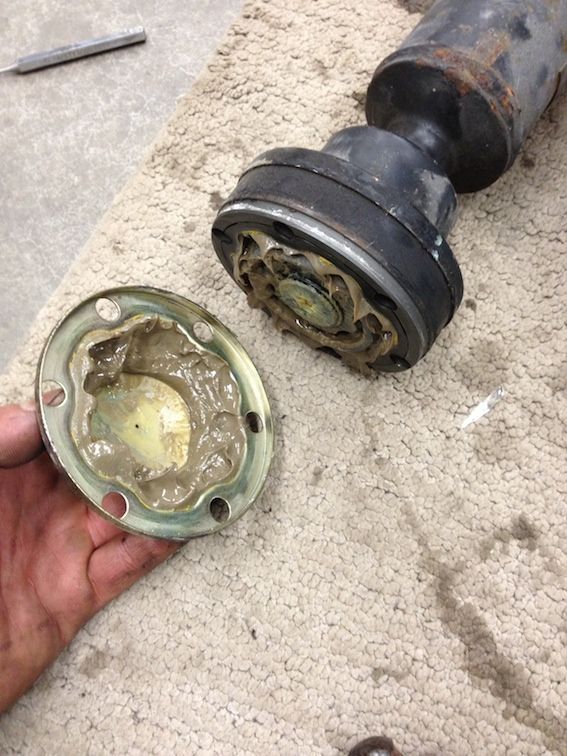
I pulled the driveshaft from the skyline today and found that the rear CV has a grease shield that my 510 driveshaft didn't have. I popped it off and cleaned up and repacked the joint on my 510 driveshaft before popping the grease shield on.
You need to be a buff contortionist hold this down and get er torqued. Under the rag is a 1.5"-1/8" thick piece of angle iron bolted to the axle.
Oh hello there
510 shaft
Heading to the states tomorrow to do some wreckering. I'm hoping to get a few big ticket items... We'll see how it goes.
Re: Jordan's '72 2 door KA project
Posted: 01 Apr 2014 23:10
by Byron510
Eh Jordon, I have a 4:1 multiplier in case you still need it 1/2" input, 3/4" output and I have the necessary 27mm socket. Makes life really easy, and possible to do under a car on jack stands as well.
Call me if you need it.
Byron
Re: Jordan's '72 2 door KA project
Posted: 02 Apr 2014 07:35
by Three B's Racing
Byron510 wrote:Eh Jordon, I have a 4:1 multiplier in case you still need it 1/2" input, 3/4" output and I have the necessary 27mm socket. Makes life really easy, and possible to do under a car on jack stands as well.
Call me if you need it.
Byron
Oh Ya!! that 225-250ftlbs of required torque is a feat. I did mine with the control arms mounted in my bench vice with a 24" torque wrench. Set it up, set wrench on nut, down a cold beer, brace myself against the bench, pull torque wrench to click, pat yourself on back, down another beer, repeat on the other control arm, take three bayers 8>)
6 Days
Posted: 04 Apr 2014 23:19
by JordanTr
A couple days ago pops and I spent the day in the states at the wreckers. I was able to snag the early companion flanges off a z31T so I now have a full set of spare bits for my 510. I first went to the effort of pulling the axles only to find that the joints were all sloppy. That Z31 had the pump and flange chopped out. (Rich??

). We also spent an hour pulling an FS5R30A at the Pick N Pull in Lynnwood for my impending project (more on that later). I was really hoping to get a trans so I dragged down an old 4 speed that came out of pops' green truck for a core. Instant $30 back.
Distracted by my new transmission, I spent a good 3 hours cleaning and degreasing it before I even allowed entry to the shop yesterday. After I had all the extraneous bits off of it like the harness, crossmember, mount, shifter linkage etc, I realized that the rubber trans mount was still very stiff and OEM. My S13 trans mount in my 510 is pretty tired so I embarked on getting it replaced with my newfound Z32 one. I realized how bad my driveline angle while I was down there because the rear of the transmission was sitting so low. I raised it up as much as I could given the constraints of the tunnel so we'll see if it improves things.
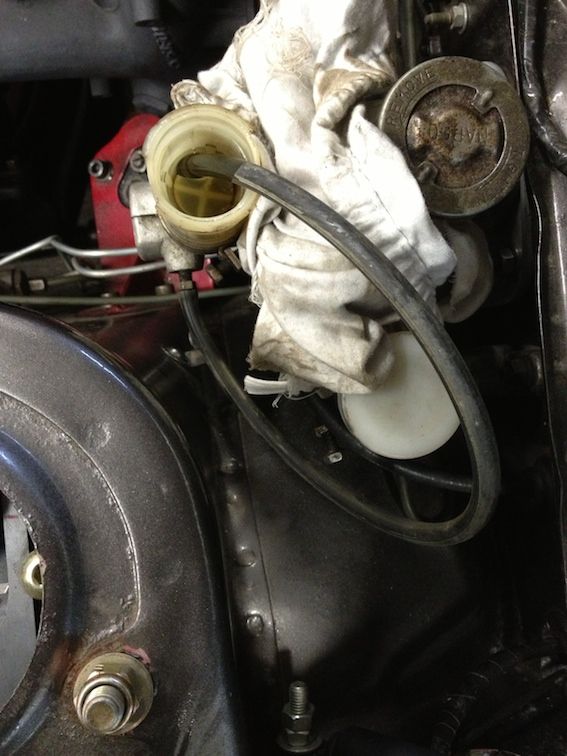
Got my last nut torqued down on the pinion companion flange under the car with the help of Byron's torque multiplier. It was significantly easier than doing the other ones sans multiplier despite this one being under the car. I chased the threads on the companion flange to get out the stray powder and residual glass beads that resided in there. I replaced the output shaft seal on the trans at this time as well. At this point I was ready to install the driveshaft for good. I popped it in there and got all the bolts torqued up. Later on yesterday evening I had a friend help me fill up the trans with 2.4L of AC Delco friction modified manual trans fluid. While we were all oily we also filled up the diff with Redline 75w90 GL5 hypoid gear oil.
Today I went out to UBC and machined the standoffs for the rear coilovers from some 1.5” 6061T6 roundstock. I almost forgot how nice it is to machine aluminum compared to steel. I pressed them into the top hats that I’ve got and they’re good to go. Test fitted once of the coilovers today and all seems well. This evening I finished welding the inner fenders and coated them liberally in cold galv before seam sealer and paint tomorrow.
Car needs some exhaust, rear coils, and rear control arms still but it should be back on it’s own 4 feet tomorrow if all goes as planned. Hopefully I'll have a solid update tomorrow. I’d really love to swap plates over on Sunday or Monday and start driving this thing to work the bugs out before the Oregon trip. Anything I should be sure to see while I'm down there?
Some pics
Top to bottom. KA510 rev 2, KA510 rev 1, Stock 510, R32 GTR

Re: Jordan's '72 2 door KA project
Posted: 05 Apr 2014 08:48
by two_68_510s
If I adopted you, you would be obligated to come help the old man finish his project, right?
Yeah, that's the ticket, now all I have to do is negotiate with Henk!
Beautiful work Jordan, I hope you sit (I don't think you ever sit still though) on your stool in the shop, look at this project and savor it.
Re: Jordan's '72 2 door KA project
Posted: 05 Apr 2014 08:55
by JordanTr
Haha that's what the drivers seat is for
I'm hoping for much time spent there this summer.
On the ground!
Posted: 05 Apr 2014 23:13
by JordanTr
Much progress has been made today...Not much sitting around lol.
- Control arms in
Brakes on
Brakes bled
Coilovers in
Inner fenders sealed up
CV bolts torqued
Interior reinstalled
Half decent alignment
Exhaust reinstalled
Diff breather installed
Bleeding master
So many "anodized red" coloured bits
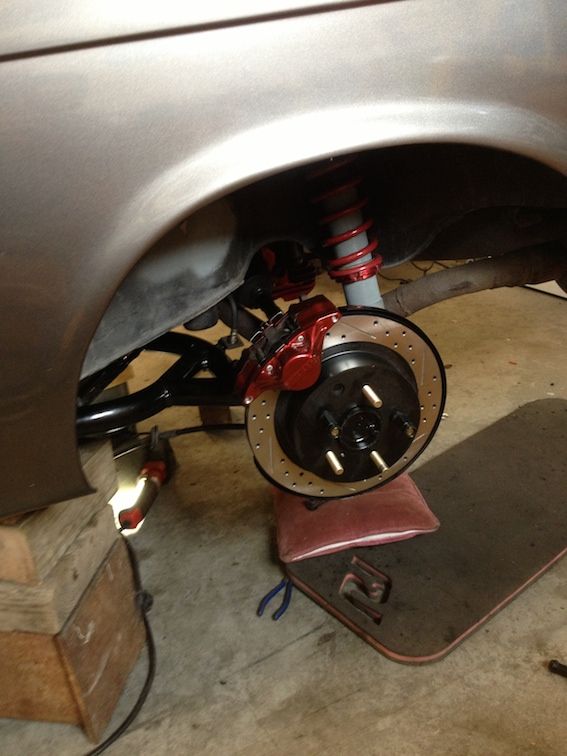
First time since Christmas it's not on blocks!! First drive tomorrow...

Re: Jordan's '72 2 door KA project
Posted: 06 Apr 2014 06:36
by two_68_510s
Late Christmas present today,eh?
Take some videos dude, we are all hounds for input!
Re: Jordan's '72 2 door KA project
Posted: 06 Apr 2014 08:36
by Byron510
Looks great Jordan, deadline met?
See you for a coffee....
Byron


