Page 1 of 14
GAS 1600
Posted: 22 Sep 2012 16:59
by Garvice
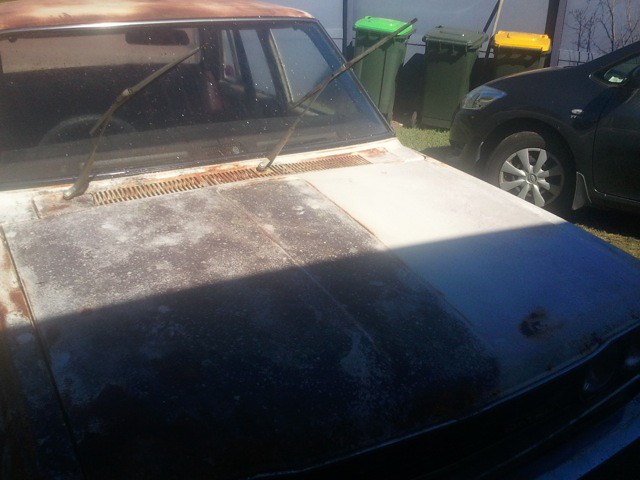
My Z requires more money than I can afford to throw at it, so when my mate told me about this car it just seemed logical.
It cost me a slab of carlton cold and a tow truck to "Come and get it ASAP".
Plans for this car are a quick (like to get it on the road late next year) and cheap build to give me something to enjoy while the Z sits in modification jail.
This is where it got parked in 2003 and it stayed there till I picked it up.
Even had a tree growing through the rear bumper.
 GAS1600001_1_zpsef06b188
 by
Garvice, on Flickr
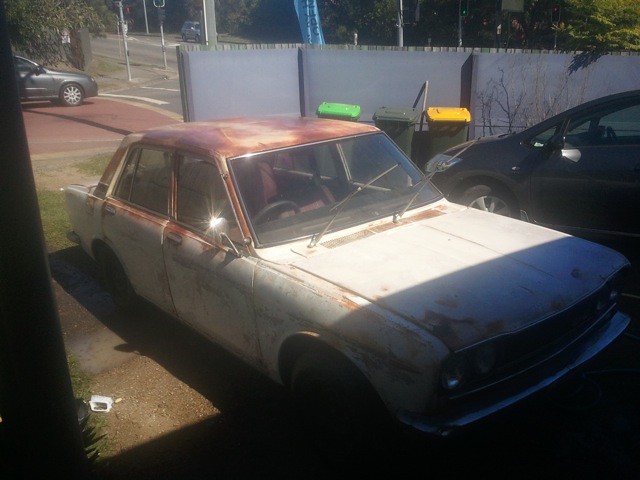
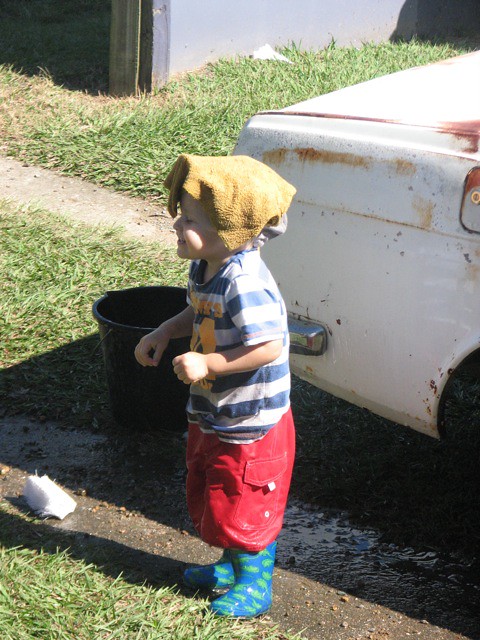
This is after a good wash with help from my eldest.
 GAS1600_001_02
 by
Garvice, on Flickr
 GAS1600_001_03
 by
Garvice, on Flickr
 GAS1600_001_04
 by
Garvice, on Flickr
 GAS1600_001_05
 by
Garvice, on Flickr
Re: GAS 1600
Posted: 22 Sep 2012 17:00
by Garvice
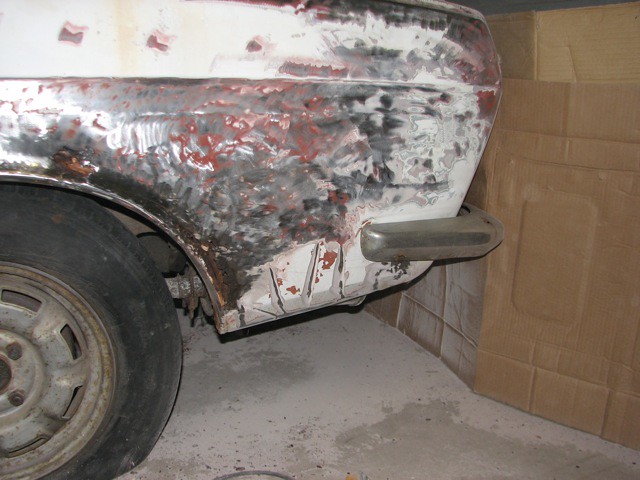
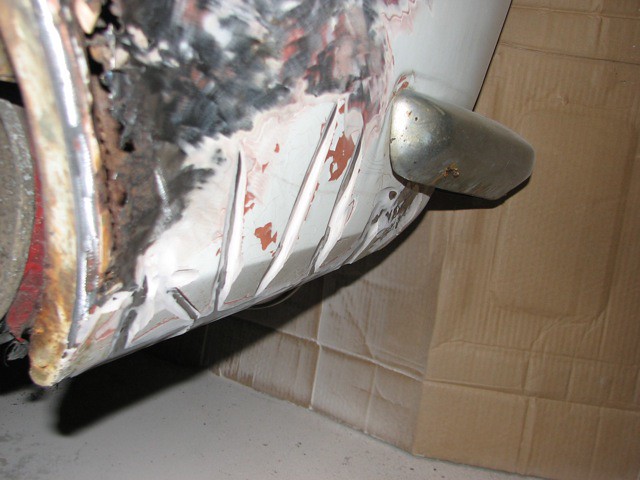
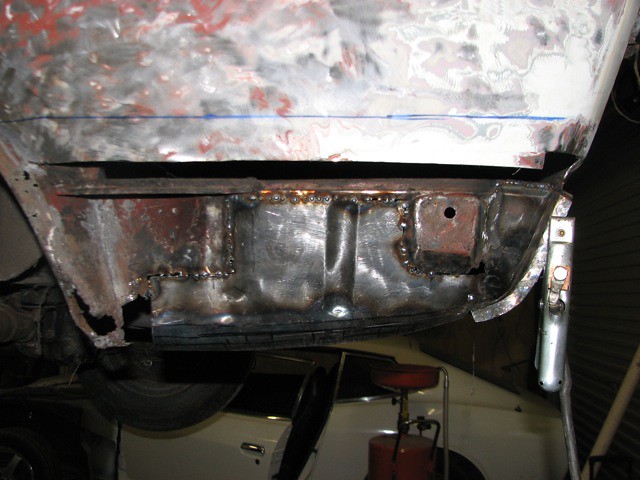
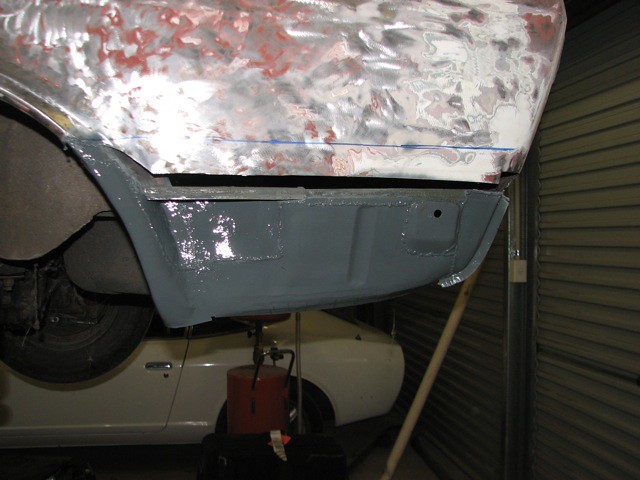
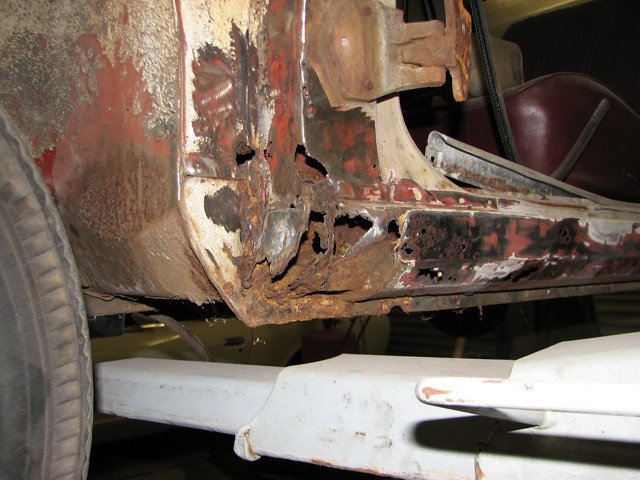
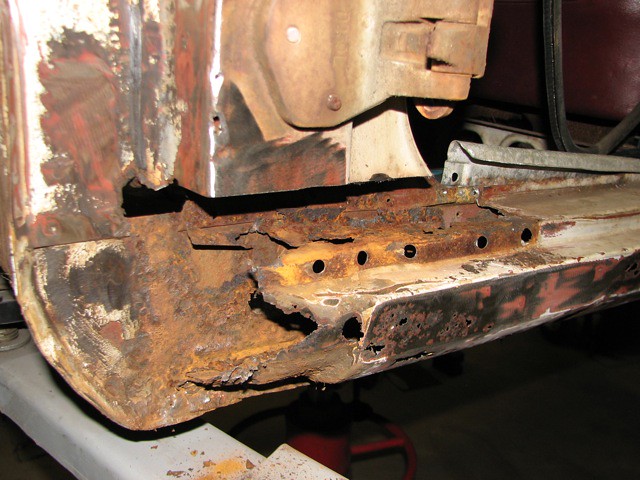
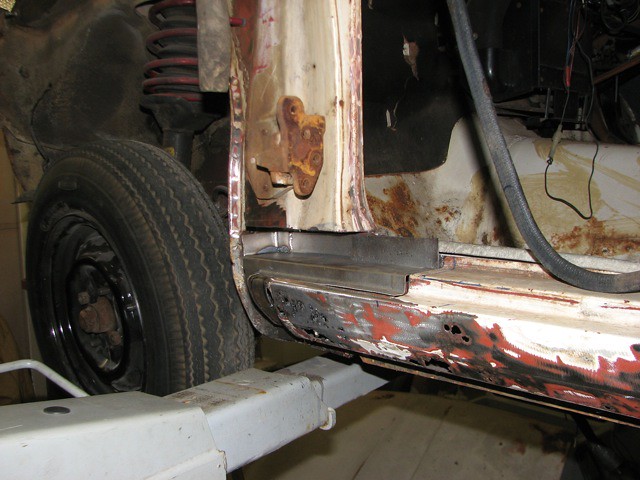
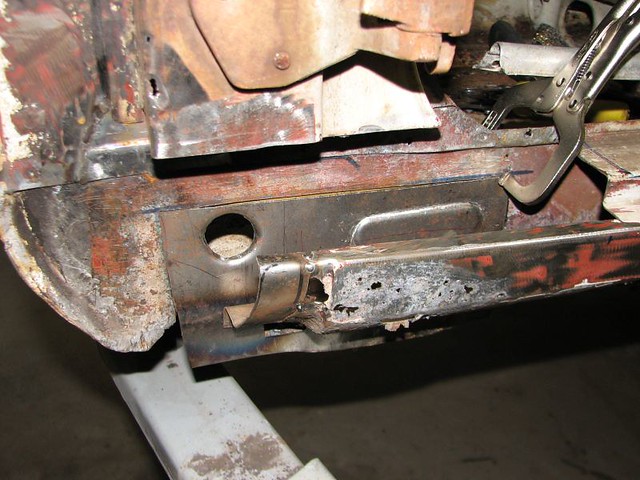
Rear passenger quarter was the first job to be tackled. 1/2" of bog on the lower edge gave me a couple of frights. Decided to cut out the front panel and rebuild the inner panel. Made the inner panel in 3 sections.
 GAS1600_002_01
 by
Garvice, on Flickr
 GAS1600_002_02
 by
Garvice, on Flickr
 GAS1600_002_03
 by
Garvice, on Flickr
 GAS1600_002_04
 by
Garvice, on Flickr
 GAS1600_002_05
 by
Garvice, on Flickr
 GAS1600_002_06
 by
Garvice, on Flickr
GAS1600_002_06 by
Garvice, on Flickr
 GAS1600_002_08
 by
Garvice, on Flickr
 GAS1600_002_09
 by
Garvice, on Flickr
Re: GAS 1600
Posted: 22 Sep 2012 17:02
by Garvice
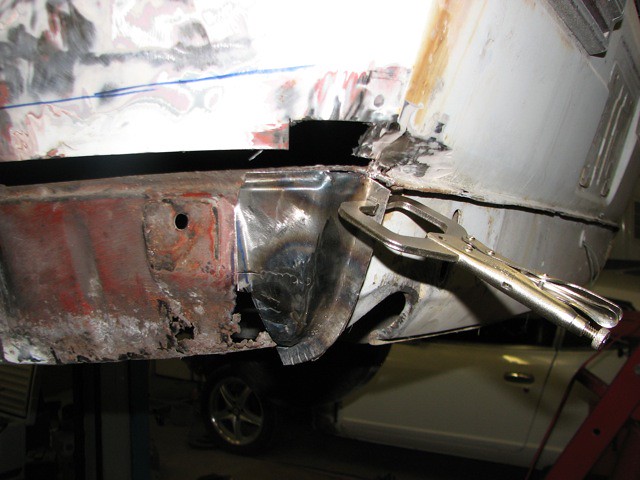
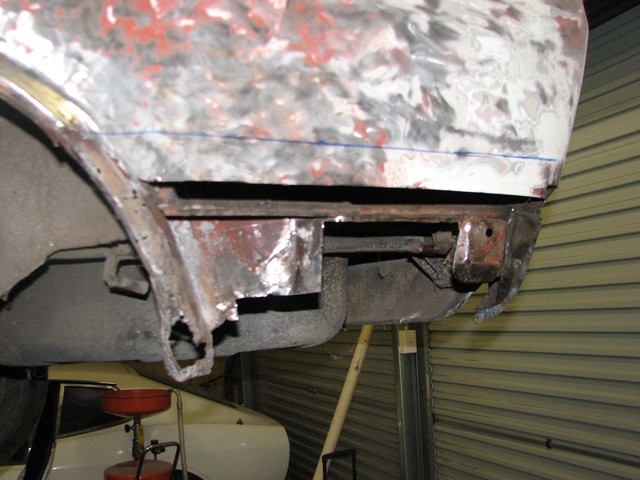
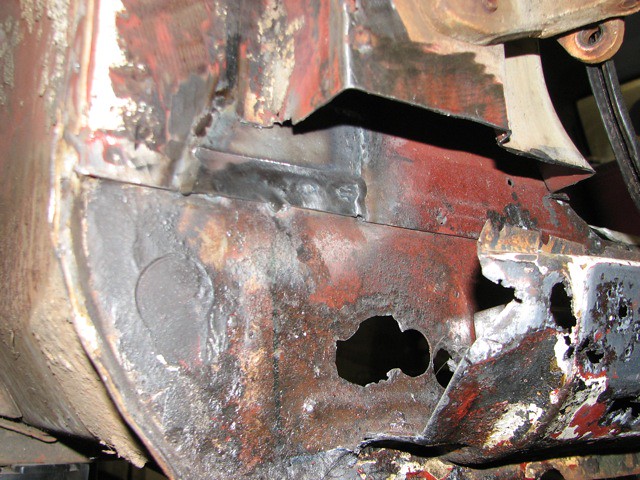
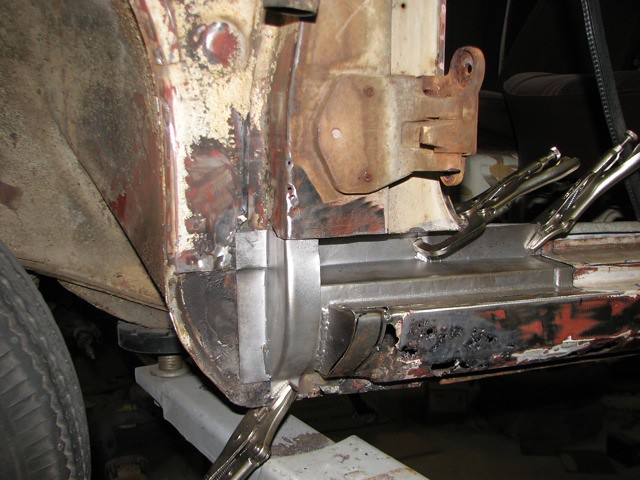
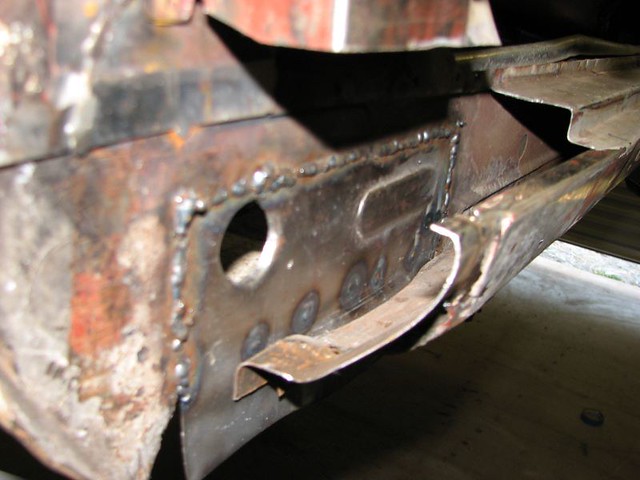
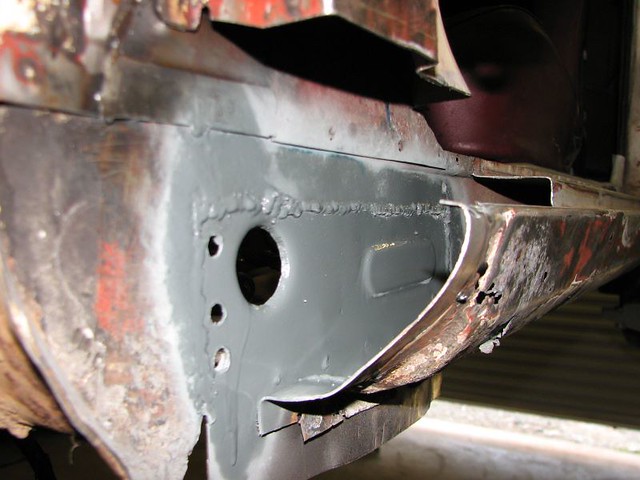
Front passenger quarter was next job. It was like swiss cheese in there. I still have to make the piece in the second last photo and remake the inside car section and bottom flange so I have something to weld to.
 GAS1600_003_01
 by
Garvice, on Flickr
 GAS1600_003_02
 by
Garvice, on Flickr
 GAS1600_003_03
 by
Garvice, on Flickr
 GAS1600_003_04
 by
Garvice, on Flickr
 GAS1600_003_05
 by
Garvice, on Flickr
 GAS1600_003_06
 by
Garvice, on Flickr
 GAS1600_003_07
 by
Garvice, on Flickr
 GAS1600_003_08
 by
Garvice, on Flickr
 GAS1600_003_09
 by
Garvice, on Flickr
 GAS1600_003_10
 by
Garvice, on Flickr
 GAS1600_003_11
 by
Garvice, on Flickr
 GAS1600_003_12
 by
Garvice, on Flickr
 GAS1600_003_13
 by
Garvice, on Flickr
 GAS1600_003_14
 by
Garvice, on Flickr
Re: GAS 1600
Posted: 22 Sep 2012 17:37
by yenpit
Is all of that hand formed?? Wow, excellent craftsmanship........

Re: GAS 1600
Posted: 22 Sep 2012 17:43
by Garvice
Yep all hand formed. Easier then it looks, this is my first atempt at making rust repair panels.
Re: GAS 1600
Posted: 22 Sep 2012 22:16
by McShagger510
SKILLS!
Re: GAS 1600
Posted: 23 Sep 2012 09:16
by datzenmike
'69 is it?
Garvice wrote:Yep all hand formed. Easier then it looks, this is my first atempt at making rust repair panels.
Then you must work with sheet metal in some other job?
Re: GAS 1600
Posted: 23 Sep 2012 13:40
by Garvice
It is a 1970 model (australian delivered). No I don't work with metal I'm an electrical engineer. I bought a dvd by a guy called david gardiner which gave me a few ideas, but really I just gave it a go. Much easier then it looks. I also bight a shriner stretcher and some hand tools as making radius' was taking too long by hand.
Re: GAS 1600
Posted: 23 Sep 2012 14:16
by two_68_510s
Yeah, yeah, you say it is easy!
But I tell you you have good hand skills.
It seems easy because you have the talent.
I have seen many pieces of metal turned into pretzels by others. (myself included)
Re: GAS 1600
Posted: 25 Sep 2012 11:47
by Bike papa
It's great to see nice metal work! Super satisfying for you too!
Looking at your front rocker panels I was wondering how the jack was supporting the car! Lol
BP
Re: GAS 1600
Posted: 25 Sep 2012 11:50
by Bike papa
I'm not so sure about the "optimistic" quick and easy build statement.
Always fun nonetheless!
BP
Re: GAS 1600
Posted: 25 Sep 2012 13:13
by Garvice
Ha, yeah, no jack just a hoist. Sure makes life easy. Build time is optimistic, but this thing isn't going to be real pretty when done, just tidy and functional. I have a z too which is the pretty/properly built one.. Thanks for the support.
Re: GAS 1600
Posted: 12 Oct 2012 07:21
by Garvice
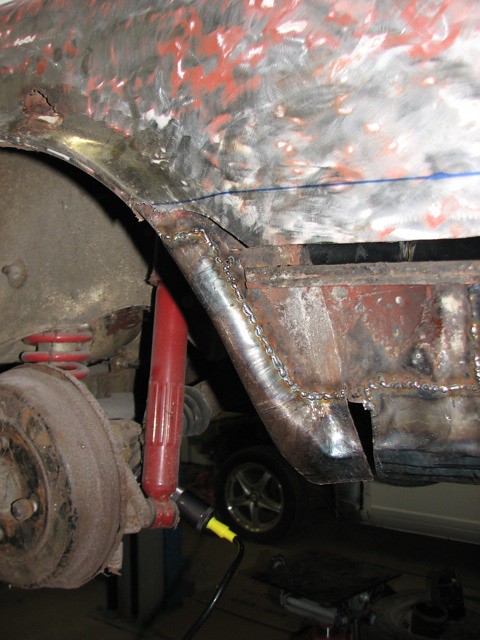
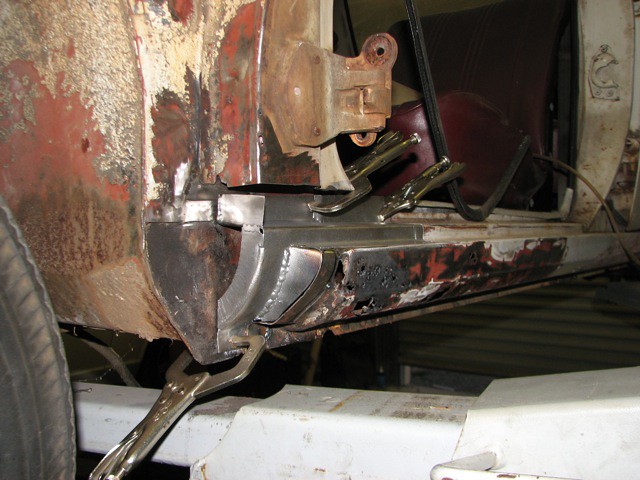
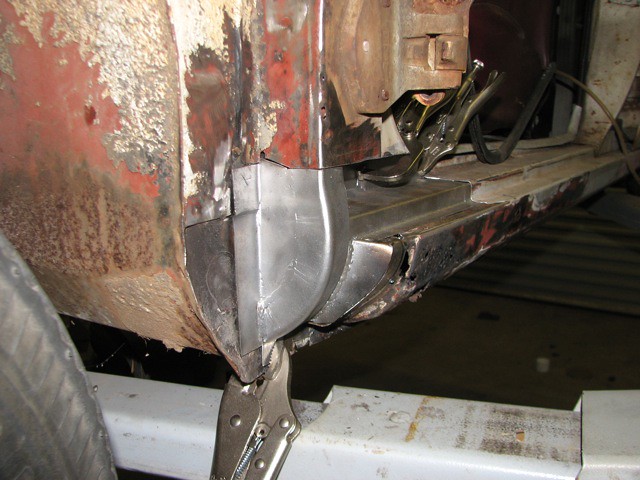
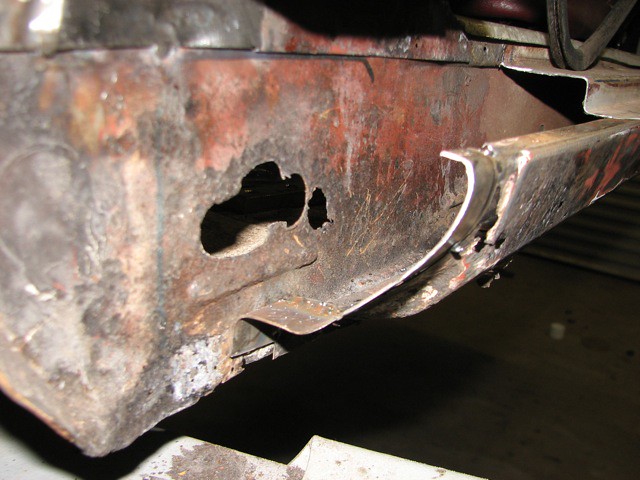
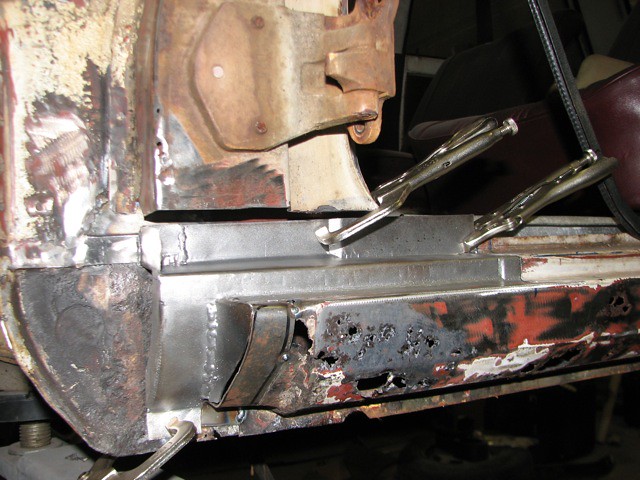
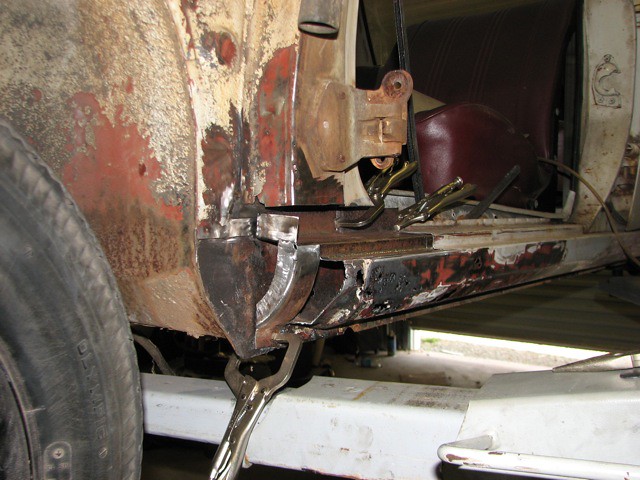
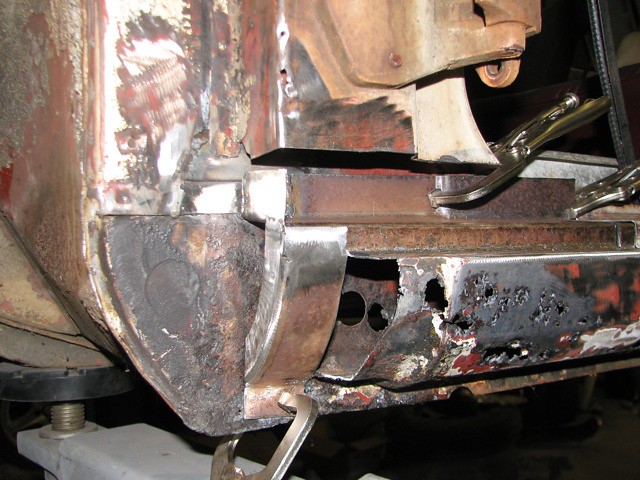
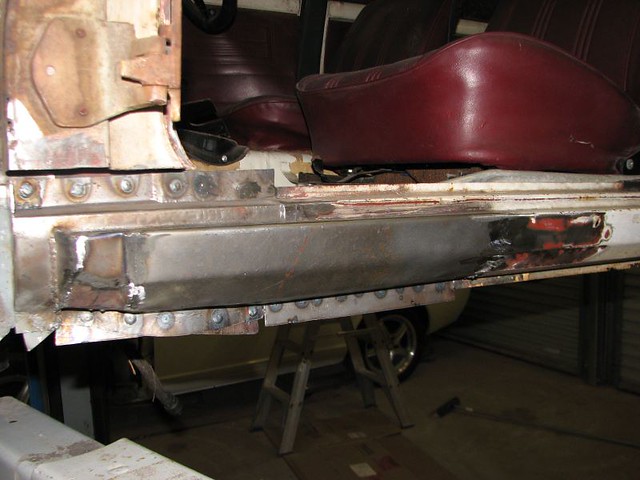
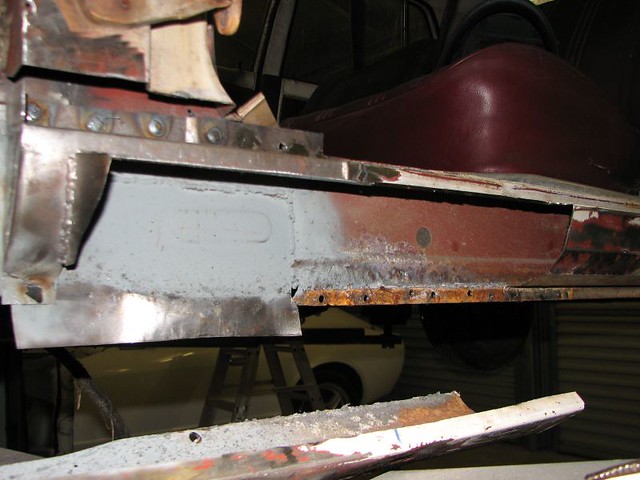
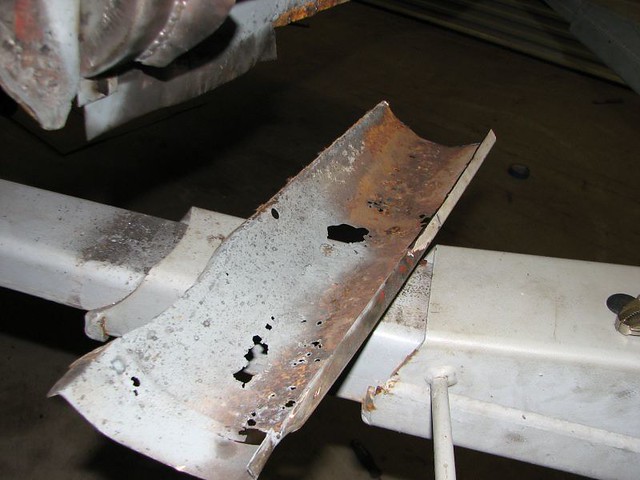
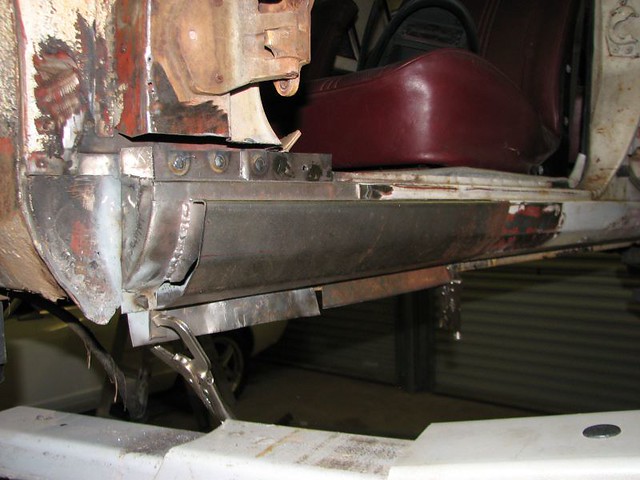
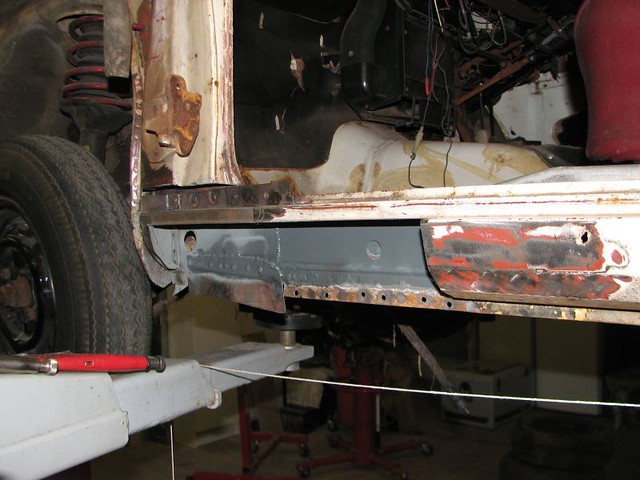
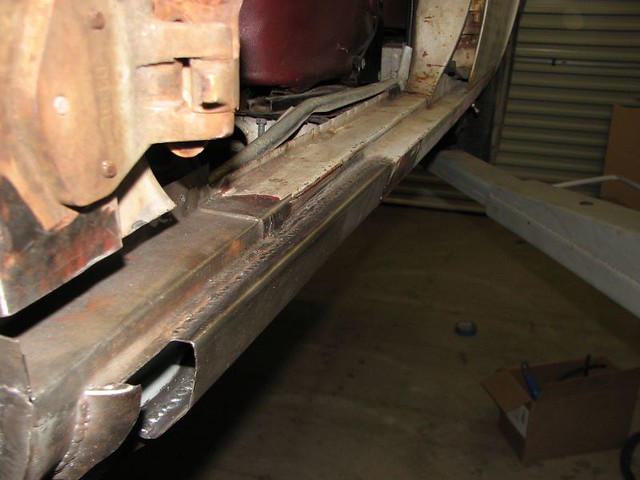
Got a chance to spend a bit more time on the 1600. Still not as much done as I would have liked, but I'm getting there. Will be glad to be done with the dogleg to be honest.
Had to remake the inner sill as the metal was very thin and did not allow me enough strength to weld to.
 GAS1600_004_01
 by
Garvice, on Flickr
 GAS1600_004_02
 by
Garvice, on Flickr
 GAS1600_004_03
 by
Garvice, on Flickr
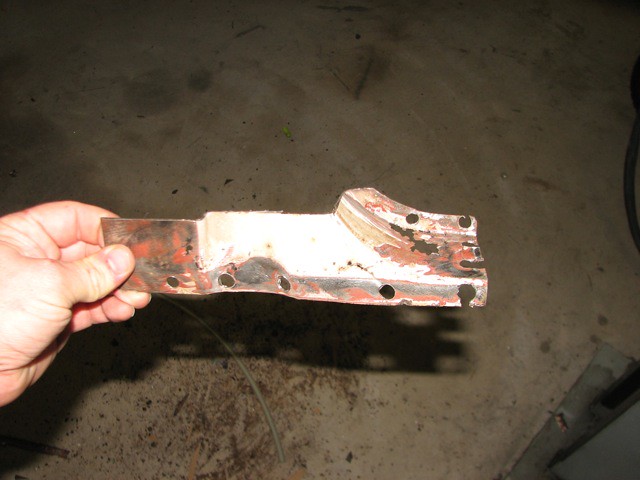
After I had spent considerable amount of time making the inner sill fit behind the outer sill, I had another look at the outer sill and thought, this is going to be easier to build a new one rather then fixing the holes. So I cut out a big section, should have done that from the start.
 GAS1600_004_04
 by
Garvice, on Flickr
 GAS1600_004_05
 by
Garvice, on Flickr
 GAS1600_004_06
 by
Garvice, on Flickr
 GAS1600_004_07
 by
Garvice, on Flickr
 GAS1600_004_08
 by
Garvice, on Flickr
 GAS1600_004_09
 by
Garvice, on Flickr
 GAS1600_004_10
 by
Garvice, on Flickr
 GAS1600_004_11
 by
Garvice, on Flickr
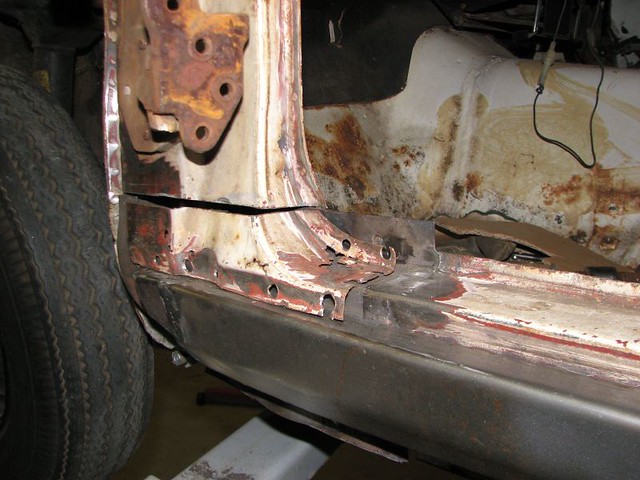
Still have to make this piece before the dogleg is all done.
 GAS1600_004_12
 by
Garvice, on Flickr
Re: GAS 1600
Posted: 12 Oct 2012 07:29
by okayfine
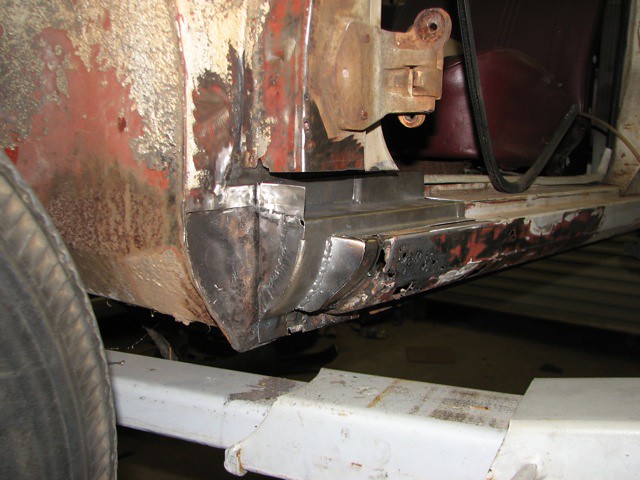
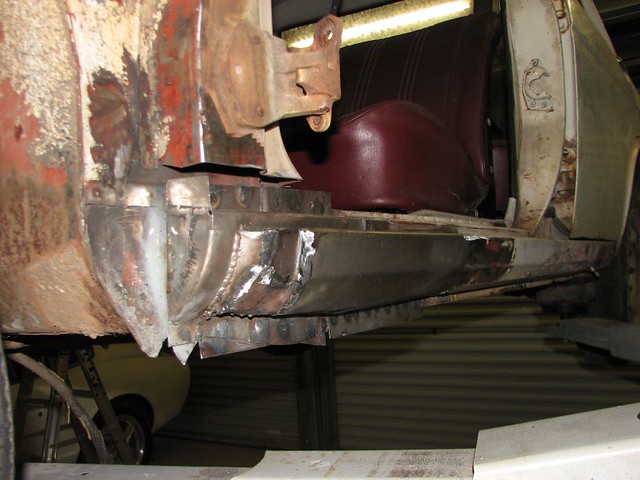
Nice! And I love the picture of the repair rocker against what looks like a perfect red driver's seat.
Re: GAS 1600
Posted: 12 Oct 2012 07:34
by Garvice
Actually it's a pretty crappy maroon passenger seat

, but that is only because I'm on the other side of the world.

Thanks by the way.