Page 11 of 14
Re: GAS 1600
Posted: 17 May 2015 04:49
by Garvice
Thanks guys.
510rob, yep made my day too.
Jobs left to do before it can drive out of the shed under it's own power (underlined is struck out). I thought some of the jobs may not get done before it got driven out of the shed
Torque Rear Axle nuts
Bolt and torque half shafts to axles
Get some intake fuel line and o-ring/retainer for the fuel sender so that I can mount up the tank
Run some wiring for the fuel pump
Mount battery and run some power feeds
Mount the steering column (wouldn't mind replacing the rubber connection with a unijoint, but that will come later)
Run one more short length of hard line for rear passenger brake
Make the brake line fixings more permanent
Mount the soft brake lines
Fluids
Transmission
Differential
Brakes
Clutch
Make a handbrake mount
Make a temporary mount for the gauges Does zip ties count?
Neaten up some of the wiring
Make an air intake/filter
Finding my time in the shed unproductive, so need to refocus with a new hit list I think.
Re: GAS 1600
Posted: 18 May 2015 08:52
by Byron510
Man - that has to have felt good.
Awesome that you took your boys for that first "drive".
Great milestone to cross for sure. Great job, keep the updates coming as it's been a hella long road so far.
Byron
Re: GAS 1600
Posted: 07 Jun 2015 23:19
by Garvice
Alright, I sat down and wrote a list of jobs to do. Probably isn't everything, but will give me something to work with.
- Wiring
- Headlight Wiring
Turn Signals
Brackets for Engine bay wiring
Fuel Pump/Sensor
Rear Lights/Demister
Wipers
Mount indicator stalks
Radiator Temp Switch
Rust Repairs/Metal Work/Fabrication
- Roof line above rear drivers door
Boot water channel
Drivers Door
Drivers Qtr Panel/Bottom Mount
Drivers Qtr Panel Mounting Flange
Passenger Door
Passenger Qtr Panel/Bottom Mount
Passenger Qtr Panel Mounting Flange
Front Grill Brackets
Exhaust cutout
Hand brake mount
Hand brake pinion lever reversed/remade
Dashboard strip down/fabrication
Steering Column Mount
Exhaust outlet
Brake line mounts, tunnel/radiator support
Heater Install
Air intake/filter
Radiator Fan Install
Purchase
- Handbrake cable
Heat shielding
Windscreen seal
Rear Window seal
Door Seals
Window Seals
Boot Seal
Bonnet Seal
Seat belts
Mount
- Front Bumper
Front Grill
Front Light Buckets
Front swaybar
Re: GAS 1600
Posted: 07 Jun 2015 23:27
by Garvice
Got a couple of hours in the shed this weekend.
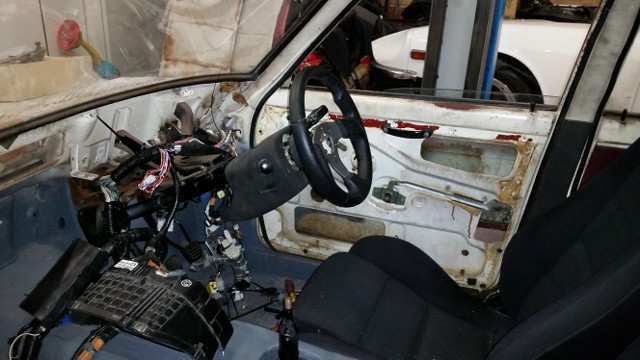
Mounted the Altezza indicator/lights and wiper stalks on the 180b steering column. Couple of small welds on the bracket from the altezza. I'm not convinced about the plastic surround, much bigger than it needs to be, but will be nice to have good quality new switches.
 GAS1600_057_01
 by
Garvice, on Flickr
 GAS1600_057_02
 by
Garvice, on Flickr
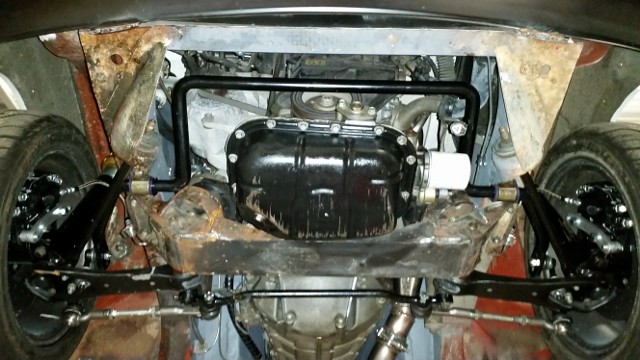
Mounted the Maddat swaybar. Was a pain in the rear (nothing is easy with this engine/car combination). Ended up mounting it upside down to clear the sump. Fouled on the sump and the oil filter the other way.
 GAS1600_057_03
 by
Garvice, on Flickr
 GAS1600_057_04
 by
Garvice, on Flickr
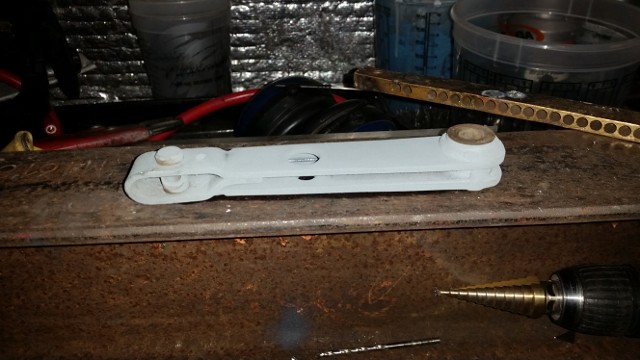
My new exhaust was fouling on the handbrake cables, so i had to lower the saddle a little. Ended up just making a simple modification to the pinion lever so that the saddle sat about 10mm lower. Was enough to give me the clearance needed to the exhaust.
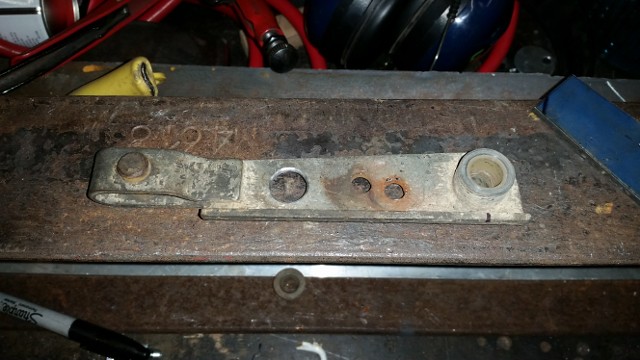 GAS1600_057_05
 by
Garvice, on Flickr
 GAS1600_057_06
 by
Garvice, on Flickr
 GAS1600_057_07
 by
Garvice, on Flickr
I also welded on the nuts for the front bumper, so it is finally properly mounted. No photos.
Re: GAS 1600
Posted: 08 Jun 2015 05:59
by two_68_510s
Clever lever!
Re: GAS 1600
Posted: 14 Jun 2015 01:28
by Garvice
Having issues with the willwood remote masters leaking at the reservoir end. Thinking of measuring up to see if the Tilton job will fit. It's much bigger than i need though and not sure it'll work well there. Only other option i can think of is getting the remote feeder section (where the reservoir connects to) made out of aluminum. All other remote options seem to be too small (1oz motor bike type jobs).
Anyone else no of other good options? (Needs a way to be mounted too, ideally that doesn't look like a stainless zip tie/bandit strap).
Re: GAS 1600
Posted: 14 Jun 2015 08:15
by Byron510
I do know that the rubber line that connected the reservoir to the M/C's are prone to weeping, so I went a different route on my car years ago - used air brake hose and fittings I needed were locally available at the time. Check out the photos in my build thread starting April 6, 2005. Not a single issue to date.
viewtopic.php?f=27&t=530&start=150
Byron
Re: GAS 1600
Posted: 14 Jun 2015 14:18
by Garvice
Thanks Byron that looks good. Mine is leaking from between the two plastic pieces though. I thought about perservering with it but from my reading it seems to be quite common.
Re: GAS 1600
Posted: 21 Jun 2015 04:45
by Garvice
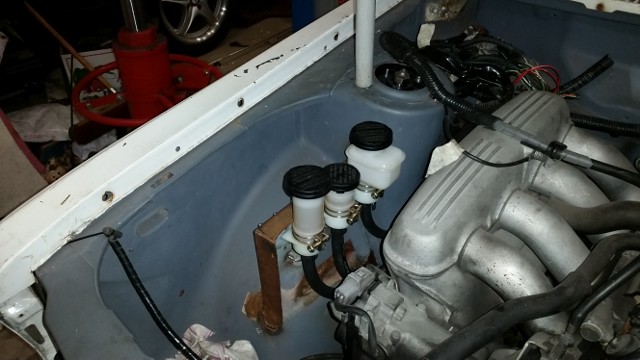
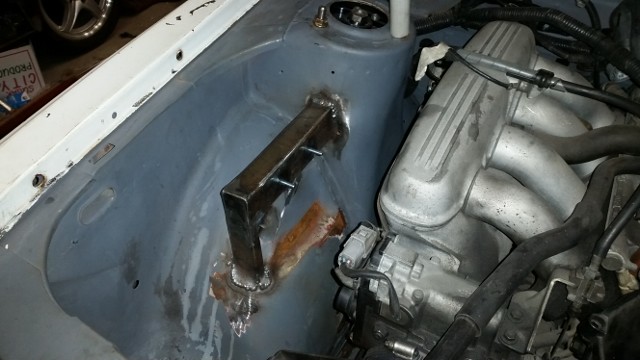
This first job wasn't on the list, but had to be done.
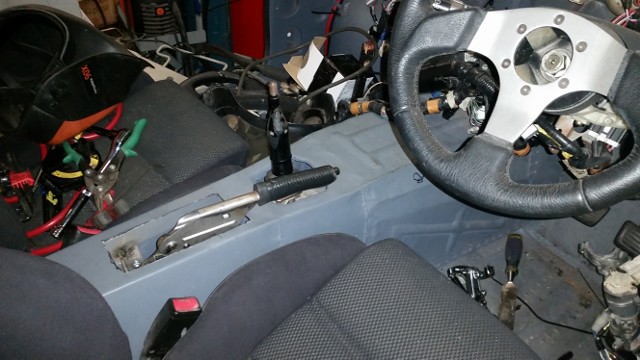
These willwood reservoirs kept leaking (alternating, but mainly the largest one). Might of been something to do with different brand reservoirs or might of been the plastic on plastic connection. Either way I gave up on these which meant I needed to make a new mount.
Out with the old.
 GAS1600_058_01
 by
Garvice, on Flickr
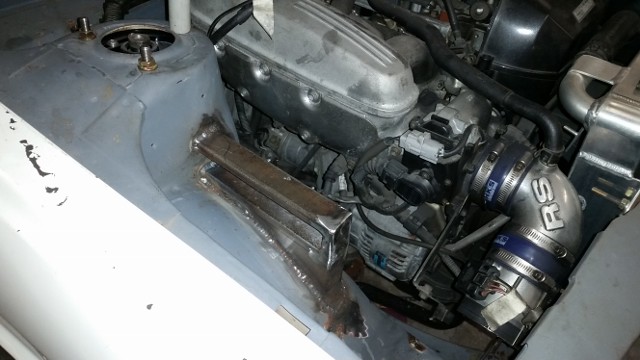
In with the new.
 GAS1600_058_02
 by
Garvice, on Flickr
 GAS1600_058_03
 by
Garvice, on Flickr
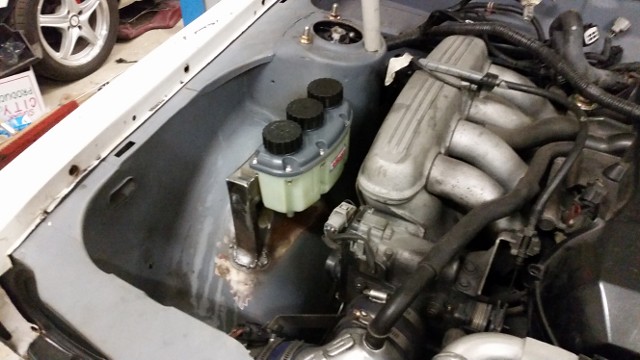 GAS1600_058_04
 by
Garvice, on Flickr
This shows the new reservoirs are still higher than the cylinders
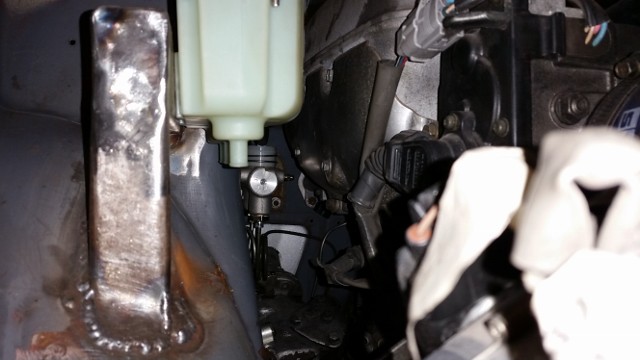 GAS1600_058_05
 by
Garvice, on Flickr
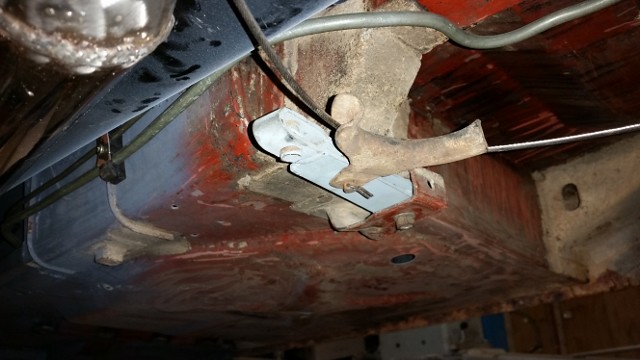
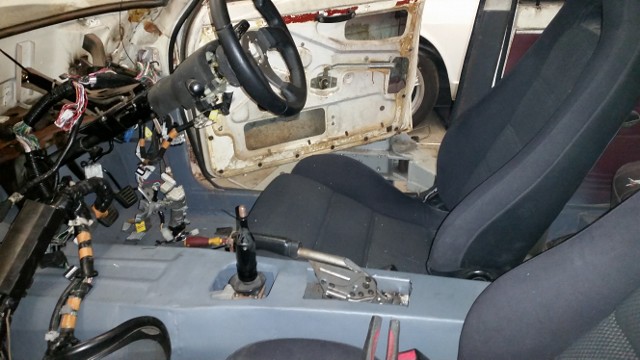
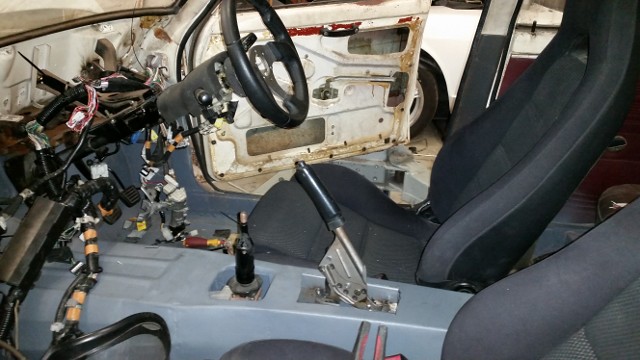
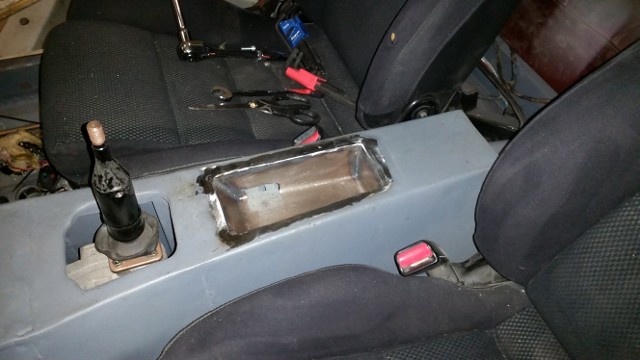
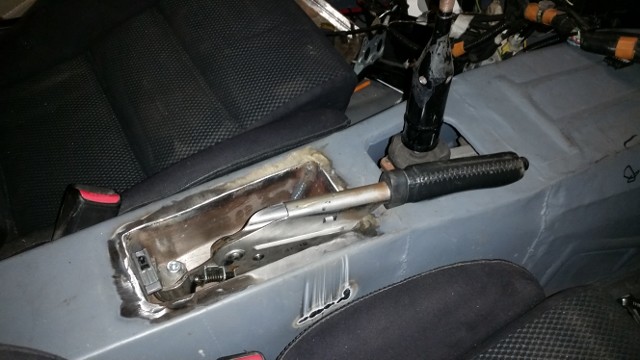
Started on a job on the list, mounting the handbrake. I need to weld the brackets in permanently, make a new cover to seal the tunnel and have a cable made. It is an R33 handbrake.
 GAS1600_058_06
 by
Garvice, on Flickr
 GAS1600_058_07
 by
Garvice, on Flickr
 GAS1600_058_08
 by
Garvice, on Flickr
Re: GAS 1600
Posted: 28 Jun 2015 04:32
by Garvice
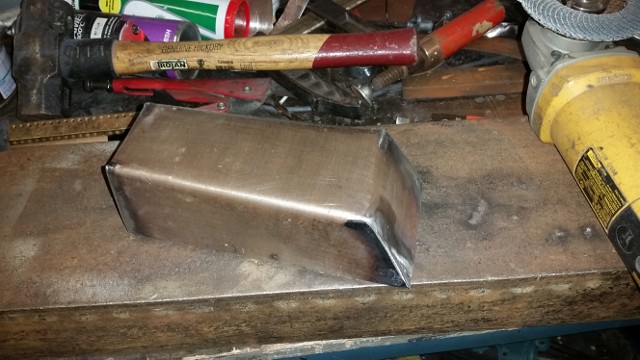
Sealed up the handbrake mount. Need to get a cable made.
 GAS1600_059_01
 by
Garvice, on Flickr
 GAS1600_059_02
 by
Garvice, on Flickr
 GAS1600_059_03
 by
Garvice, on Flickr
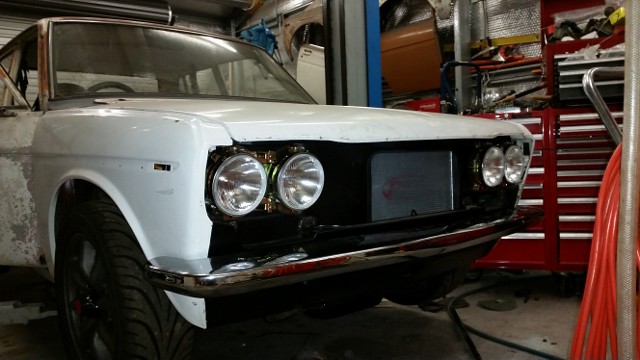
Also got my headlight buckets and bulbs mounted up. Went to wire them up only to find my crimpers can't get around the H4 connector angle plugs. Job for another day now.
 GAS1600_059_04
 by
Garvice, on Flickr
Re: GAS 1600
Posted: 19 Jul 2015 02:26
by Garvice
- Plumbed in the new brake reservoir
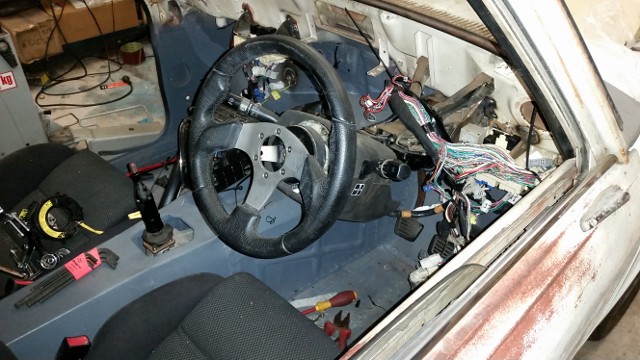
- Installed the Toyota Altezza windscreen wiper motor and extended the altezza loom. I searched for 5minutes for a proper pinout/wiring diagram of the factory 510 motor before saying, stuff it the altezza motor is newer, so spent the next hour and a half making it fit. It has the motor sticking out the opposite direction to the 510 motor and required a slight modification of the bracket to make it fit nicely with where i had installed the fuse box. Also ended up welding the arm onto the motor shaft as i stripped the bolt trying to press fit the arm on. After all that, it actually works rather nicely. I did have to also press out one of the wiper mechanisms (drivers side) shaft as it was seized. Probably should give the mechanism a coat of paint, but couldn't be bothered at the time.
- Fixed the temporary mounts in the tunnel for the brake lines.
Current Job list with completed jobs underlined.
Wiring
- Headlight Wiring
Turn Signals
Brackets for Engine bay wiring
Fuel Pump/Sensor
Rear Lights/Demister
Wipers
Mount indicator stalks
Radiator Temp Switch
Rust Repairs/Metal Work/Fabrication
- Roof line above rear drivers door
Boot water channel
Drivers Door
Drivers Qtr Panel/Bottom Mount
Drivers Qtr Panel Mounting Flange
Passenger Door
Passenger Qtr Panel/Bottom Mount
Passenger Qtr Panel Mounting Flange
Front Grill Brackets
Exhaust cutout
Hand brake mount
Hand brake pinion lever reversed/remade
Dashboard strip down/fabrication
Steering Column Mount
Exhaust outlet
Brake line mounts, tunnel/radiator support
Heater Install
Air intake/filter
Radiator Fan Install
Purchase
- Handbrake cable
Heat shielding
Windscreen seal
Rear Window seal
Door Seals
Window Seals
Boot Seal
Bonnet Seal
Seat belts
Mount
- Front Bumper
Front Grill
Front Light Buckets
Front swaybar
Re: GAS 1600
Posted: 01 Jan 2016 15:23
by Doraemon
Astonishing job Sir ! I really admire your metal working.
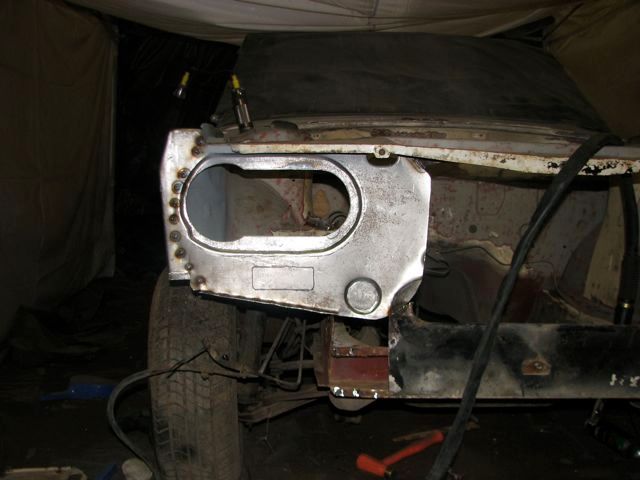
Can you tell how you did the front light panel ?
Re: GAS 1600
Posted: 01 Jan 2016 17:52
by Garvice
Hi Doreamon. Thanks for the kind words.
Check out this link for some ideas on how to do the various steps.
http://www.the510realm.com/viewtopic.php?t=25090
I essentially cut out a large hope the sharp of the indent with 3mm mdf. Then i clamped metal over the mdf and chased the metal into the hole (Stretched it ) with a couple of different tools. Check the link and if you have any questions on the process I'm happy to help.
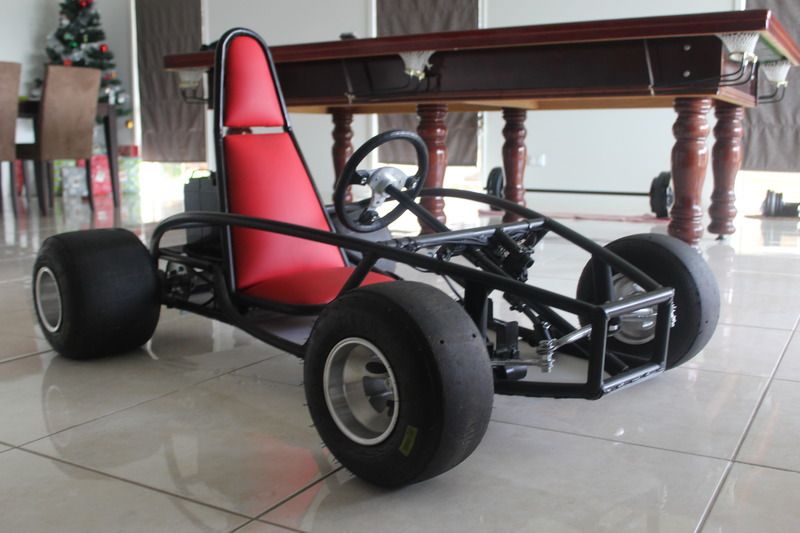
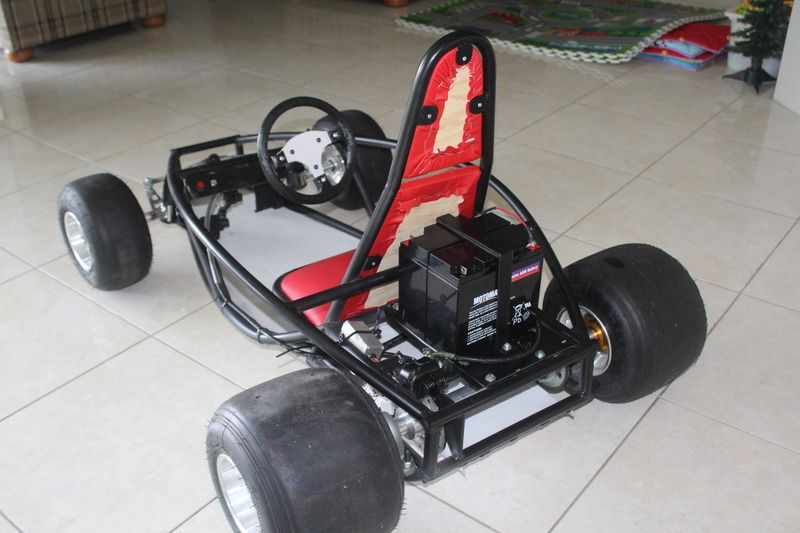
Since i haven't updated this thread in a long time Iguess i better explain why. Been flat chat at work the last 8 months so finding the time and motivation to work on the car has been hard. Also helped a mate build a go kart for his son (pictures below) so that took up done of the garage time. Now i have to build one for my sons. Then i can get back onto the datsun.
Re: GAS 1600
Posted: 01 Jan 2016 20:19
by 510rob
What did you use to bend the tubing for the go-kart chassis?
Re: GAS 1600
Posted: 01 Jan 2016 20:29
by Garvice
I welded a bunch of 32NB pipe to my bench in the arc that i wanted and just man handled the tube around it. Helps if you have a full length as leverage. I used black 15Nb pipe which has a2.6mm wall. So it bends quote nicely. The next one I'm using 1.6mm wall 1"pipe so it may not bend as nicely.