
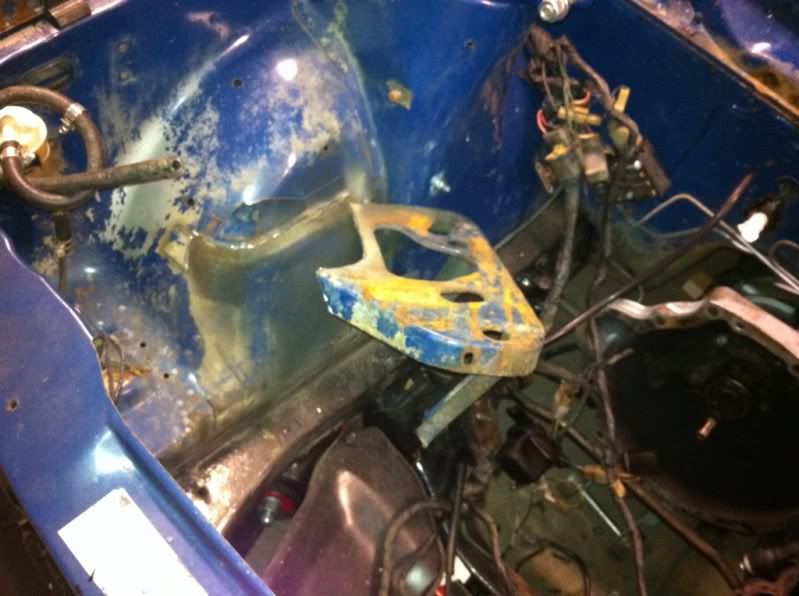
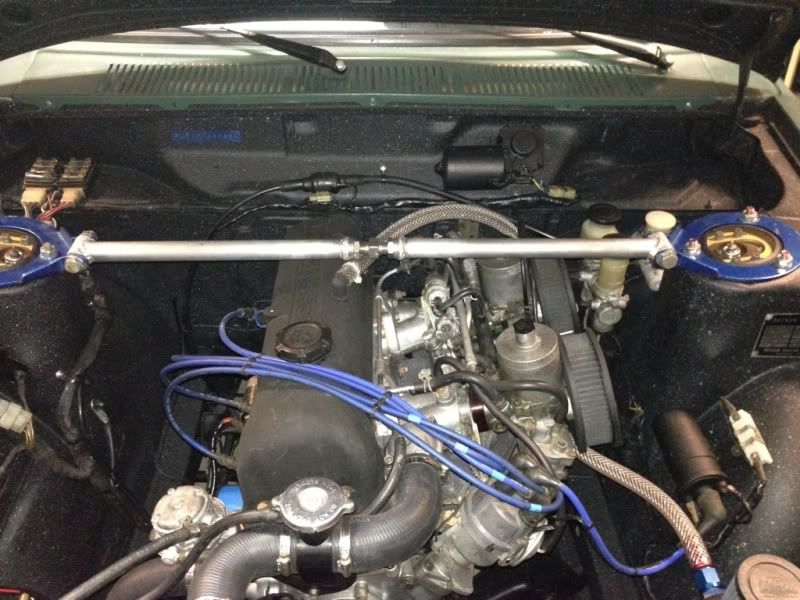
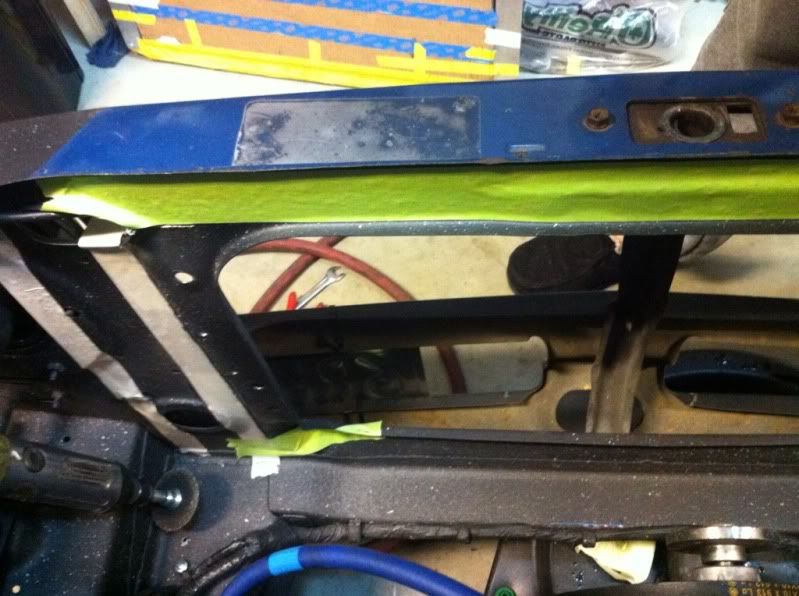
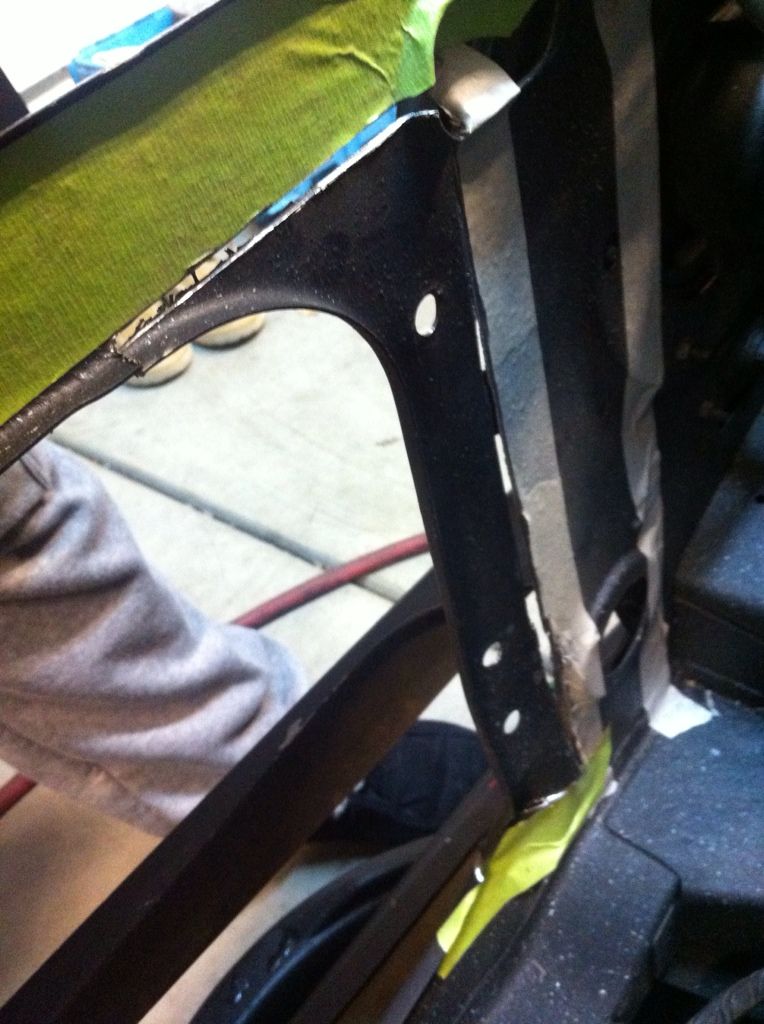
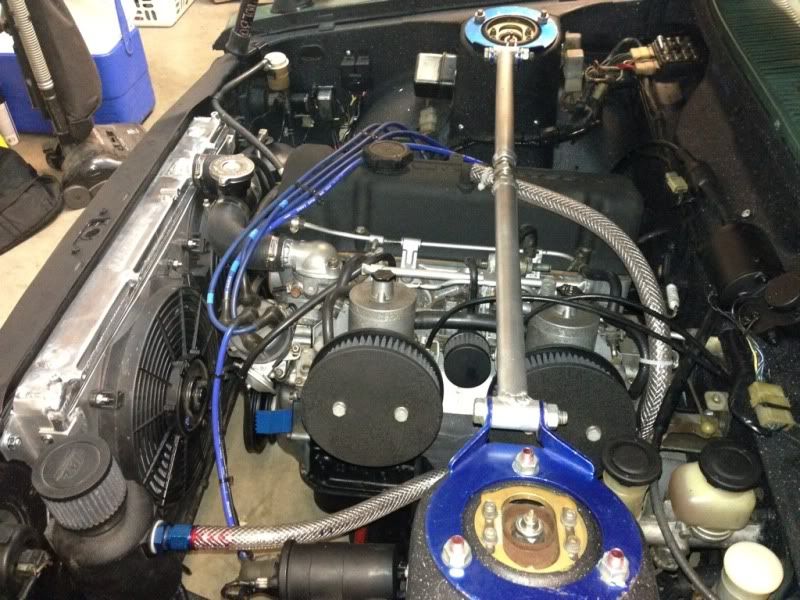
It clears the support, but I had to notch the support guide/rail, it was making slight contact.Byron510 wrote:
Will this brace clear the hood support?
Byron
'72 Sedan "Do It Right" build - denis.drc
Re: '72 Sedan "Do It Right" build - denis.drc
When you truly love your project, you won't cut corners!
Re: '72 Sedan "Do It Right" build - denis.drc
They are XXR wheels. Great bang for the buck! I'm thinking of repainting them eventually.RonM wrote:Looks like he's got plenty. Are those XXR nock offs? I have the same Star Specs on my car. Sticky stuff.
When you truly love your project, you won't cut corners!
Re: '72 Sedan "Do It Right" build - denis.drc
Now that the suspension is working well, I left it was time for a drive....all the way to Thunderhill Raceway for some FUN!
No stereo means headphones on the BORING drive up..
Can you tell by the grin on my face how satisfied I am?

I forgot my GoPro that day, so no in-car footage, and nothing to really take footage of..
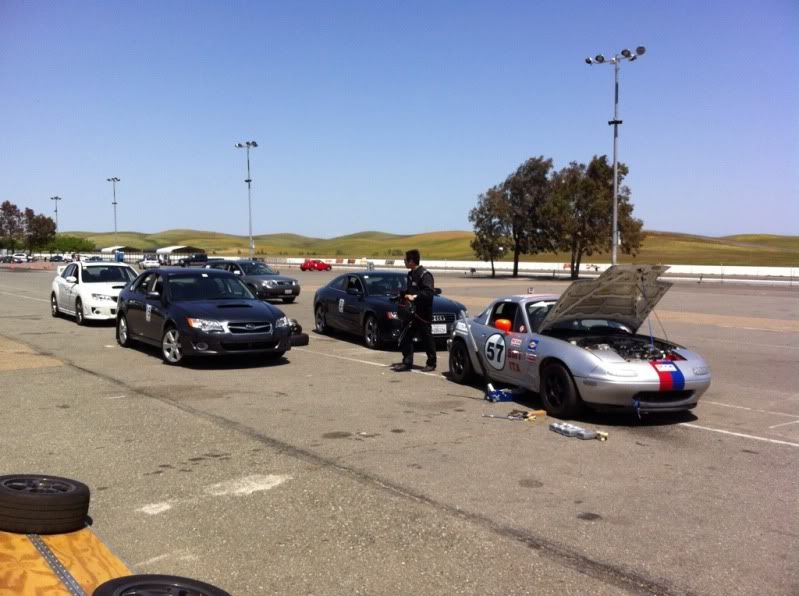
I snagged a shot of me in the paddock next to a buddy's car..

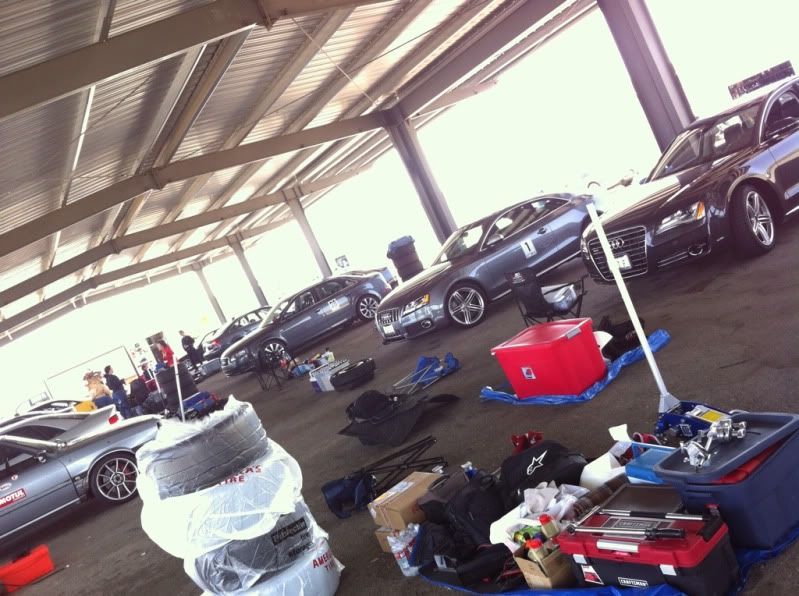
And a few more..
I didn't get out on track for a couple of reasons (all of which were my fault), but had enough seat time on the drive to and from to make a couple of dampening adjustments and set a final functional ride height.
Until now, I hadn't taken the car on any trips longer than ~35 miles, so this lengthy freeway trip was an eye opener. An important thing I noticed during the drive was the lack of power from the beat L16. It just felt too flat. Judging by the rest of the car, it was more than likely original and not well maintained.
No stereo means headphones on the BORING drive up..
Can you tell by the grin on my face how satisfied I am?
I forgot my GoPro that day, so no in-car footage, and nothing to really take footage of..
I snagged a shot of me in the paddock next to a buddy's car..
And a few more..
I didn't get out on track for a couple of reasons (all of which were my fault), but had enough seat time on the drive to and from to make a couple of dampening adjustments and set a final functional ride height.
Until now, I hadn't taken the car on any trips longer than ~35 miles, so this lengthy freeway trip was an eye opener. An important thing I noticed during the drive was the lack of power from the beat L16. It just felt too flat. Judging by the rest of the car, it was more than likely original and not well maintained.
When you truly love your project, you won't cut corners!
Re: '72 Sedan "Do It Right" build - denis.drc
I drove the car around a few more days trying to convince myself that the engine was fine and I'm just used to (spoiled by) more power. In the end I just got tired of wondering and, VERY tired of the heavy rear main seal, front main seal, and oil pan gasket leaks.
My driveway was tired of it as well...
First, I did a compression & leak-down check. To no surprise of mine, compression was WAY low and leak-down numbers were WAY too high.
Next, it was time to make a decision. Do I go for an engine conversion right away or rebuild the L16.
As tempting as it was to just dump the L16 in favor of something more modern, I really wanted to know what a TIGHT L16 feels like. So, rebuild it is...
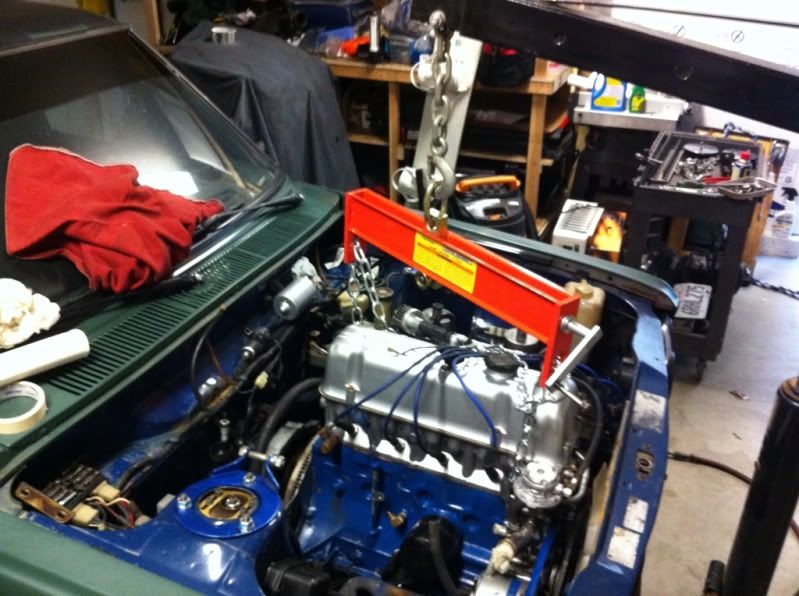
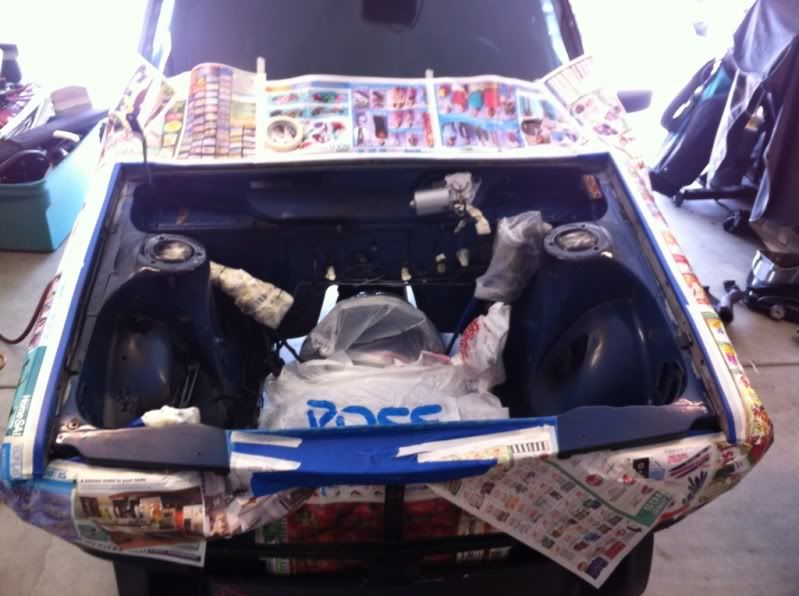
First the engine had to come out..
Hood off.
Radiator out.
Here we go!
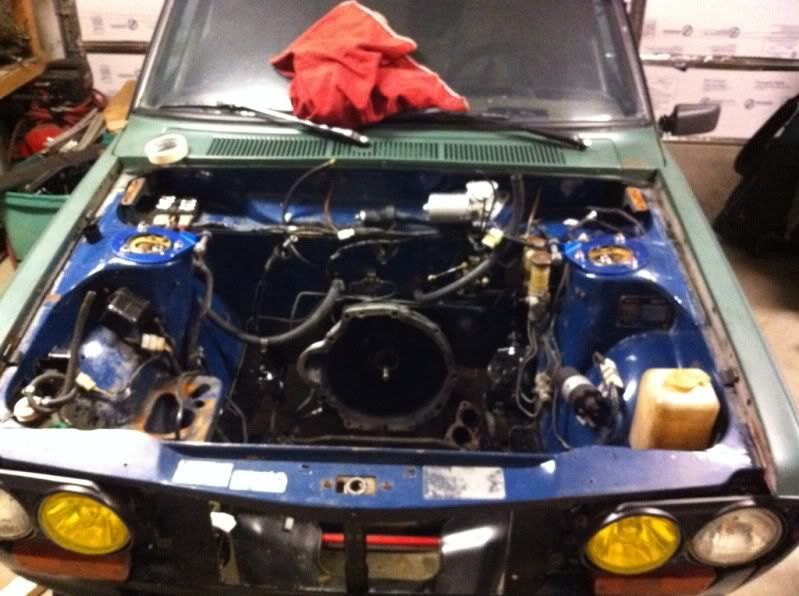
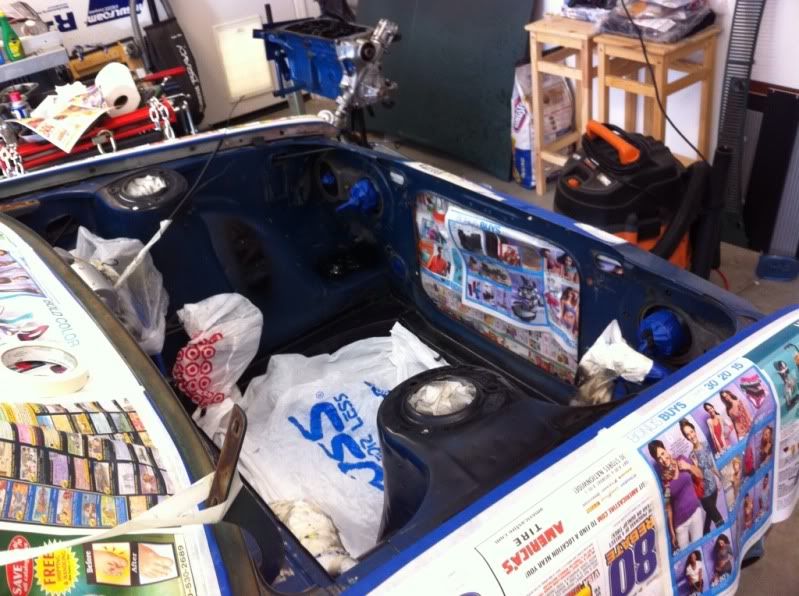
Now a little tear-down and A LOT of cleaning.
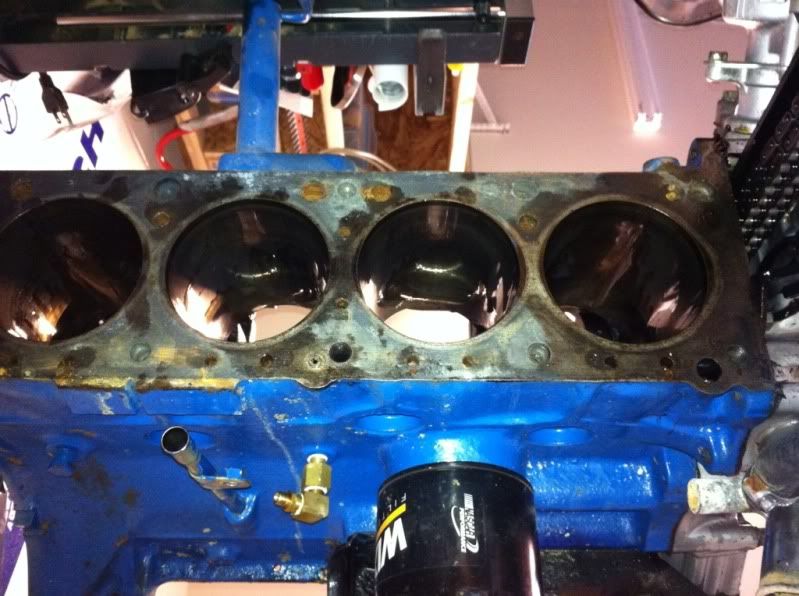
The motor looked pretty grimy on the inside and outside. The last few owners really didn't give a rat's ass about maintenance.
Looked like instead of changing the oil, they just kept adding oil as it would leak out.
Don't let the pics fool you, I pressure washed the whole thing before I started pulling the motor.
Head off, pistons out..
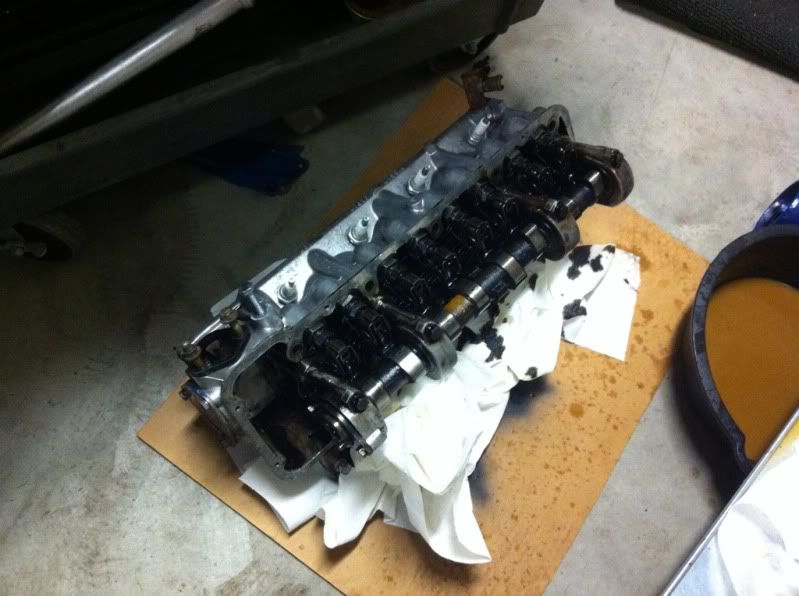

While the head was off at the machine shop. I though I'd work on the block a bit..
Honed the cylinders.
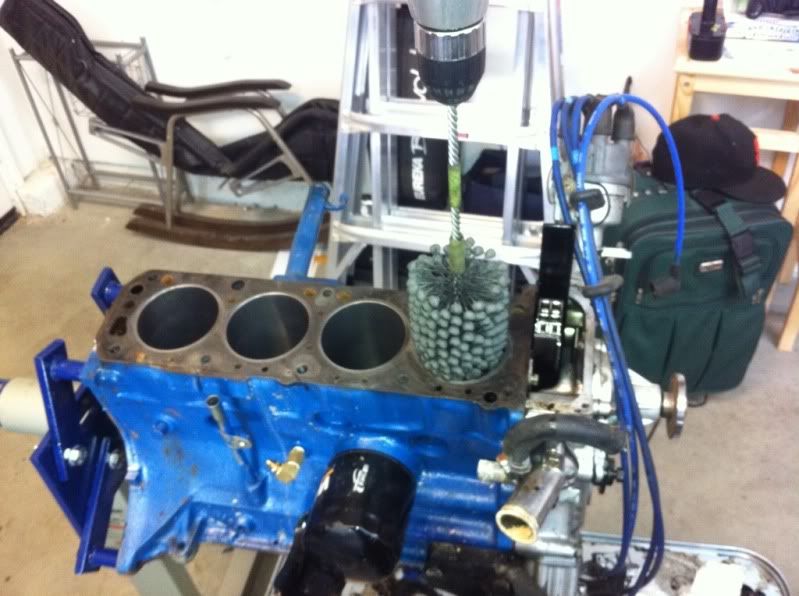
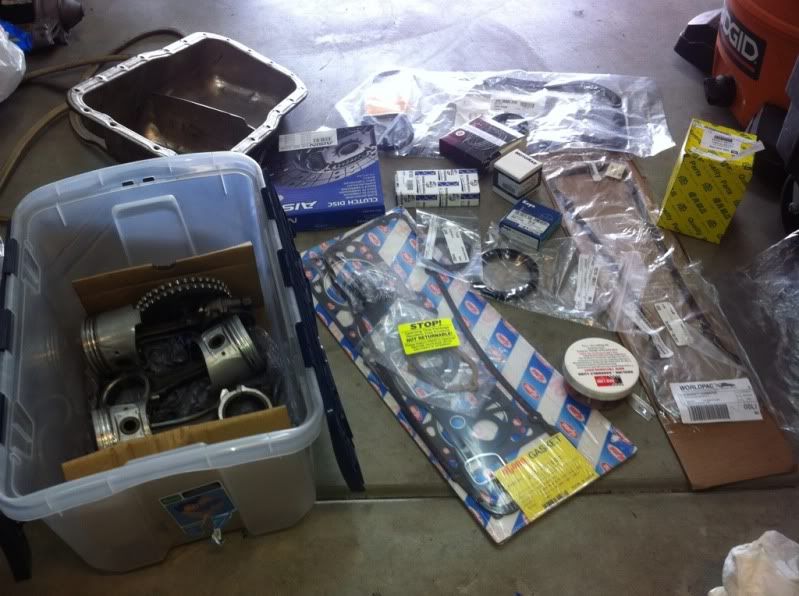
Cleaned all the carbon from the piston ring-lands and had pistons/rods hot tanked. Also went out and got myself some new parts -gaskets, bearings, rings, etc..
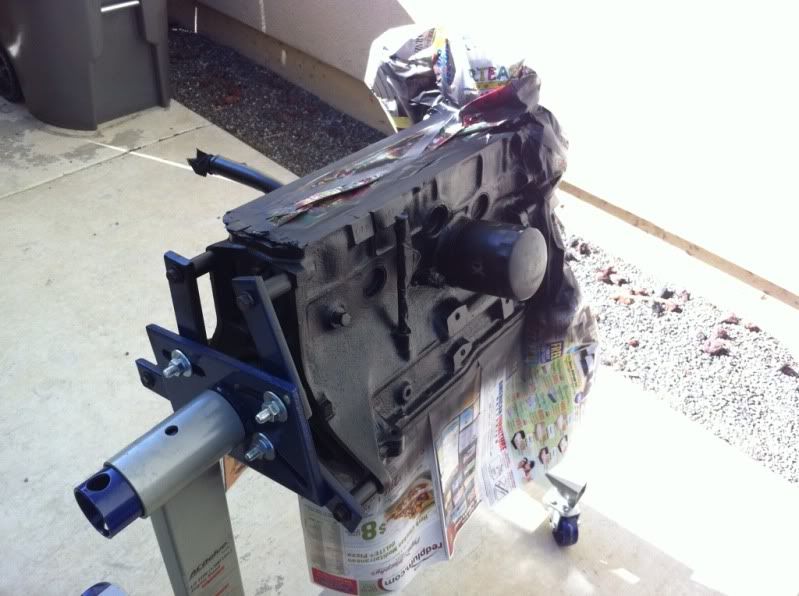
Finally got to paint the block too!
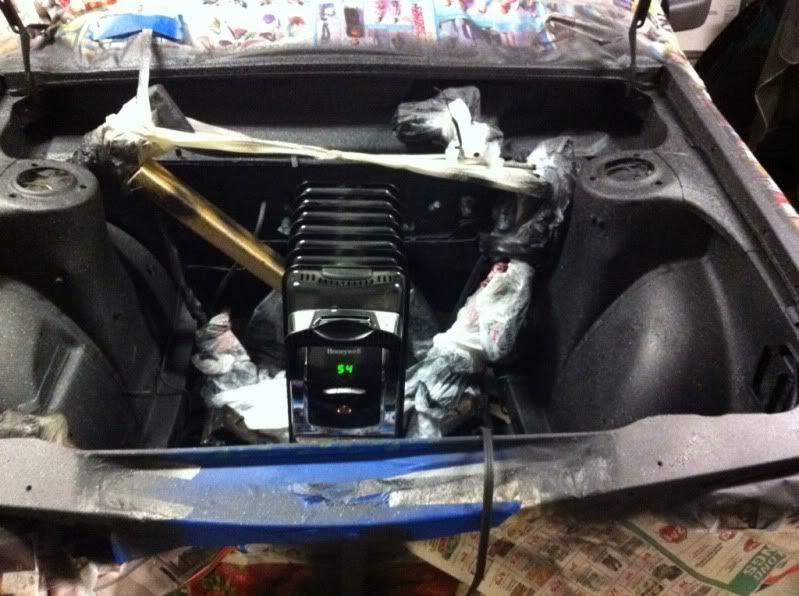
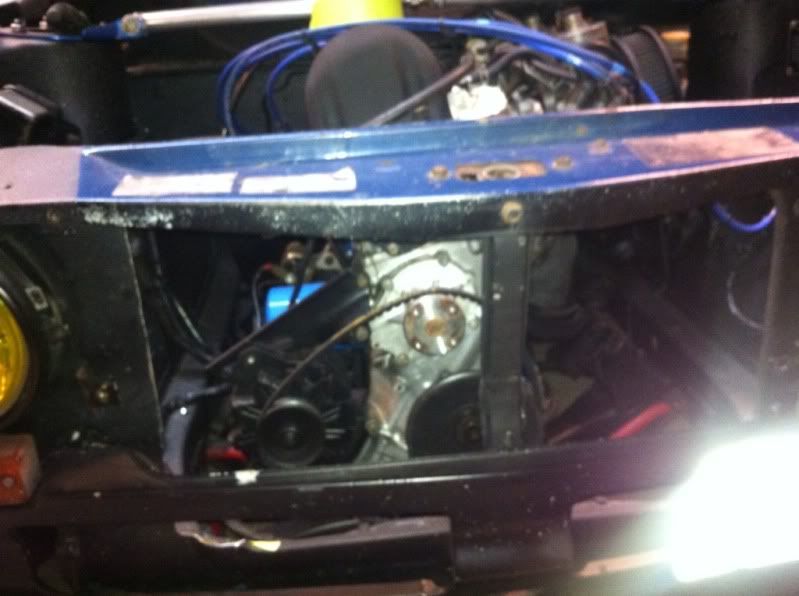
While waiting for the cylinder head to come back, I got to cleaning up and painting the engine bay.
Removed the battery tray.
Much Better!
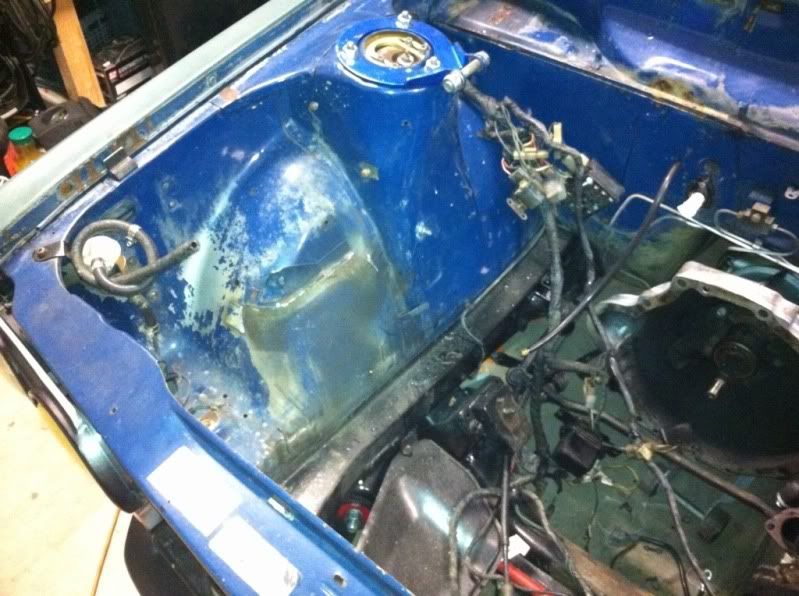
Prep and prime..
Now, time for some AWESOME spatter paint!
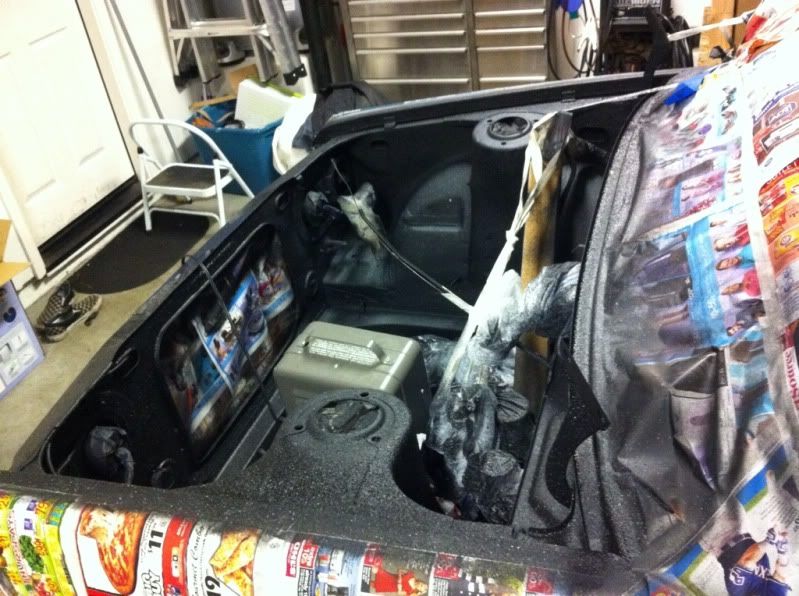
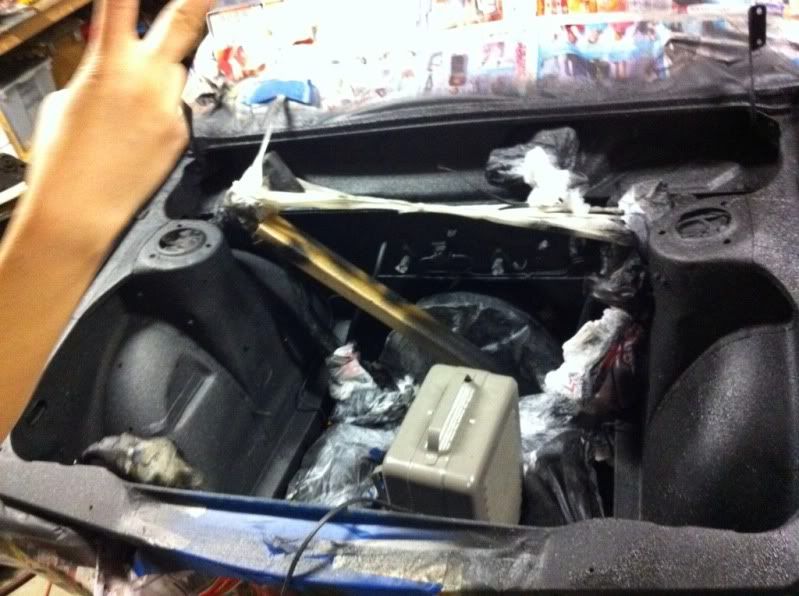
Powered by SPACE HEATER.
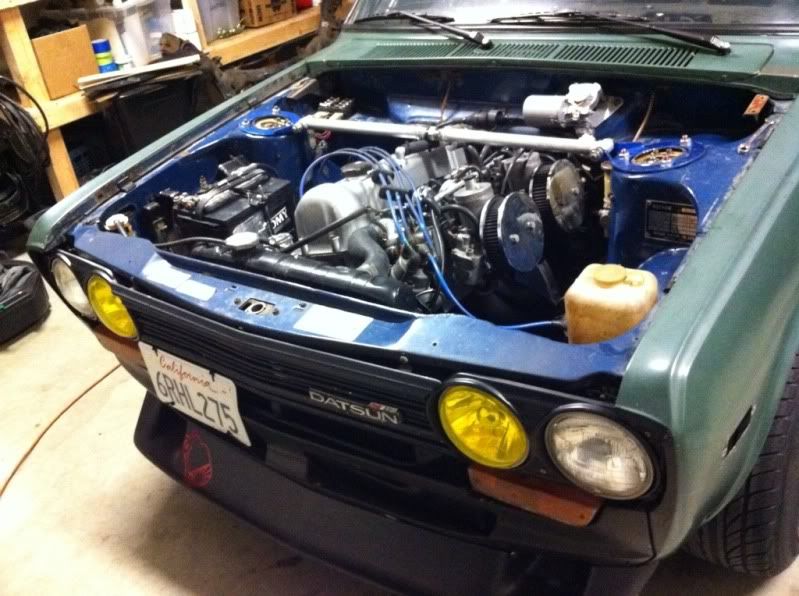
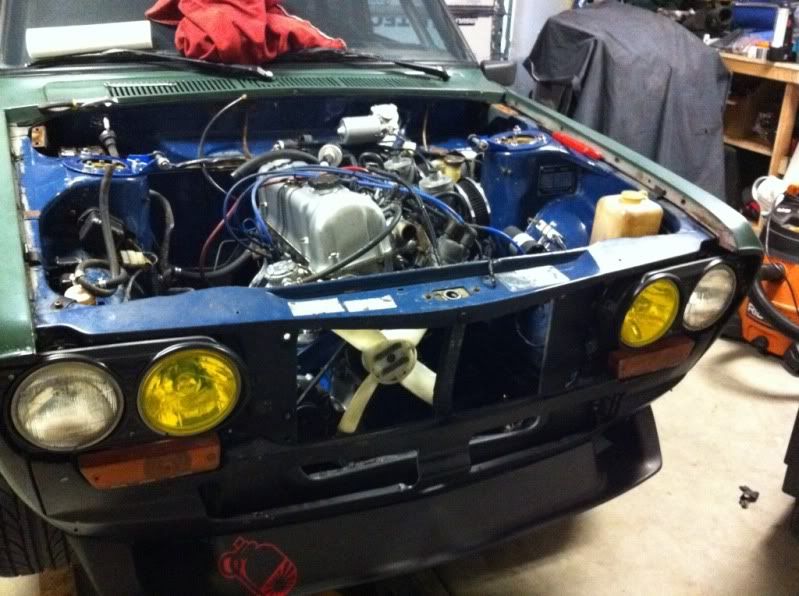
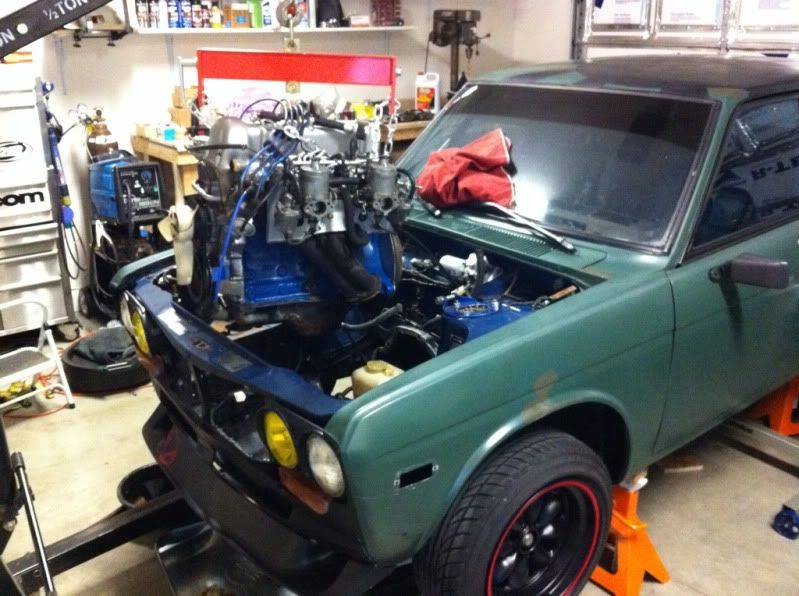
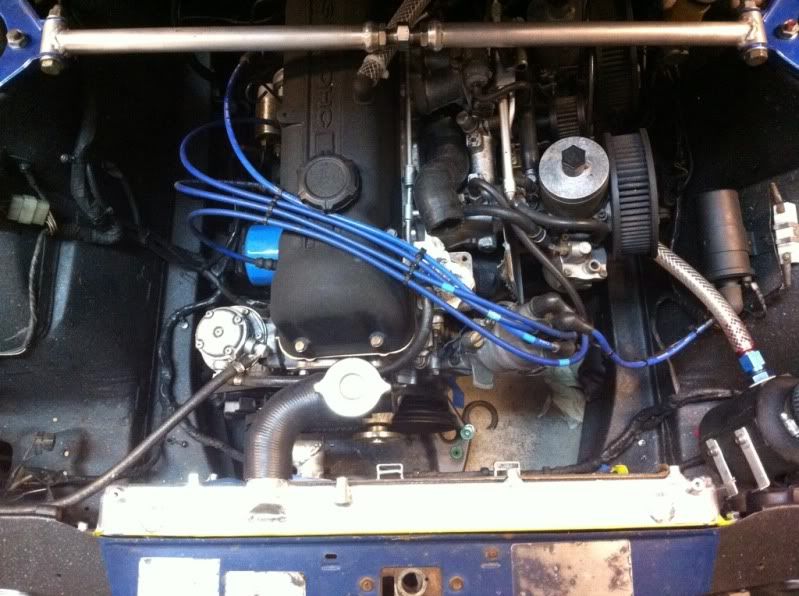
A week later I got my head back. Threw on a new clutch and back in she went.

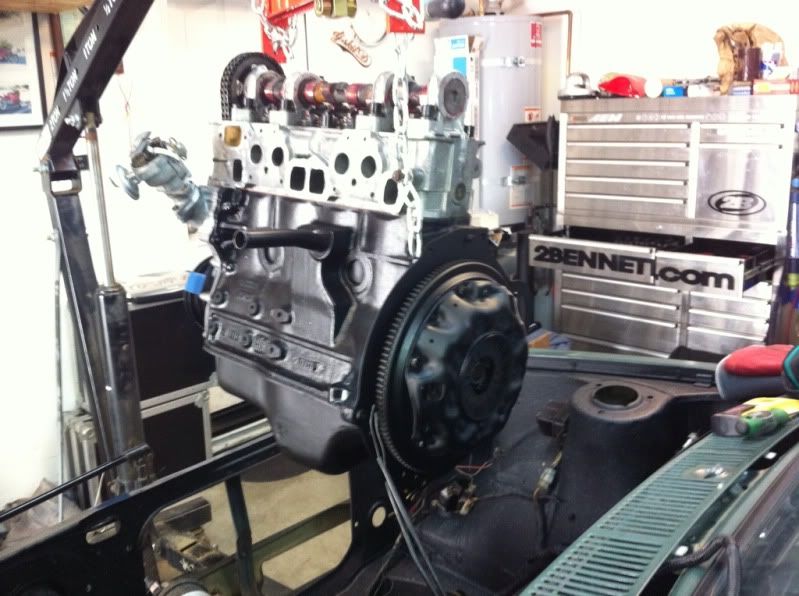
I ended up also painting the valve cover and a couple of other components wrinkle finish black.
Here is the final product:
My driveway was tired of it as well...
First, I did a compression & leak-down check. To no surprise of mine, compression was WAY low and leak-down numbers were WAY too high.
Next, it was time to make a decision. Do I go for an engine conversion right away or rebuild the L16.
As tempting as it was to just dump the L16 in favor of something more modern, I really wanted to know what a TIGHT L16 feels like. So, rebuild it is...
First the engine had to come out..
Hood off.
Radiator out.
Here we go!
Now a little tear-down and A LOT of cleaning.
The motor looked pretty grimy on the inside and outside. The last few owners really didn't give a rat's ass about maintenance.
Looked like instead of changing the oil, they just kept adding oil as it would leak out.
Don't let the pics fool you, I pressure washed the whole thing before I started pulling the motor.
Head off, pistons out..
While the head was off at the machine shop. I though I'd work on the block a bit..
Honed the cylinders.
Cleaned all the carbon from the piston ring-lands and had pistons/rods hot tanked. Also went out and got myself some new parts -gaskets, bearings, rings, etc..
Finally got to paint the block too!
While waiting for the cylinder head to come back, I got to cleaning up and painting the engine bay.
Removed the battery tray.
Much Better!
Prep and prime..
Now, time for some AWESOME spatter paint!
Powered by SPACE HEATER.
A week later I got my head back. Threw on a new clutch and back in she went.
I ended up also painting the valve cover and a couple of other components wrinkle finish black.
Here is the final product:
When you truly love your project, you won't cut corners!
-
Sleepys-14
- Posts: 434
- Joined: 03 Mar 2011 11:26
- Location: Appleton, WI
Re: '72 Sedan "Do It Right" build - denis.drc
Wow! Nice job and a quick turn around. You like to get things done just like me. Spend time, get it done, and drive it. Way better than letting it sit around for a few months (sometimes years) for some people. Well done!
Beer... The cause of, and solution to, all of lives problems- Homer Simpson
Re: '72 Sedan "Do It Right" build - denis.drc
denis.drc wrote:It clears the support, but I had to notch the support guide/rail, it was making slight contact.Byron510 wrote:
Will this brace clear the hood support?
Byron
Many of the commercial strut bars don't clear the hood brace, which is why I asked, good work.
So more to the point, what did you think of the fresh L16? I'm one of those old school guys who has also kept a L motor...
Byron
Love people and use things,
because the opposite never works.
because the opposite never works.

Re: '72 Sedan "Do It Right" build - denis.drc
You're doing it right!denis.drc wrote:
Re: '72 Sedan "Do It Right" build - denis.drc
Thanks guys!
Byron,
The freshened up L16 feels MUCH better! I had the head machined quite a bit to bump the compression up, that helped make it a little peppier as well.
Overall it's a great engine, I can see why it has such a big following.
Also, not a lot of things compare to the sound of dual carbs in the mid-to-high rpm range.
I do wish the L16 had a little more low-end, but then I guess that's what L20s are for ...
When you truly love your project, you won't cut corners!
Re: '72 Sedan "Do It Right" build - denis.drc
I drove the car with the newly rebuilt engine for about a month and loved every minute of it, then summer rolled around.
NorCal summers, especially in Sacramento, are HOT. We had stretch last year of about a month with 100+ degree weather.
The hot weather really showed flaws in my cooling system. I found it nearly impossible to drive for more than 30 miles without the gauge reaching 80%+ HOT. This was less than ideal..
What better excuse than to upgrade the cooling system?!
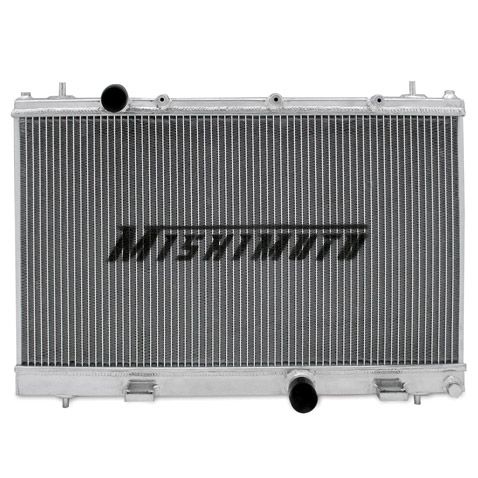
Lucky for me one of my buddies had a fancy brand-new 'Mishimoto' aluminum radiator that he was willing to part with.
It was for a late 90s Dodge Neon. The size was just right. Wider and taller than OEM, measured out to be a perfect fit inside the engine bay.
Broke out the tools and got to work..
This is the radiator. Nice quality unit.
This radiator uses pegs at the top and bottom to mount into the vehicle.
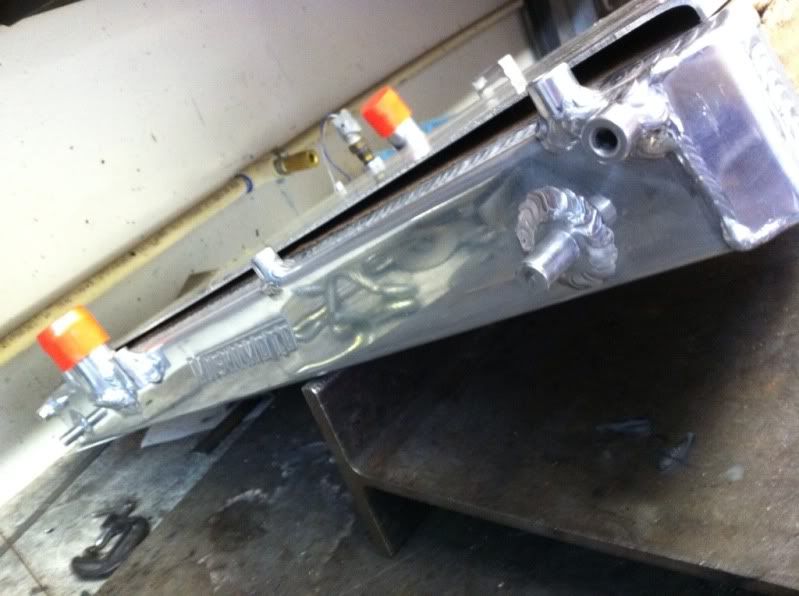
I though about using the pegs and associated rubber mounts/isolators, but after careful measuring, I noticed it would make the radiator sit too high. So I cut the posts off and decided to fab up for brackets to use oem style direct core-support mounts.
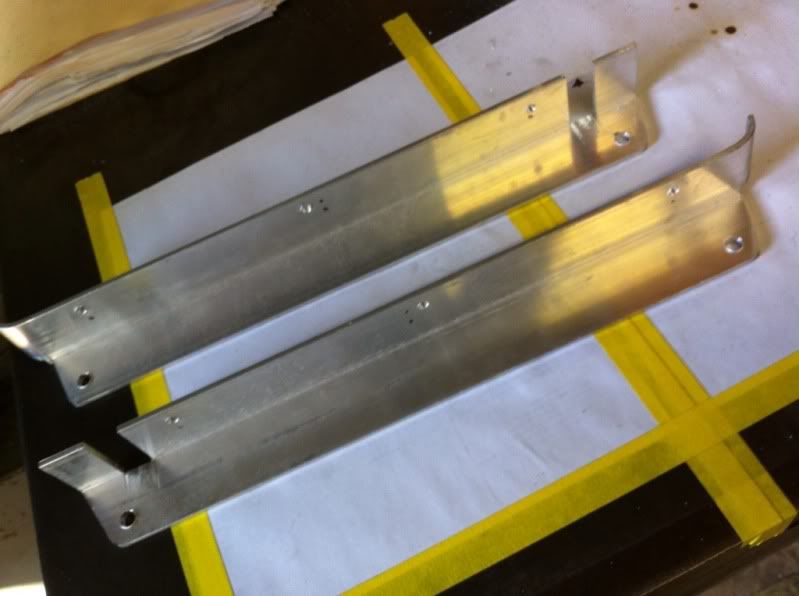
Got out the tig and attached the brackets.
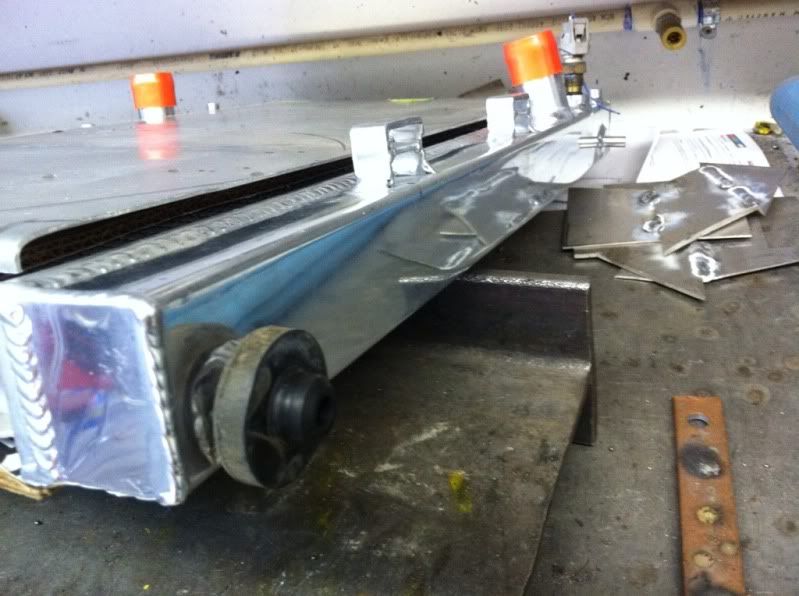
Then it was time for a test fit..
Fit was great, but the opening in the front of the 510 was just too small, so I had to enlarge it a tad..
MUCH BETTER!
The next step I did just because I wanted to.
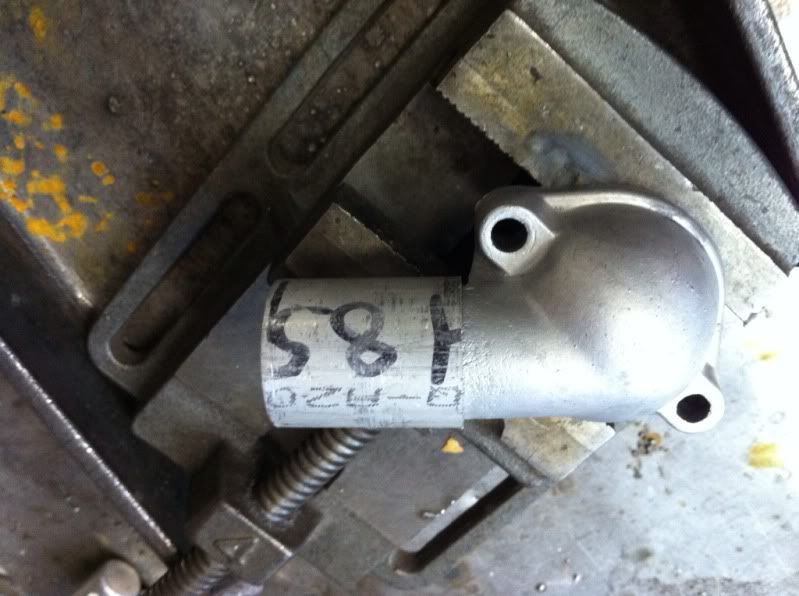
I wanted to run larger radiator hoses, so I enlarged the inlets/outlets of the engine and the radiator. This was also a good way to remove the corroded ends of the thermostat housing and the lower water outlet fitting.
Here's an example..
While at it, I also made a temperature switch housing for my electric fan setup, and a hose union (I ended up not using the hose union pipe)
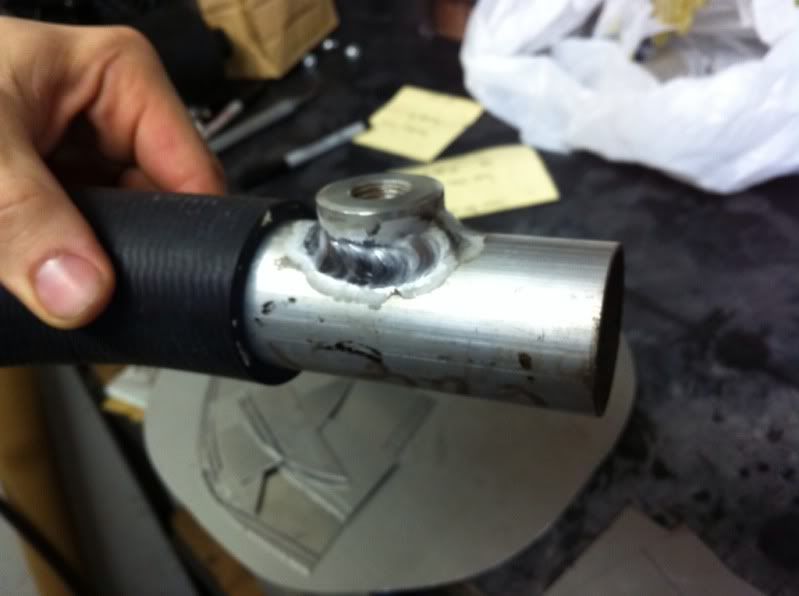
All the pieces completed with beads rolled into the ends.
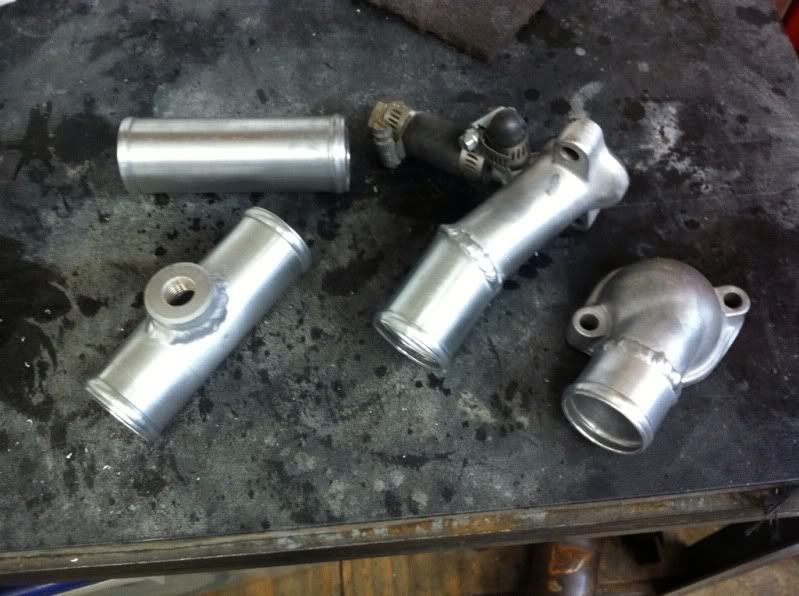
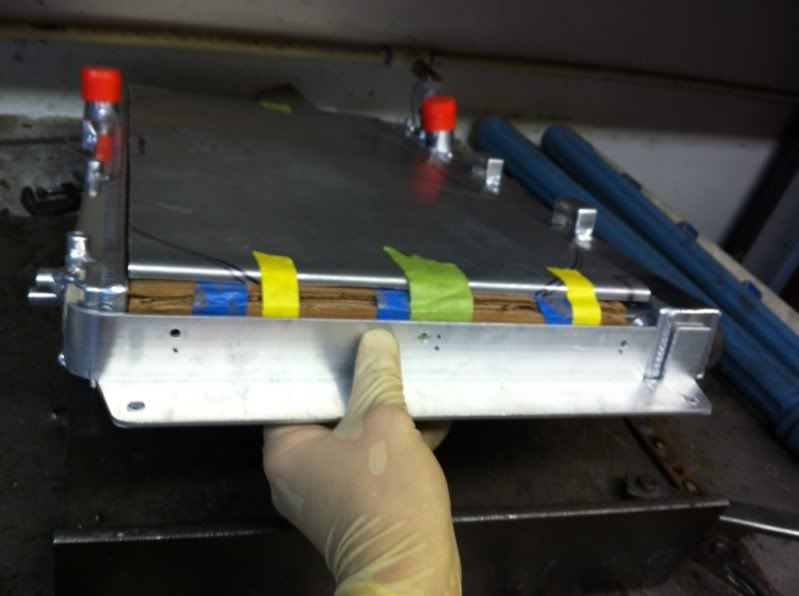
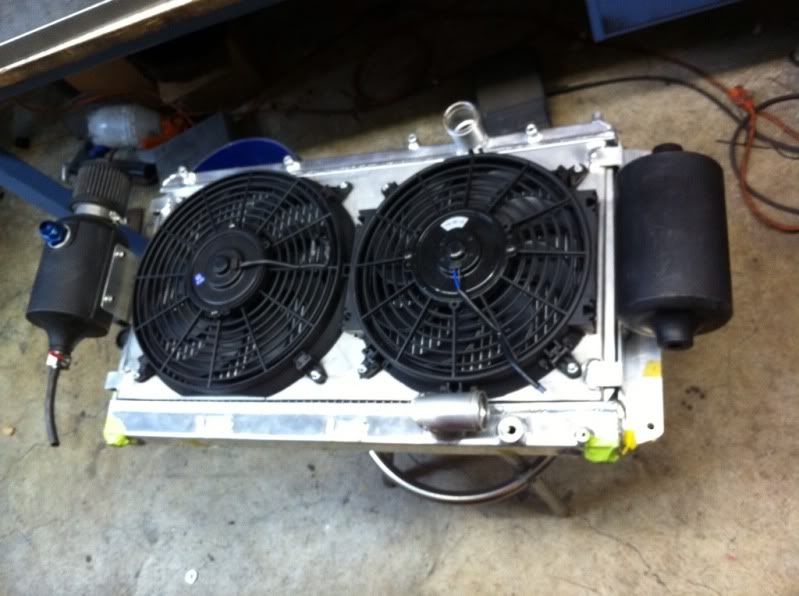
Since my car didn't come with a radiator overflow tank (I had been using a Gatorade bottle for a while), I decided to add an overflow tank and breather tank. Attached them to the sides of the radiator. I also fabbed up an aluminum fan shroud to use with a pair of slim line fans. (One is an 11" one is a 10"..most clearance that way.)
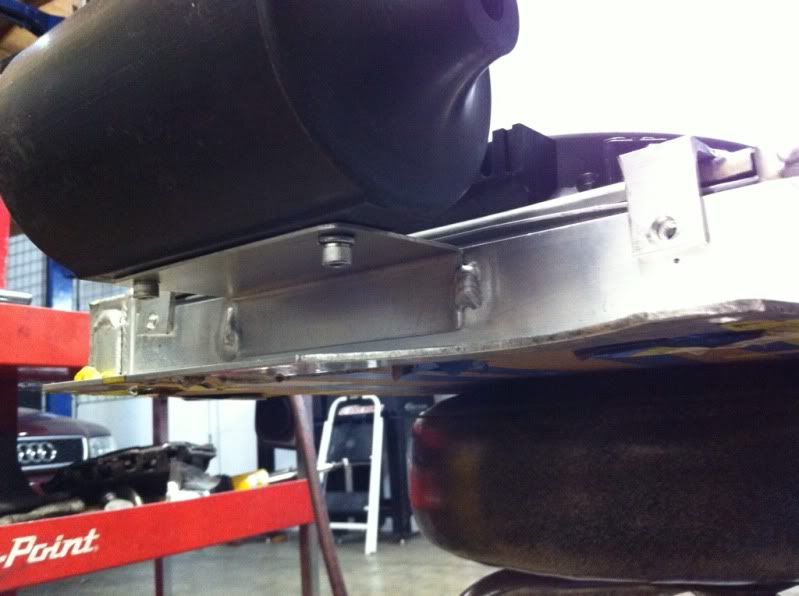
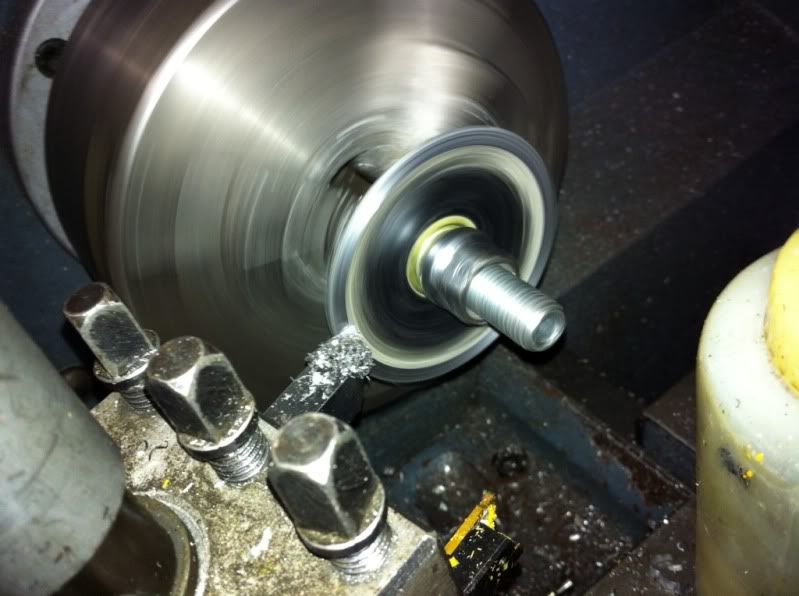
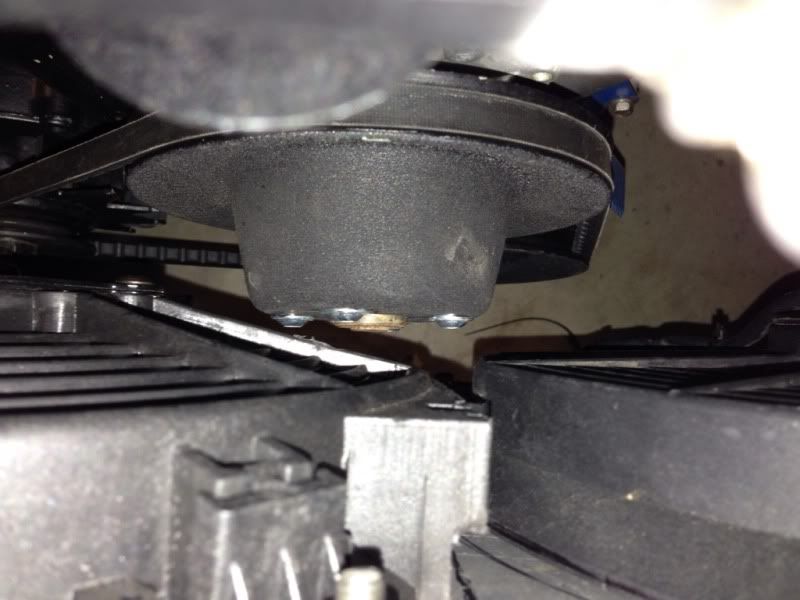
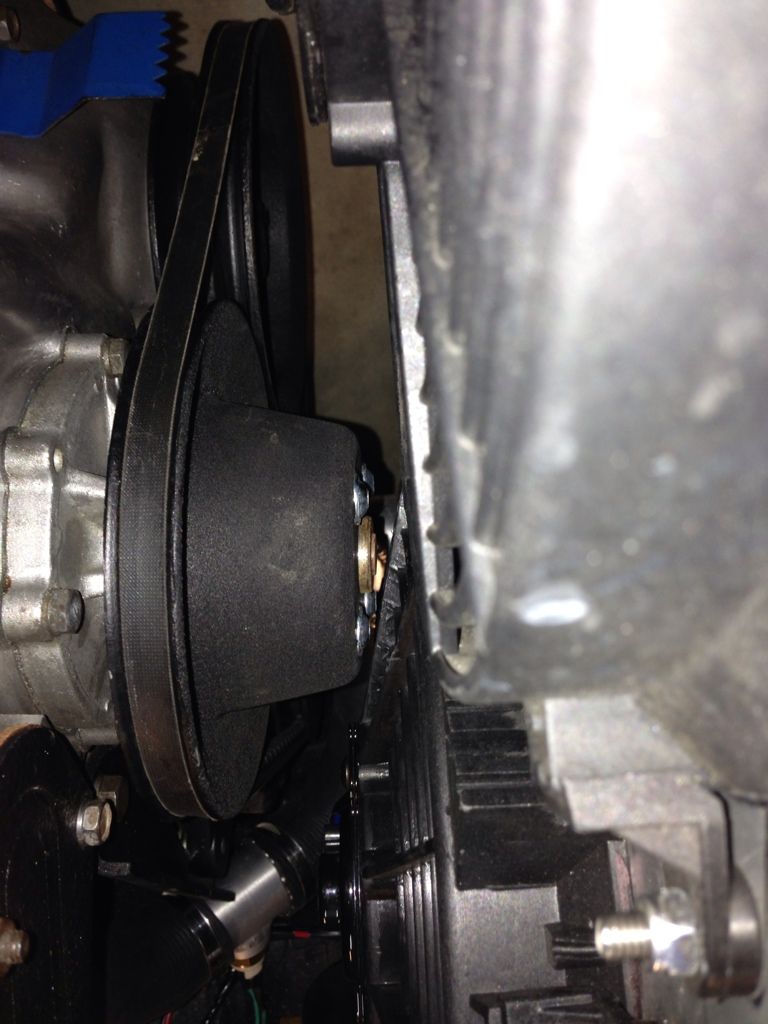
Final test fit without the fans. I noticed the lower radiator hose was now too close to the alternator pulley, so I machined about 3mm from the pulley and ended up with a much more comfortable clearance.
Final test fit with the fans installed revealed just how close the water pump pulley was to the fans if using standard bolts. Easiest solution was just to use slim line bolts. Don't let the pics fool you, there is about 1/4 to 3/8 of an inch between them now.
All that done, it was time to install the assembly and see how it works..
Final product:
Also, not the reliefs in the radiator mounting brackets around the headlights...attention to detail! B)
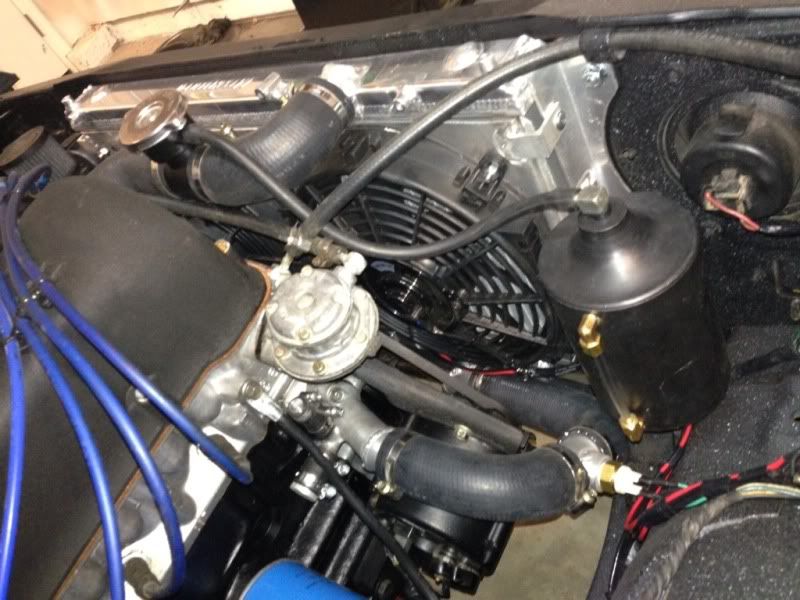
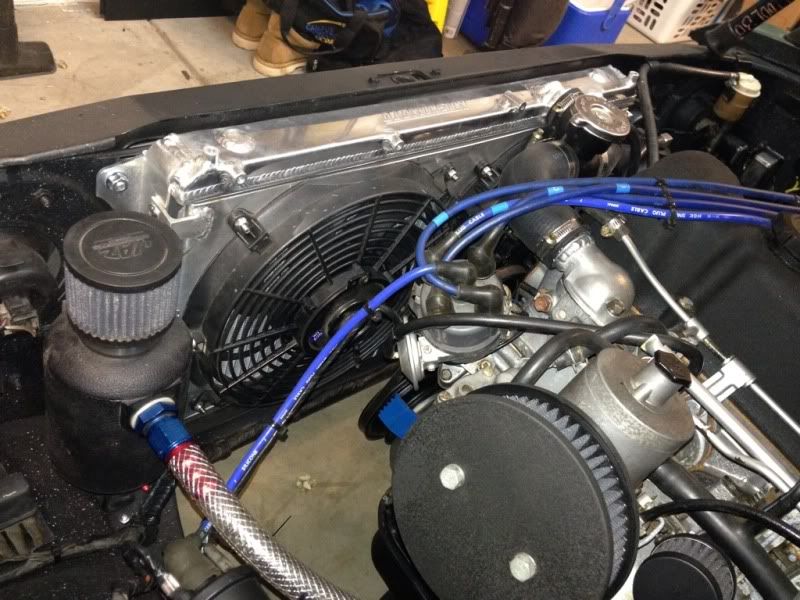
Cooling is AWESOME with this setup. With an OEM temp. setting thermostat it get's up to temp. quickly and stays there!
It's a 85*C thermostat and a 92*C temp. switch.
NorCal summers, especially in Sacramento, are HOT. We had stretch last year of about a month with 100+ degree weather.
The hot weather really showed flaws in my cooling system. I found it nearly impossible to drive for more than 30 miles without the gauge reaching 80%+ HOT. This was less than ideal..
What better excuse than to upgrade the cooling system?!
Lucky for me one of my buddies had a fancy brand-new 'Mishimoto' aluminum radiator that he was willing to part with.
It was for a late 90s Dodge Neon. The size was just right. Wider and taller than OEM, measured out to be a perfect fit inside the engine bay.
Broke out the tools and got to work..
This is the radiator. Nice quality unit.
This radiator uses pegs at the top and bottom to mount into the vehicle.
I though about using the pegs and associated rubber mounts/isolators, but after careful measuring, I noticed it would make the radiator sit too high. So I cut the posts off and decided to fab up for brackets to use oem style direct core-support mounts.
Got out the tig and attached the brackets.
Then it was time for a test fit..
Fit was great, but the opening in the front of the 510 was just too small, so I had to enlarge it a tad..
MUCH BETTER!
The next step I did just because I wanted to.
I wanted to run larger radiator hoses, so I enlarged the inlets/outlets of the engine and the radiator. This was also a good way to remove the corroded ends of the thermostat housing and the lower water outlet fitting.
Here's an example..
While at it, I also made a temperature switch housing for my electric fan setup, and a hose union (I ended up not using the hose union pipe)
All the pieces completed with beads rolled into the ends.
Since my car didn't come with a radiator overflow tank (I had been using a Gatorade bottle for a while), I decided to add an overflow tank and breather tank. Attached them to the sides of the radiator. I also fabbed up an aluminum fan shroud to use with a pair of slim line fans. (One is an 11" one is a 10"..most clearance that way.)
Final test fit without the fans. I noticed the lower radiator hose was now too close to the alternator pulley, so I machined about 3mm from the pulley and ended up with a much more comfortable clearance.
Final test fit with the fans installed revealed just how close the water pump pulley was to the fans if using standard bolts. Easiest solution was just to use slim line bolts. Don't let the pics fool you, there is about 1/4 to 3/8 of an inch between them now.
All that done, it was time to install the assembly and see how it works..
Final product:
Also, not the reliefs in the radiator mounting brackets around the headlights...attention to detail! B)
Cooling is AWESOME with this setup. With an OEM temp. setting thermostat it get's up to temp. quickly and stays there!
It's a 85*C thermostat and a 92*C temp. switch.
When you truly love your project, you won't cut corners!
Re: '72 Sedan "Do It Right" build - denis.drc
I've heard of people with old cars having the heater cranked on hot days, just to get that extra little bit of cooling.
Re: '72 Sedan "Do It Right" build - denis.drc
Very nice work, I love your "condensed" updates.
If not posting it here, maybe post it in one of the metal project threads - thanks
Byron
But I really need to know the bead rolling process you used for these hose pieces. Did you simply use a standard bead roller? Or did you have access to some other real cool tool?denis.drc wrote:
If not posting it here, maybe post it in one of the metal project threads - thanks
Byron
Love people and use things,
because the opposite never works.
because the opposite never works.
Re: '72 Sedan "Do It Right" build - denis.drc
Really glad to see you went the l16 route. Seems like fewer people are going that way these days.
Re: '72 Sedan "Do It Right" build - denis.drc
I've noticed that too, so I thought I'd give it a go. We'll see where my path takes me down the road..vanmansam wrote:Really glad to see you went the l16 route. Seems like fewer people are going that way these days.
I'd heard that too, but really don't like being hot..shacks510 wrote:I've heard of people with old cars having the heater cranked on hot days, just to get that extra little bit of cooling.
Standard bead roller. Just rolled them slowly. What kind of results were you getting?Byron510 wrote:But I really need to know the bead rolling process you used for these hose pieces. Did you simply use a standard bead roller? Or did you have access to some other real cool tool?
When you truly love your project, you won't cut corners!
Re: '72 Sedan "Do It Right" build - denis.drc
Well, being the machinist that I am, all my nipples were machined out of solid stock, no forming done. But your approach is much more elegant if you don't mind me saying so.denis.drc wrote:
Standard bead roller. Just rolled them slowly. What kind of results were you getting?
Nice work.
Byron
Love people and use things,
because the opposite never works.
because the opposite never works.
Re: '72 Sedan "Do It Right" build - denis.drc
Awesome job on the radiator upgrade man!! Your skills are really shining through here!
As someone who also reps the L16 I also gotta give you props on choosing to stick with it!
gunna keep an eye on this
As someone who also reps the L16 I also gotta give you props on choosing to stick with it!
gunna keep an eye on this