Byron is the man, when it comes to rethreading the struts and has the proper tooling. Sectioning is the most common as you mentioned, but from a machinist standpoint, retreading is the preferred method.Canadian510 wrote:Got my homemade coilovers finished up and put on the car yesterday. Ended up lowering the car a few inches up front but it's still not 100% where I'd like it and i have pretty much no travel now. To fix this I used some of the money from selling my diff to buy a set of rear inserts from a first gen mr2 and weld on coilovers from t3.
This is my first venture into the "custom" suspension world so doing a lot of research before i start cutting or welding anything. One question i do have, is shortening the strut tube as simple as cutting the difference between the stock vs mr2 inserts off of it and rethreading the tops? I know other people have cut the needed bit out of the middle and keep the stock threads but one of mine is pretty chewed up and will need to be rethreaded anyway.
1971 2 Door, L16 --> 2.1 Long Rod --> CA18DET
Re: 1971 2 Door 70s build

Re: 1971 2 Door 70s build
The issue as I remember is that if you cut the strut tube below the threads, the wall thickness of the remaining tube is not sufficient to cut new threads. I believe the stocked threaded area is thicker to start with. Hence the preference to remove a section of the tube, reweld, and retain the stock threads. As noted, few have access to equipment to cut those theads, but any old metal hacker can weld up a cut strut tube.
Mind you, that "chop your strut tube off and weld-on a new stub" stuff like from T3 and McKinney and others is the way to go IMHO . Having new strut tubes with independant spring preload and strut length appears to be the "best" of all worlds.
Mind you, that "chop your strut tube off and weld-on a new stub" stuff like from T3 and McKinney and others is the way to go IMHO . Having new strut tubes with independant spring preload and strut length appears to be the "best" of all worlds.

Re: 1971 2 Door 70s build
To section and shorten:
DQ Volume 6 Issue 3 - Strut Shortening and Economical Ride Height Adjustment: Suspension travel is always at a premium on a lowered 510. You want to get the center of gravity as low as possible for better handling and that cool racer look. Suspension travel is essential to good handling and grip. Shortening the strut helps restore some of the lost travel on a lowered 510. More available travel = more available grip = better handling. With this modification to your stock struts (or any strut housing longer than 280ZX) you will get up to 1-3/4" of extra suspension travel and as a side benefit end up with adjustable front ride height.
DQ Volume 6 Issue 3 - Strut Shortening and Economical Ride Height Adjustment: Suspension travel is always at a premium on a lowered 510. You want to get the center of gravity as low as possible for better handling and that cool racer look. Suspension travel is essential to good handling and grip. Shortening the strut helps restore some of the lost travel on a lowered 510. More available travel = more available grip = better handling. With this modification to your stock struts (or any strut housing longer than 280ZX) you will get up to 1-3/4" of extra suspension travel and as a side benefit end up with adjustable front ride height.
Because when you spend a silly amount of money on a silly, trivial thing that will help you not one jot, you are demonstrating that you have a soul and a heart and that you are the sort of person who has no time for Which? magazine. – Jeremy Clarkson
Re: 1971 2 Door 70s build
zKars wrote:The issue as I remember is that if you cut the strut tube below the threads, the wall thickness of the remaining tube is not sufficient to cut new threads. I believe the stocked threaded area is thicker to start with. Hence the preference to remove a section of the tube, reweld, and retain the stock threads.
Hi Jim, I'll have to thread jack here and set this one correct.
All Datsun strut tubes that I have worked with are the same wall thickness all the way down to the bottom. The tube itself is a seamless tubing that is press fit and tack welded into the forged spindle. This design includes PL510, 610, 710, A510, B210, 200SX (S10), 200SX (S110), 240Z, 280ZX, 300ZX (84-88) as these are the ones I have personally shortened and can confirm. There may be others. I've done a few...documented the procedure well here on the site.
Personally, cutting and welding strut tubes doesn’t sit well with me. It's very difficult to check your work and you must count on absolute perfect penetration from welding from the outside to get the same strength in the finished product. If guys TIG welded struts together more often I'd feel better. But there still isn’t gas on the back side of the weld (few people purge for proper welding), so even if perfect penetration was achieved, you'd have a poor weld as far as the air could reach the molten material on the back side.
On the flip side I am aware that the cut and weld method rarely fails, but this is a suspension component – and like brake components, I don’t weld these.
My thoughts are not because I am a machinist and can rethread the tubes, but because of my understanding in metallurgy having worked in a heat treatment facility and the knowledge of material structures and how heat effected zones change properties and ultimately strength.
I'll stay with rethreading the uppermost and least stressed part the strut personally because it’s the greatest strength available.
Byron
Love people and use things,
because the opposite never works.
because the opposite never works.
-
Canadian510
- Posts: 300
- Joined: 29 Sep 2013 14:02
- Location: Fredericton, NB
Re: 1971 2 Door 70s build
Not a thread jack at all, exactly the information i was looking for thanks! I found the pictures and info you had in your build thread last night and gave it a couple reads. There's really only one guy that does machining in my area so I'll have to see if he's able to do them.Byron510 wrote:zKars wrote:The issue as I remember is that if you cut the strut tube below the threads, the wall thickness of the remaining tube is not sufficient to cut new threads. I believe the stocked threaded area is thicker to start with. Hence the preference to remove a section of the tube, reweld, and retain the stock threads.
Hi Jim, I'll have to thread jack here and set this one correct.
All Datsun strut tubes that I have worked with are the same wall thickness all the way down to the bottom. The tube itself is a seamless tubing that is press fit and tack welded into the forged spindle. This design includes PL510, 610, 710, A510, B210, 200SX (S10), 200SX (S110), 240Z, 280ZX, 300ZX (84-88) as these are the ones I have personally shortened and can confirm. There may be others. I've done a few...documented the procedure well here on the site.
Personally, cutting and welding strut tubes doesn’t sit well with me. It's very difficult to check your work and you must count on absolute perfect penetration from welding from the outside to get the same strength in the finished product. If guys TIG welded struts together more often I'd feel better. But there still isn’t gas on the back side of the weld (few people purge for proper welding), so even if perfect penetration was achieved, you'd have a poor weld as far as the air could reach the molten material on the back side.
On the flip side I am aware that the cut and weld method rarely fails, but this is a suspension component – and like brake components, I don’t weld these.
My thoughts are not because I am a machinist and can rethread the tubes, but because of my understanding in metallurgy having worked in a heat treatment facility and the knowledge of material structures and how heat effected zones change properties and ultimately strength.
I'll stay with rethreading the uppermost and least stressed part the strut personally because it’s the greatest strength available.
Byron
-
Canadian510
- Posts: 300
- Joined: 29 Sep 2013 14:02
- Location: Fredericton, NB
Re: 1971 2 Door 70s build
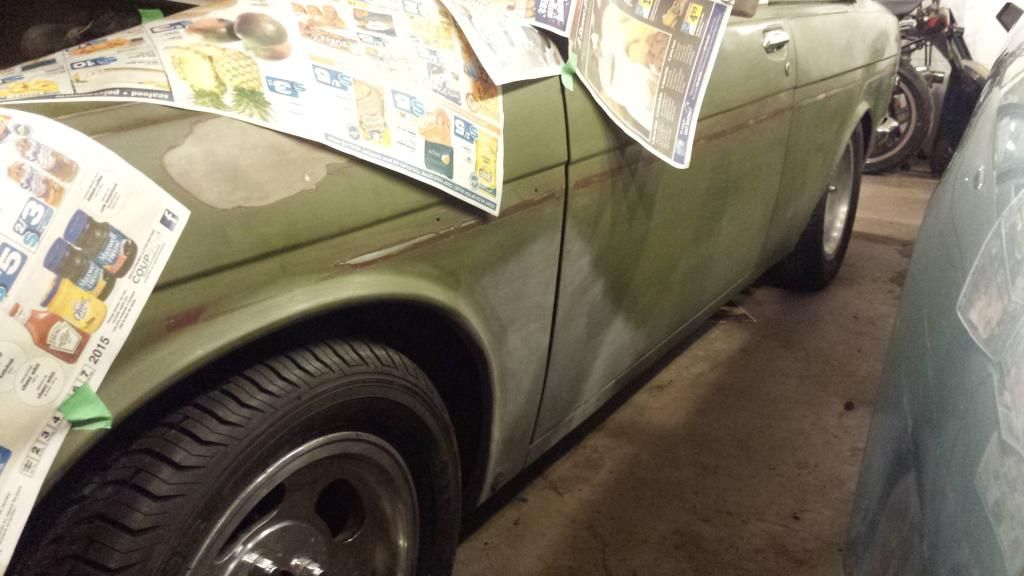
Got incredibly lucky and was able to pick up a set of 4 new tires in 185 60 14 for around the price of one of them normally, got to love unadvertised sales! The rears are tucking real nice now!
Once my front end parts get here I'll lower the front a bit more and see where i stand. Might say screw it and grab a set of rear coilovers since my shocks travel in the rear is getting pretty bad and they aren't the healthiest anyway. My dog was also mad that there was no room for him to sit on the floor and watch but soon found an alternate place to go


Once my front end parts get here I'll lower the front a bit more and see where i stand. Might say screw it and grab a set of rear coilovers since my shocks travel in the rear is getting pretty bad and they aren't the healthiest anyway. My dog was also mad that there was no room for him to sit on the floor and watch but soon found an alternate place to go

Re: 1971 2 Door 70s build
Greyhound?
Cools dogs - always amaze me how such a big dog likes to fold itself into such a small area.
Byron
Cools dogs - always amaze me how such a big dog likes to fold itself into such a small area.
Byron
Love people and use things,
because the opposite never works.
because the opposite never works.
-
Canadian510
- Posts: 300
- Joined: 29 Sep 2013 14:02
- Location: Fredericton, NB
Re: 1971 2 Door 70s build
Yes he is, got him through one of those greyhound rescue programs in the states, used to race out of Florida for the first 3 years of his life.Byron510 wrote:Greyhound?
Cools dogs - always amaze me how such a big dog likes to fold itself into such a small area.
Byron
I dont have any pictures of it but some of the places or positions we've found him in are pretty funny, sleeping with his back paws under his chin and stuff like that. Hard to imagine an 80lbs dog being able to do it lol
Re: 1971 2 Door 70s build
I have heard about those programs for years – what a great thing they do. Greyhounds make such awesome family pets too. Good on ya!
So is it impossible to keep him off the couch and your favorite chair? It's a classic Greyhound trait - they love to be ON things, not beside or under....
Byron
So is it impossible to keep him off the couch and your favorite chair?
Byron
Love people and use things,
because the opposite never works.
because the opposite never works.
-
Canadian510
- Posts: 300
- Joined: 29 Sep 2013 14:02
- Location: Fredericton, NB
Re: 1971 2 Door 70s build
Haha that describes him perfectly, either on the couch, his bed, or one of our beds at all times. He's enjoying retirementByron510 wrote:I have heard about those programs for years – what a great thing they do. Greyhounds make such awesome family pets too. Good on ya!
So is it impossible to keep him off the couch and your favorite chair?
Byron
-
Canadian510
- Posts: 300
- Joined: 29 Sep 2013 14:02
- Location: Fredericton, NB
Re: 1971 2 Door 70s build
Spent a while looking at options for the rear other then a set of coilovers that would cost me an arm and a leg and ended up purchasing shocks for an 80s F Body with some D50 springs. Since the shocks are 2" shorter they should be much happier at the current ride height, doesn't hurt that they were on sale for $24 each. Much cheaper than the $650 for coilovers.
Re: 1971 2 Door 70s build
In the main on 510s, coilovers just allow easy ride-height adjustment and spring rate selection, which most people only do once anyway. If you can find a spring that will give you the rate you want and can shim to the height you want, there's not a lot of difference in performance. With the car on the road, no one is going to know you do or don't have C/Os.
Because when you spend a silly amount of money on a silly, trivial thing that will help you not one jot, you are demonstrating that you have a soul and a heart and that you are the sort of person who has no time for Which? magazine. – Jeremy Clarkson
-
Canadian510
- Posts: 300
- Joined: 29 Sep 2013 14:02
- Location: Fredericton, NB
Re: 1971 2 Door 70s build
Well most of the suspension parts are here! Front inserts should be here in the next few days and springs by early next week. Once i get the inserts I'll be tearing the front end apart again and shipping my strut casings out to be shortened and rethreaded. Once that's done I'll weld the coilover sleeves onto the casings and see where I'm at!
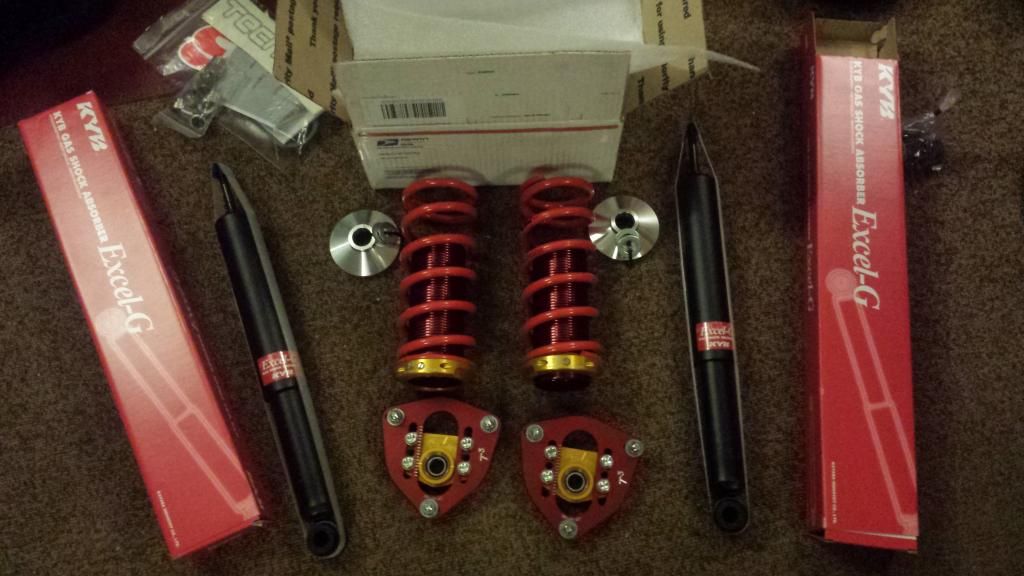
Can't get over how nice T3 stuff looks in person. Very happy so far.

Can't get over how nice T3 stuff looks in person. Very happy so far.
-
Canadian510
- Posts: 300
- Joined: 29 Sep 2013 14:02
- Location: Fredericton, NB
Re: 1971 2 Door 70s build
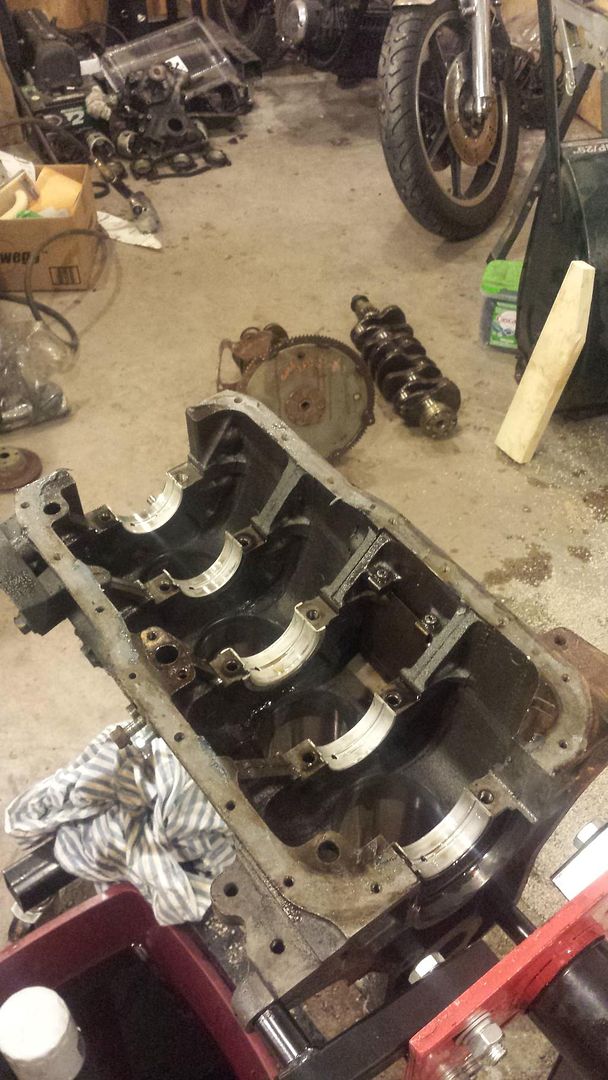
Struts are off getting shortened now, can't wait for them to get back and see how low i get! Also in the process of making a 2.1 long rod motor using one of my spare l20b's and the a87 head with big cam i have laying around, just bought some z20e rods so now it's just the easy stuff!
-
Canadian510
- Posts: 300
- Joined: 29 Sep 2013 14:02
- Location: Fredericton, NB
Re: 1971 2 Door 70s build
The tear down of one of my spare l20b's started last night, so far everything looks good. Might take the block out to the engine shop Monday to be bored while i keep an eye out for some pistons.