Page 1 of 1
280ZX IRS Adjustable Camber/Toe Brackets
Posted: 24 Jan 2016 18:52
by Byron510
This project has been on the go for three years, and due to various delays, is only now coming to fruition - at least in a per-production sense anyways. Not a P510 product, but a Datsun specialty product just the same.
I had built 4 Beta versions of this bracket before getting to the point, it feels good to hold this first production unit in my hands.
The design has passes the static test, and should give a similar range of adjustment that the very successful PL510 brackets which have been available for the past number of years. However the 280ZX certainly posed some challenges in the space department - as in there isn't any space! Unlike the P510, the 79-83 ZX rear cross member is quite low profile. To compound the issues, the floor and frame sections are very close by, nearly on top of the cross member itself. The original P510 design - pivoting at the top, just could not be made to work. The answer was to invert the design, and engineer within the space available. My test mule to date has been a very tired ZX parts car. It has served well for this project, but is not road worthy.
The next step will be to install these on a running, driving car. I will install the brackets and set the car up at stock ride height to measure the full range of adjustment in the camber and toe departments. I will then lower the car to the point where it's pretty much not drive-able, and complete the same process of measuring adjustment ranges of camber and toe. This will cover the majority of the applications. I have purchased an '82 ZXT 5spd, however it will be a few weeks before I can export the car to Canada from the US.
When the above task has been completed, I will write up an installation manual and the bracket set will be released. I would think 3 months minimum at this point, maybe more depending on the day job that actually pays the bills.
I look forward to moving this project forward, and I have to thank my good friend Kurk (
www.mackaypowerproducts.com) for inspiring me from start to this point - and supplying the parts car and additional spare pieces that have been required along the way. Without Kurk's help, I would not be at this point. I also have to thank Richard, who tirelessly made adjustment after adjustment to the CAD drawings to get that nice laser cut product seen below. It's been a bit of a team effort, thanks guys.
A photo of the product to date.
Byron
Re: 280ZX IRS Adjustable Camber/Toe Brackets
Posted: 24 Jan 2016 21:37
by JordanTr
Awesome work Byron. Having those freshly designed parts in hand always feels so good!!
Re: 280ZX IRS Adjustable Camber/Toe Brackets
Posted: 25 Jan 2016 07:23
by icehouse
Nice Byron!!!!
Re: 280ZX IRS Adjustable Camber/Toe Brackets
Posted: 25 Jan 2016 10:16
by 510rob
those look really good!
Re: 280ZX IRS Adjustable Camber/Toe Brackets
Posted: 07 Mar 2016 18:41
by Byron510
OK, since I finished the last step, I now have the tool to move one step closer to having this project become a working product. This weekend I finally got to drag home the "Rolling Dyno" test bed for the aforementioned brackets above. It's an S130 1982 280ZX Turbo 5spd. Yes, the barely 200 HP L28ET - the last of the L series engines. And even though I have had a turbo motor in the works for the Bronze since 2007, this is actually my first turbo car. I won’t hide it, currently the car runs like shite! Might have a lot to do with the fact that the gas has been in the tank since 2007.... It is a California car, brought to Portland Oregon in 2002. In 2006 it developed a running issue, and was never daily driven again. It did get a few permits on it for short periods of time and has not moved since 2009 at all. The California sun has completely baked the interior - multiple fault lines on the dash, interior panels will need to be sourced as the vinyl has disintegrated.
The true selling point for me - rust is not an issue! For those that have played with 280ZX's, these car rust way worse than 510's. And like S30's, the S130 rusted in critically structural areas, hence why there are so few left today. There is no rust repair in my near future which is awesome.
Mechanically; the tires are rotten, but it's clear that the car has new brakes, lines and calipers all around - they have never been wet until I towed the car home last night. There are multiple new sensors under the hood, new injectors and even new connectors on much of the EFI harness. He was searching for an issue that was never solved. So, getting it running correctly will be some methodical working of the EFI system and its various rudimentary L-Jetronic parts. But there is always the MS option, and i have a buddy who's well versed in these cars, building custom wiring harnesses for MS swaps - and he is willing to help out. It's the last option, but if all else fails, it'll be the route I go.
So I still have a little work to get done in the workshop before this thing gets in there, but in a few weeks I'll get to installing the adjustable rear camber/toe brackets in this car and verify the adjustment range at both the stock ride height and a crazy mad low Icehouse type ride height. Updates to come soon.
A couple of notes;
-The new trailer - which isn't new to me but this is the first car I have had on it since taking delivery 9 months ago. It towed awesome and worked well in combination with the Xterra.
-the exportation of the car through the US Border and Customs agency was strait forward. I did complete the necessary documentation as required, and aside from the usual border guard posturing which is just their training, it went well. This documentation now is required to be reviewed by a US Customs Broker, and an ITN number is assigned by the broker, as step us mere mortals can not do. Obviously the US Customs guys were tires of dealing with incomplete paperwork, so this is the new norm. Involving the broker cost me $80, and all paperwork (Bill of sale, copy of title and US Customs worksheet filled in by your US broker) needs to be submitted 3 full days before crossing by email or in person. Upon verification of the cars VIN, the border guard will stamp the title thereby releasing it into Canada.
-On the Canadian side, nothing special is required. You just fill out a form at the counter with has surprisingly few fields, and you pays your taxes and duties. I guess the Canadian government really couldn't care less, as long as you pay your taxes!
The process took about 1.5 hours in total to complete. It was a slow day, only one person in front of me at both the US and then Canadian offices. However the Canadian Customs guy did say that a couple years ago there were as many as 150 cars a day being processed - be prepared for a long line up is this is your particular day! The Canadian Customs guy was a hell of a lot friendlier this time - normally its the US guys that are ok and the Canadian guys that have issues.
A good day, and happy to have this car here. Now to get it through a government inspection and register it in my name fully.
Byron
Re: 280ZX IRS Adjustable Camber/Toe Brackets
Posted: 07 Mar 2016 20:51
by RMS
very cool. I see all the space in your new shop is spoken for. Im sure I was able to register the wagon (import from oregon) and get a day permit before the safety was completed. I found a nice Fijian shop, it was $79 to get 6inches through. when I took radio flyer into a big shop it cost me twice as much and they complained about a small snag in the drivers seat and the "well working" stock defrost blower .
Re: 280ZX IRS Adjustable Camber/Toe Brackets
Posted: 08 Mar 2016 18:42
by McShagger510
I ZEE what you did there! Cool machine Byron.
James
Re: 280ZX IRS Adjustable Camber/Toe Brackets
Posted: 28 Oct 2016 08:05
by Byron510
Been working on this project through the summer when procrastinating by not working on the garage! Admittedly I found myself out there in the cold evening on Tuesday night thinking it sure would be nice to have heat. The I had to slap myself silly - what the hell was I complaining about! - I'm in a dry, covered work space of my own.... suddenly I felt warmer and got back to work!
After many versions and design changes, I have proved a concept to work. Through much help with Richard on the cad drawing table, we hope to make the few adjustments to create the last beta/test version and call it the final design.
This has been quite the project as there is just so little space to play with under the ZX.
What is funny is that I can run the car with bump stops removed and no springs and still dial out all toe and camber to zero. This is what i wanted to achieve. Just for kicks I decided to dial in the "Mad Camber, Yo!" setting - roughly 6 degrees of negative camber is available! Jeff, I should call this the Wolfman settings, bet you'd love it. It gave me 2 1/2" of of clearance between the unrolled fender lip and tire. Fun.
I'll keep the project updated.
Byron
Re: 280ZX IRS Adjustable Camber/Toe Brackets
Posted: 25 Mar 2018 08:45
by Byron510
So, work continues on the 280ZX Camber/Toe brackets - the above post noted that I was there... I wasn't! Infact I was so put off by the effort in and lack of results, that I didn't even want to post that fact that it didn't work. It looked really artistic, but it didn't work.
Over the past month I got back to it and now the design is close - in fact proven that I now have the adjustment range. With the help of Richards cutting equipment, I'm now at Version 7.3. I think there have been over a dozer different actual designs on this project. It's crazy. I spent 1/8 of this time developing the 510 brackets! And without Richards machine, I'm not sure where I'd be on this - likely nowhere!
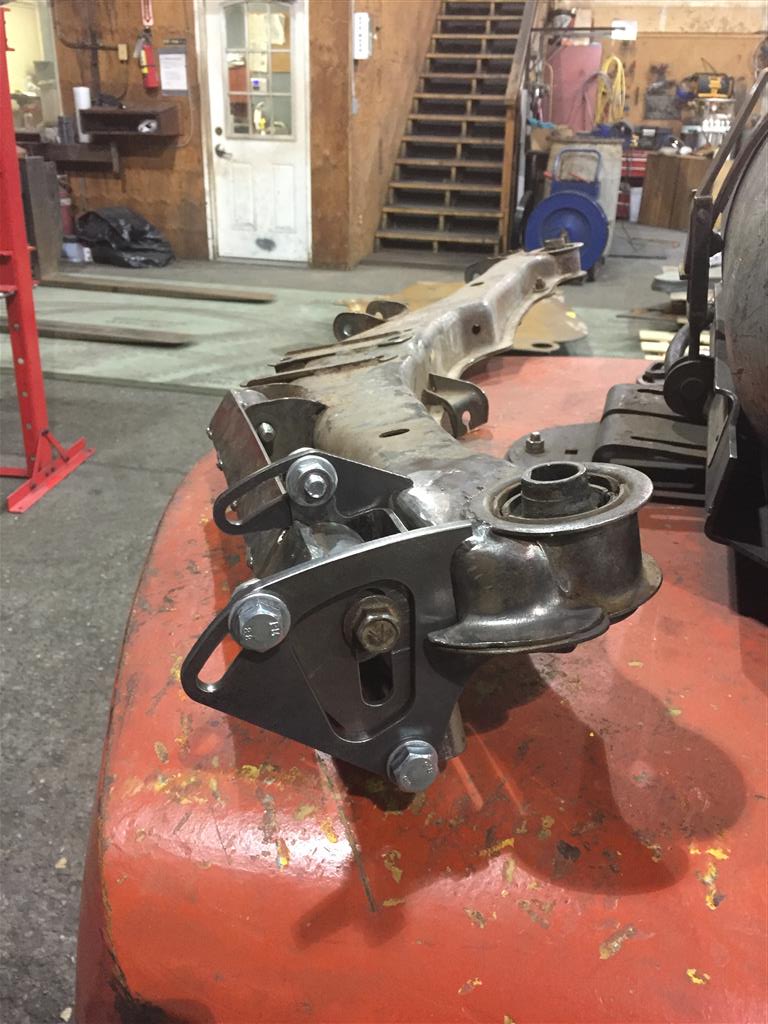
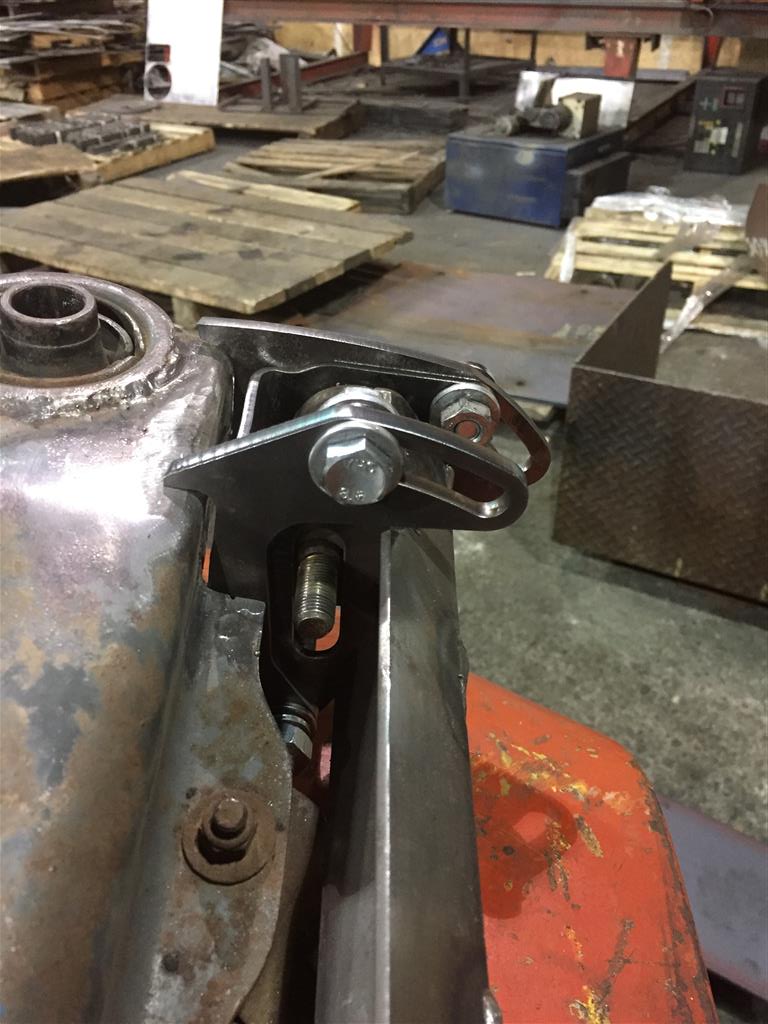
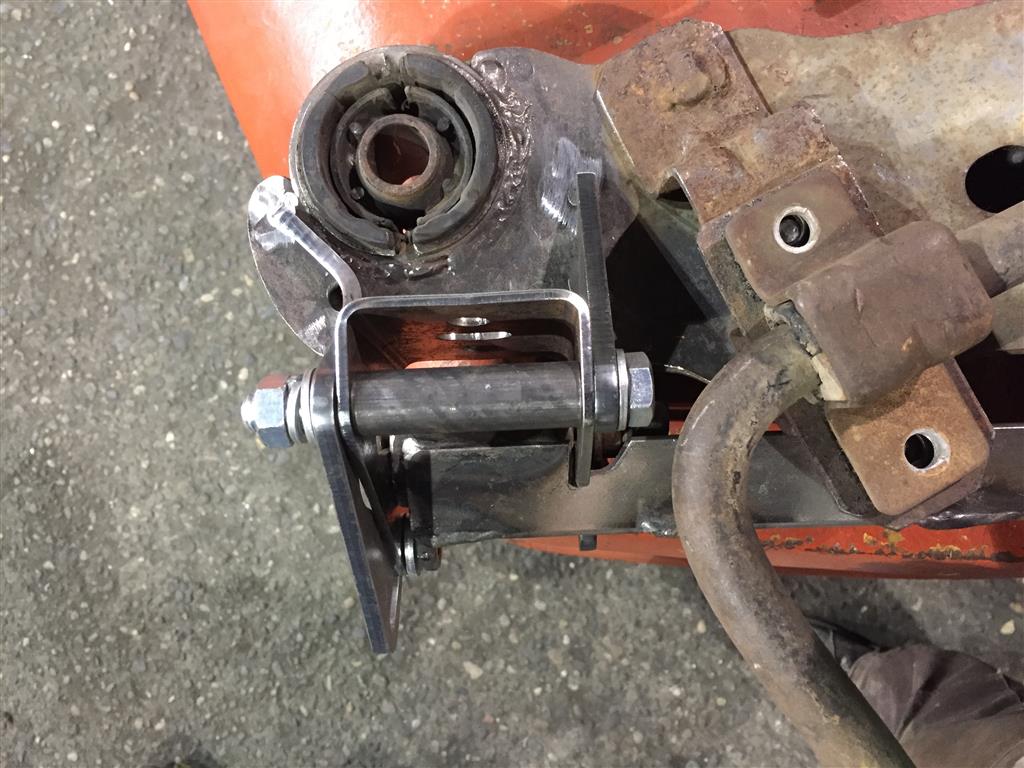
Anyways, here's where I'm at with it today. Inner bracket - just didn't have the space to get done what needed to get done. So on version 7, I moved to making the outer bracket adjustable. And here we have a winner. Space is still a huge issue, but the design clears, looks most stable and has the adjustment range needed that bring in 4 degrees of negative camber to zero, and from 1/4" toe in to 1/8" toe out with the car sitting on it's bump stops.
I sent Richard a whole bunch of little corrections to clean up the design and add a bit more support in a few areas. I am hoping I have a product at this point for the 5 guys out there that need it

Really this had all been for one friend, but I've made a few more 280ZX contacts along the way, so we'll see where it goes.
But without all of Richards help making the drawings to all my crazy changes, and the use of his plasma cutting machine to prove the rough work - I wouldn't be anywhere on this project - thanks Richard!
Here's where I'm at today....
- IMG_1122 (Medium).JPG (131.45 KiB) Viewed 3778 times
- IMG_1123 (Medium).JPG (120.52 KiB) Viewed 3778 times
- IMG_1124 (Medium).JPG (130.89 KiB) Viewed 3778 times
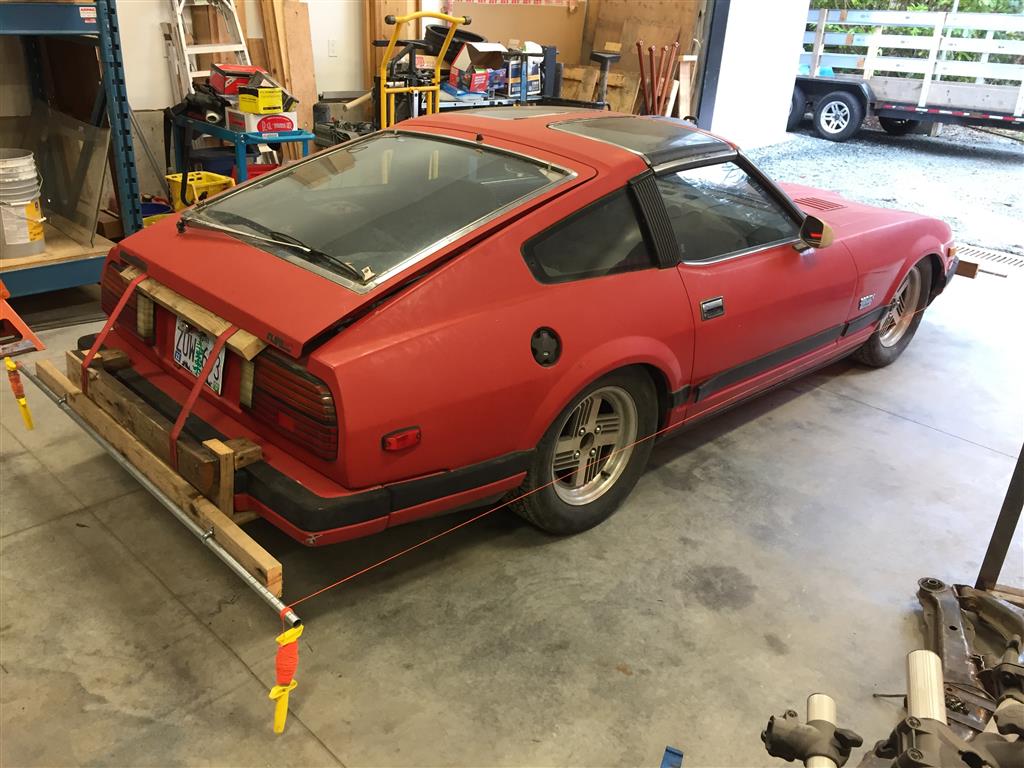
To do the alignment and to save time, I built this jig that hangs off the car. I combined two ideas that I found on You Tube videos - one where a drifter guy used a steel bar at each end to help make squaring up the car faster, and another guy who hung a jig off his Porsche 911. Because I jack up the car every time I want to make an adjustment, this jig has been a real time saver. I have done so many alignments, it's unreal. I must have 40 hours of setting up alignment adjustments into this project alone!

- IMG_1080 (Medium).JPG (120.22 KiB) Viewed 3778 times
- IMG_1081 (Medium).JPG (132.02 KiB) Viewed 3778 times
And the work continues. Hope to have V7.3 in the coming week...
Byron
Re: 280ZX IRS Adjustable Camber/Toe Brackets
Posted: 25 Mar 2018 08:56
by Byron510