Lets see some welding and fabrication pics!

No worries. Post here to your hearts content
User avatar
JordanTr
Posts: 1006
Joined: 20 Feb 2013 22:27
Location: Kimberley, BC, Canada

Re: Lets see some welding pics!

Post by JordanTr »

Nice staircase!

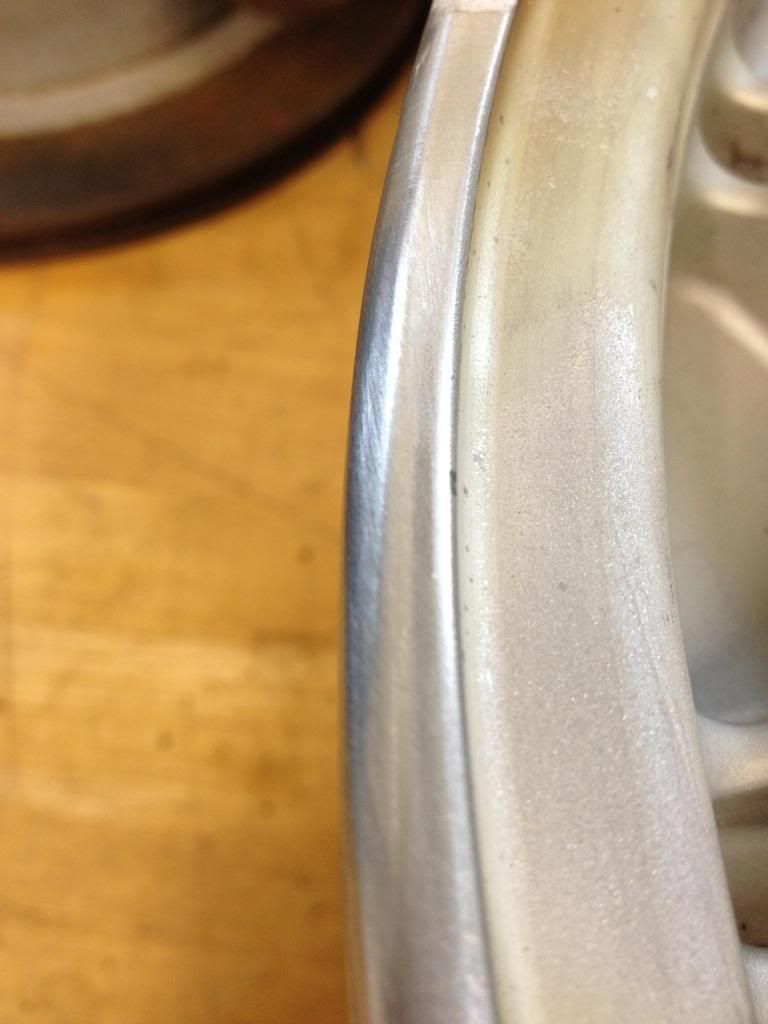
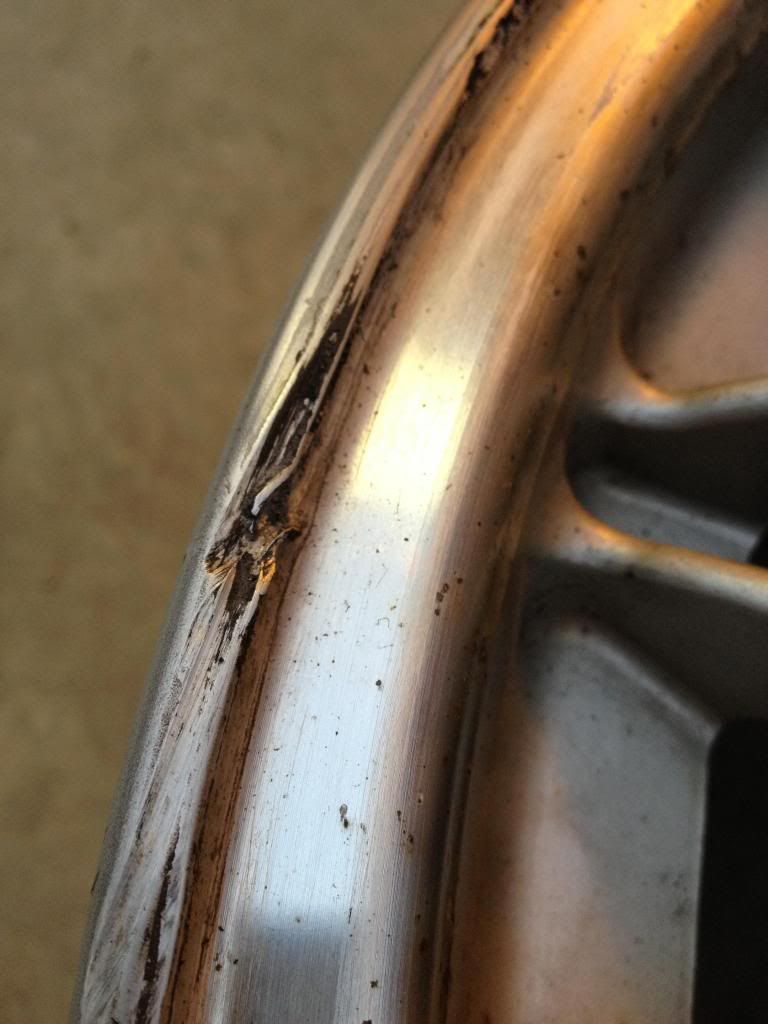
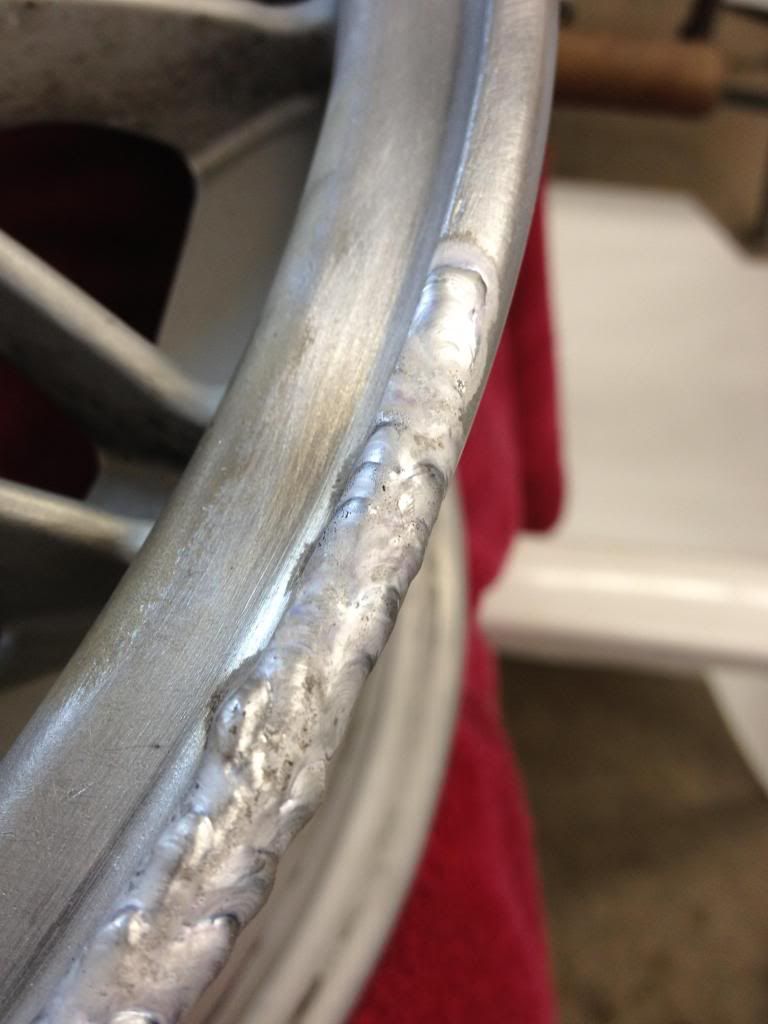
Decided to repair some curbage on one of my rims prior to powdercoating. Rims are forged BBS so the aluminum has a pretty weldable structure.

Using Miller Syncrowave 200 with pulse, pure argon @ 15 CFH, 3/32" thoriated tungsten ground to a point and balled after arc strike, #8 gas cup, 1/16" 4043 rod.

For cleaning, I blasted with 50% glass/ 50% aluminum oxide, rinsed, PPG DX440 degreaser on a rag and then scuffed with dedicated aluminum wire brush. I also used a nosepicker to dig out grunge that was deep in the curbage.

Pics!

Image

Image

Image
'72 2 door KA project | S14 Silvia RB25DET | S14 RB26DETT (sold) | '90 Audi 90Q20V (sold)
User avatar
defdes
Supporter
Posts: 5050
Joined: 12 May 2005 14:45
Location: Vermont

Re: Lets see some welding pics!

Post by defdes »

510-Trevor wrote:Spent the day in the shop holding tools for professional fabricators:
Built this:
[/url]
It was great to get dirty and see how much work is involved after it's been drawn.
Man, having built any number of steel STRAIGHT stairs, that makes my head hurt. Super respect for them, and you?

Nice work on those wheels Jordan, I had to do the same with my ARE Libra's (scuffed) and some of the Panasports on my race car (cracks).


Last set I made back in LA. Folded tread and risers on 2" x 10" tube, stainless steel gussets below with stainless steel glass mounts.
uristairdetail.JPG
uristairdetail.JPG (94.92 KiB) Viewed 3353 times
uristair.JPG
uristair.JPG (106.62 KiB) Viewed 3353 times
510rob
Moderator
Posts: 5167
Joined: 09 Oct 2003 23:37
Location: Vancouver, BC

Re: Lets see some welding pics!

Post by 510rob »

zoinks! much skills everywhere! rad!!!
User avatar
510-Trevor
Supporter
Posts: 1373
Joined: 03 Mar 2007 18:34
Location: Calgary, Alberta

Re: Lets see some welding pics!

Post by 510-Trevor »

defdes wrote:
510-Trevor wrote:Spent the day in the shop holding tools for professional fabricators:
Built this:
[/url]
It was great to get dirty and see how much work is involved after it's been drawn.
Man, having built any number of steel STRAIGHT stairs, that makes my head hurt. Super respect for them, and you?

Nice work on those wheels Jordan, I had to do the same with my ARE Libra's (scuffed) and some of the Panasports on my race car (cracks).


Last set I made back in LA. Folded tread and risers on 2" x 10" tube, stainless steel gussets below with stainless steel glass mounts.
All I did was show up and watch/fetch tools etc. The two guys on the stairs are the ones who came in at 5am (I didn't show up until 6:30) and had it assembled to point you see it by 11am (the layout and cuts were done yesterday, bending earlier in the week by Advance Bending) and there is still at least a days worth of welding required to finish it. I handle the drafting side of things (not this stair though). We do a handful of architectural stairs a year but nothing as detailed as what you have done, nice work. Most of the stairs we produce are for industrial projects where function over form is the game.
1972 Yellow 4dr
User avatar
duke
Supporter
Posts: 1875
Joined: 26 Oct 2005 14:21
Location: Santa Rosa, CA

Re: Lets see some welding pics!

Post by duke »

okayfine wrote:Hello all, thanks for the replies. I'll try to answer all the questions here.

Straight argon, 15cfh per the gauge. Argon bottle was basically empty, but there was flow as I could push dust/dirt off the workbench with preflow.

I know red isn't the best for aluminum, but I haven't gotten into aluminum and red's all I have at the moment. Green is on the order sheet. I point the tip and let the welding process ball the tip. Seems to work most of the time and I can get an accurate start with the arc.

I tried the pulse on my machine (Lincoln Precision TIG 185). Some sections it worked, some it didn't at all. Which is the same result as when I turned the pulse off and pedaled it.

Aluminum stock is rems from a friend's project. He welded up bigger lengths of this material for TV frames, so the material is weldable cleanly.

Definitely welding on AC. AC balance is adjustable on my machine, but I currently have it set in the auto zone. Can bias it to cleaning or penetration, says the dial.

#7 cup, no gas lens, but probably had greater than 1/4" stickout on the tungsten. Will adjust that.
Hey Julian,

I wouldn't worry about using thoriated (red) tungsten. It should be just fine for an inverter machine like yours. The use of pure (green) tungsten for AC welding is for transformer style machines. Like I mentioned though, I don't like the way red tungsten balls on AC, and I typically use 1.5 or 2% lanthanated tungsten when welding aluminum.

You shouldn't worry about pulse right now. It's not necessary and is just another trick to help out in certain situations.

I would set your AC balance to 50% (balanced welding). This will give you a good starting point for learning.

A gas lens is helpful, I prefer them, especially when welding stainless.

You have most likely seen these videos, but if you haven't give them a watch. Very informative and the practice drill really helps.

http://www.youtube.com/watch?v=cwB4PESPAlI

http://www.youtube.com/watch?v=RG4ZOwSw9CQ
Duke Schimmer

'72 2-Door 510
"Simplify and add lightness."
User avatar
okayfine
Supporter
Posts: 14154
Joined: 12 Nov 2007 23:02
Location: Newbury Park, CA

Re: Lets see some welding pics!

Post by okayfine »

Hey Duke,

Thanks. I actually subscribe to WT&T on YouTube, but after he posted the AC Balance vid. Good stuff.

Went out and took it out of Auto. BIG difference. Within about 20% of 50/50 (either way), I think I have more success on the Cleaning side of the dial, but it then takes more amps from the machine to do the same bead line. Still having trouble with the filler rod balling up into an ugly, um, ball, while adding along. Sometimes it works well, sometimes it balls.

Still a ton of practice in the near future, but with argon prices going back down I can spend a bottle or two figuring it all out. Lot more complicated and things going on than steel. I'm surprised more TIG welders aren't drummers...
Because when you spend a silly amount of money on a silly, trivial thing that will help you not one jot, you are demonstrating that you have a soul and a heart and that you are the sort of person who has no time for Which? magazine. – Jeremy Clarkson
User avatar
duke
Supporter
Posts: 1875
Joined: 26 Oct 2005 14:21
Location: Santa Rosa, CA

Re: Lets see some welding pics!

Post by duke »

Good to hear. I'm always suspect of "auto" settings on machines.

In regards to the rod balling up, there may be a few causes. First, make sure you clean your filler rod before you use it. I always wipe mine down with a clean rag with acetone on it. Second, what size rod are you using? To small of filler rod for the amperage you're running will cause it to ball up. Third, having to aggressive of a travel angle or to long of an arc length will also cause filler to ball up as it spreads the heat out more rather than concentrating it on the part. Try to keep your travel angle around 15* and keep a nice and tight arc.
Duke Schimmer

'72 2-Door 510
"Simplify and add lightness."
User avatar
okayfine
Supporter
Posts: 14154
Joined: 12 Nov 2007 23:02
Location: Newbury Park, CA

Re: Lets see some welding pics!

Post by okayfine »

Filler gets wiped a few times with a scotch-brite pad. Alternating between 1/16 and 3/32 filler. I try to keep my torch angle at ~15°.

The balling issue seems particularly related to the argon shield. If I light up on a piece on my workbench with the garage door closed, I can make effective beads. If I change nothing else but have the garage door open, I'll get 95% balling upon attempting to add filler. So, gas lenses...any good aftermarket suppliers, or is this a Lincoln-only part?
Because when you spend a silly amount of money on a silly, trivial thing that will help you not one jot, you are demonstrating that you have a soul and a heart and that you are the sort of person who has no time for Which? magazine. – Jeremy Clarkson
User avatar
JordanTr
Posts: 1006
Joined: 20 Feb 2013 22:27
Location: Kimberley, BC, Canada

Re: Lets see some welding pics!

Post by JordanTr »

I often pull the rod away from the shield when it's hot which causes ballin if I'm not careful. I believe I'm using a bigger cup than you though (#8). I can see wind from the open door not helping though.
'72 2 door KA project | S14 Silvia RB25DET | S14 RB26DETT (sold) | '90 Audi 90Q20V (sold)
User avatar
defdes
Supporter
Posts: 5050
Joined: 12 May 2005 14:45
Location: Vermont

Re: Lets see some welding pics!

Post by defdes »

All of the above and if you only manage 2 of 3, if you use 1/8" filler rod I bet your problem will go away as it's more forgiving to all of the other details mentioned.
User avatar
duke
Supporter
Posts: 1875
Joined: 26 Oct 2005 14:21
Location: Santa Rosa, CA

Re: Lets see some welding pics!

Post by duke »

Gas lenses are not manufacturer specific, but depend on the size of your torch (there is a numbering system for torch sizes which depends on amp ratings and if it is water cooled or air cooled). If your local welding store is worth anything they should have them in stock.
Duke Schimmer

'72 2-Door 510
"Simplify and add lightness."
User avatar
okayfine
Supporter
Posts: 14154
Joined: 12 Nov 2007 23:02
Location: Newbury Park, CA

Re: Lets see some welding pics!

Post by okayfine »

Progress.
IMG_5602.jpg
IMG_5602.jpg (176 KiB) Viewed 3224 times
Bottom line started a little hot, but I got it under control. Aluminum, or at least the 1/8" stuff I'm working on, seems to get to a temperature where it's just too hot to weld. More mass in the material would help, but I don't recall ever getting to that point with steel.

In any case, much improved, if only being beads on flat stock. Thanks for everyone's suggestions.
Because when you spend a silly amount of money on a silly, trivial thing that will help you not one jot, you are demonstrating that you have a soul and a heart and that you are the sort of person who has no time for Which? magazine. – Jeremy Clarkson
User avatar
okayfine
Supporter
Posts: 14154
Joined: 12 Nov 2007 23:02
Location: Newbury Park, CA

Re: Lets see some welding pics!

Post by okayfine »

More progress with aluminum. Decided my wife needed a new pen holder for her desk at school. Still using 1/8" aluminum as it's easier to control at my newb experience level.
IMG_5633.jpg
IMG_5633.jpg (171.02 KiB) Viewed 3185 times
The weld seams aren't all on the same faces, but other than that I'm happy. I should have cut the pen hole before I finished welding up the cube - that last 1/2" didn't weld very nicely due to, presumably, the interior air looking for a way out as the cube got hotter. Ground it down and went back over it, NBD.
Because when you spend a silly amount of money on a silly, trivial thing that will help you not one jot, you are demonstrating that you have a soul and a heart and that you are the sort of person who has no time for Which? magazine. – Jeremy Clarkson
User avatar
two_68_510s
Supporter
Posts: 3894
Joined: 18 Apr 2010 11:20
Location: Ben Lomond California

Re: Lets see some welding pics!

Post by two_68_510s »

You do like aluminum, and it likes you! :) Nice
Joel

2 '68 510 2 door sedans
'95 240SX


“We will either find a way, or make one.” – Hannibal
510rob
Moderator
Posts: 5167
Joined: 09 Oct 2003 23:37
Location: Vancouver, BC

Re: Lets see some welding pics!

Post by 510rob »

Cool Hand Julian
Post Reply