Just a cautionary note on the wilwood remote reservoir installation. The hose that used to be supplied with the kits had a tendency to weapons through the rubber and start to drip. It's worth checking into see if this was addressed by Wilwood. At the time I built my Bronze car, the issue had not been solved so I utilized air brake line for my remote mounted reservoirs.
I'd hate to see brake fluid start to drip onto your beautiful work when it's all completed.
Byron
GAS 1600
Re: GAS 1600
Love people and use things,
because the opposite never works.
because the opposite never works.
Re: GAS 1600
Cheers Byron.
It's gates 200# 3/8 rubber hose in the kit. Sound familiar? Looks like extreme overkill.
It's gates 200# 3/8 rubber hose in the kit. Sound familiar? Looks like extreme overkill.
Re: GAS 1600
I went back in and looked at my thread, I utilized the Tilton stuff so I don't know if it was the same (that was 10 years ago now, my god where does the time go? ).
At any rate, I think the problem is with the rubber itself, it sweats the brake fluid through it's pores, and then starts to drip. So I just looked for tubing locally which could withstand brake fluid and it turns out that truck air line hose is cheap and damn near impervious to any chemical.
Byron
At any rate, I think the problem is with the rubber itself, it sweats the brake fluid through it's pores, and then starts to drip. So I just looked for tubing locally which could withstand brake fluid and it turns out that truck air line hose is cheap and damn near impervious to any chemical.
Byron
Love people and use things,
because the opposite never works.
because the opposite never works.
Re: GAS 1600
Here's an idea for the clutch master, BAZ from Datsport informed me of this trick back when I was building my coupe......it came off a nissan van.
- Attachments
-
- greddy in16.jpg (30.24 KiB) Viewed 5283 times
Re: GAS 1600
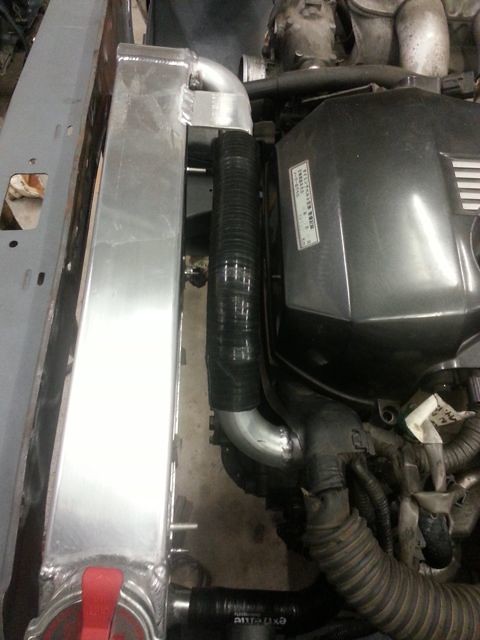
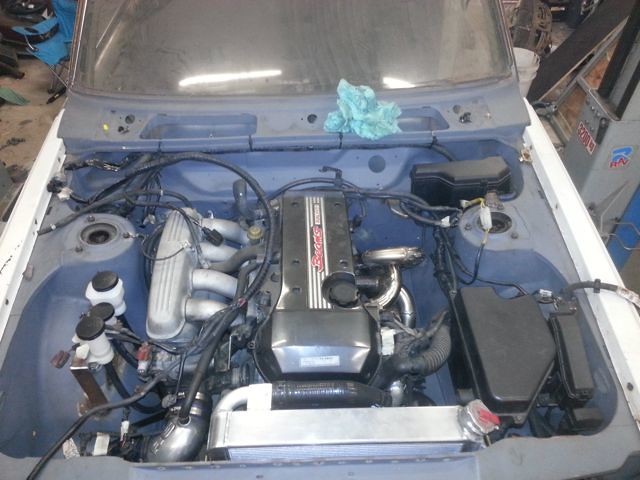
A couple of mates at BANFAB let me have a go of their tig welder, but I was no good. So I ended up having them weld up the radiator for me. Essentially it was a 90deg bend on the top water outlet, 90deg bend on the top of the radiator and a straight section on the bottom of the radiator.
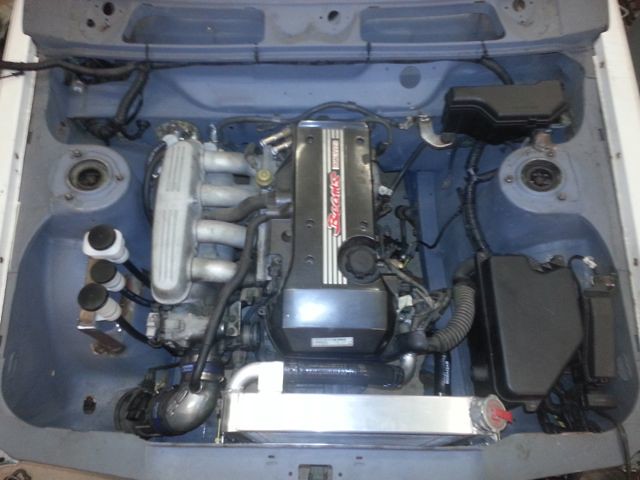
Just need oil filter, oil and work out a few of the wires then I can kick it in the guts and see if it still works.
 GAS1600_045_02 by Garvice, on Flickr
 GAS1600_045_03 by Garvice, on Flickr
 GAS1600_045_01 by Garvice, on Flickr
 GAS1600_045_04 by Garvice, on Flickr
Just need oil filter, oil and work out a few of the wires then I can kick it in the guts and see if it still works.
GAS1600_045_02 by Garvice, on FlickrGAS1600_045_03 by Garvice, on FlickrGAS1600_045_01 by Garvice, on FlickrGAS1600_045_04 by Garvice, on Flickr
Last edited by Garvice on 30 Jul 2017 04:33, edited 1 time in total.
Re: GAS 1600
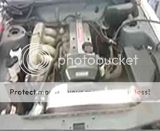
Started the Datsun today. First video has some really bad idling, took me a few minutes to realise that I had forgot to plug the brake vacuum line from the manifold. As you can see in the second video it idled great after I worked that out.
Apologies for the poor video quality, this was only format that photobucket would accept that I could compress too.
Just click on the photo for the video.

Apologies for the poor video quality, this was only format that photobucket would accept that I could compress too.
Just click on the photo for the video.
-
two_68_510s

- Supporter
- Posts: 3894
- Joined: 18 Apr 2010 11:20
- Location: Ben Lomond California
Re: GAS 1600
Nice job man, sounds good.
I love the fire down below! Must be open exhaust pipe, eh?
I love the fire down below! Must be open exhaust pipe, eh?
Joel
2 '68 510 2 door sedans
'95 240SX
“We will either find a way, or make one.” – Hannibal
2 '68 510 2 door sedans
'95 240SX
“We will either find a way, or make one.” – Hannibal
Re: GAS 1600
Joel,
There was no headers on at all, ha.
There was no headers on at all, ha.
Re: GAS 1600
Well been a while since I've done much on the car and updated this forum.
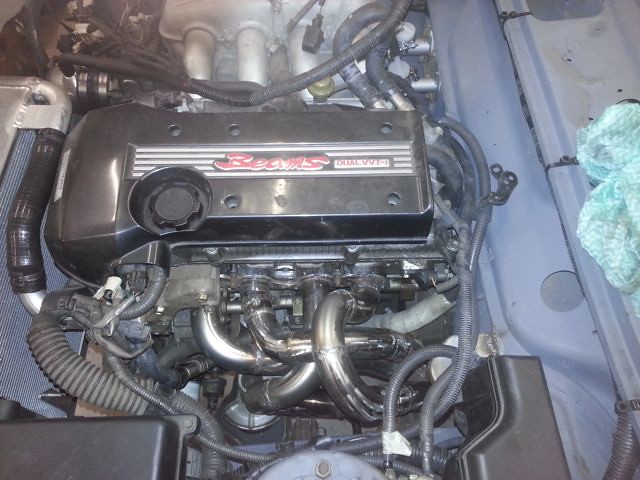
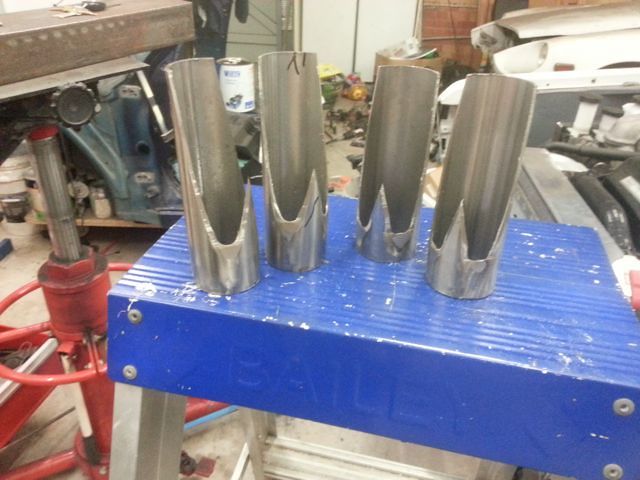
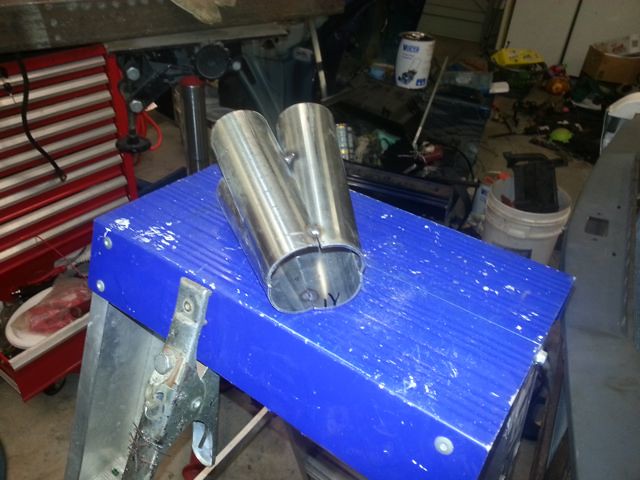
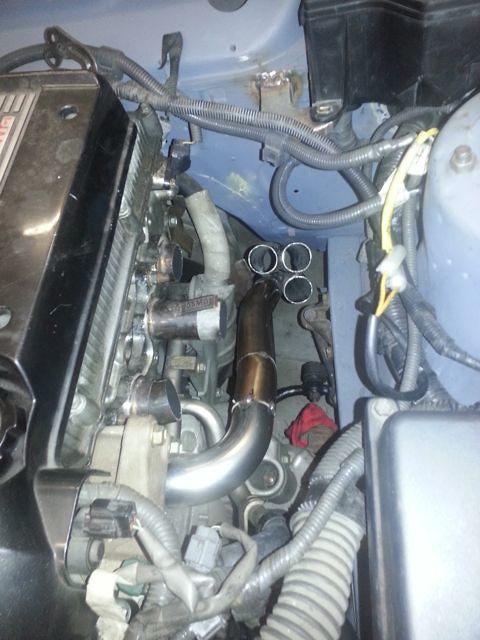
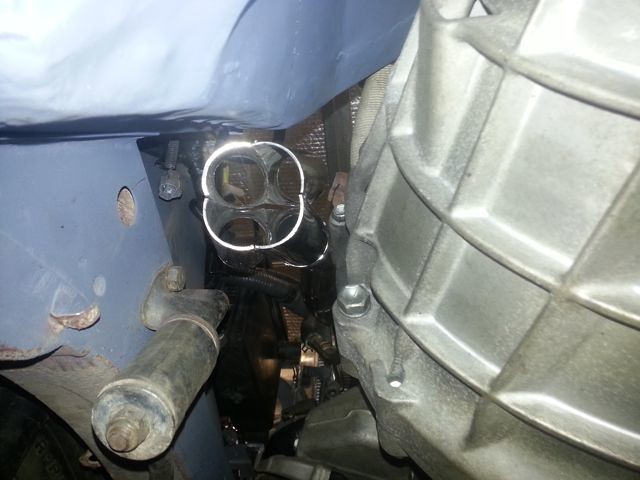
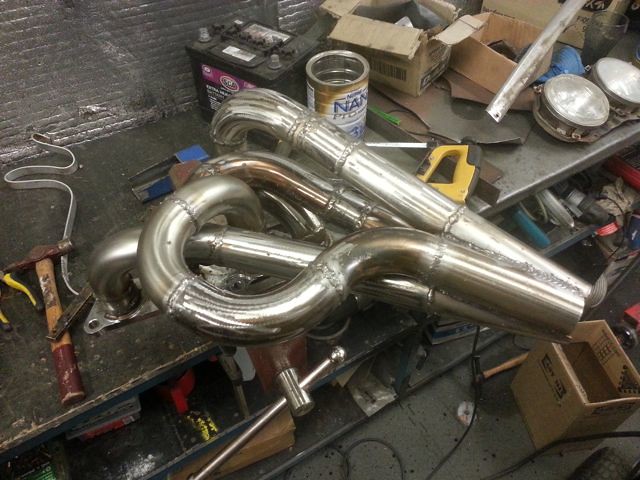
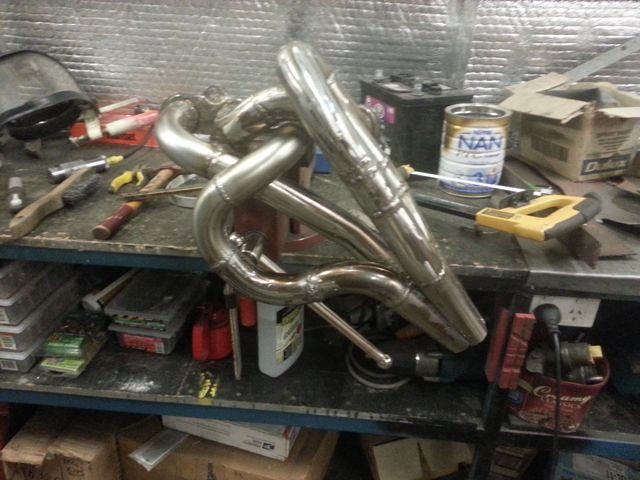
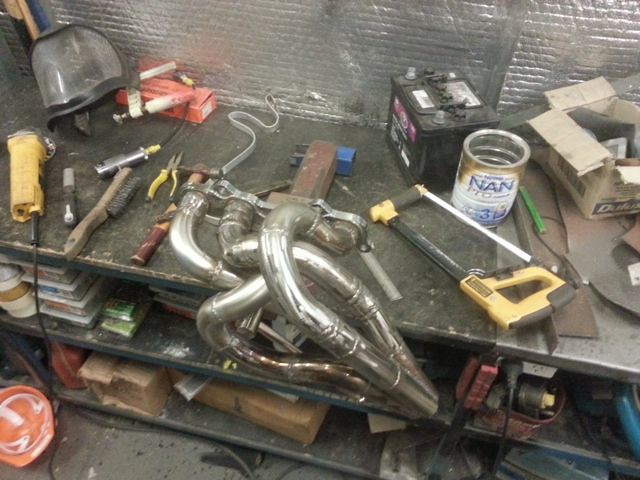
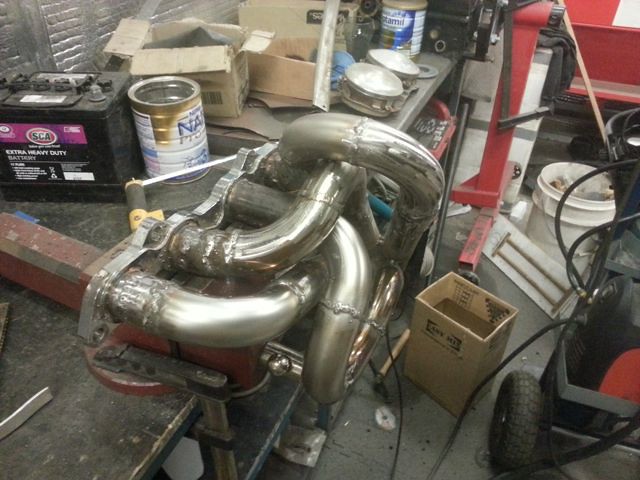
I decided that instead of building new headers, that I would just modify the ones that came with the halfcut. Problem with the ones that came with the halfcut was that they basically came into two collectors right where the steering linkage sat. So I started by cutting out cylinders 1/4 to drop the bottom collector. I discovered that the top collector then missed the linkage in most of it's range, but still hit it in the locked position. I also didn't like how close the pipes were to the rubber bush of the steering linkage. So after rerouting the 1/4 collector and spending a bit of time on modifying the headers, I decided, stuff this and cut all 4 headers off close to the flange to start again.
I built a 4 into 1 collector and started routing the pipes from the head to the collector, only to realise that this was very hard to get the angles right. So for the third time I cut the pipes again and started at both the collector and the head at the same time so that I could get them to meet better. I didn't do equal length headers, but I did get them reasonably close in length. I also used some stainless 308ss mig wire but decided I would just use the standard argo-shield light gas that I had. It worked, but it did create a fair bit of splatter. Welding wasn't my best on the headers and my flapper disc was worn out when I was doing the final welding late last night/early this morning, so I didn't bother grinding all the welds down. I'll probably regret that latter on as some are near impossible to get to now.
Well all those words are basically explained in the last photo below.
 GAS1600_047_01 by Garvice, on Flickr
 GAS1600_047_02 by Garvice, on Flickr
 GAS1600_047_03 by Garvice, on Flickr
 GAS1600_047_04 by Garvice, on Flickr
 GAS1600_047_05 by Garvice, on Flickr
 GAS1600_047_06 by Garvice, on Flickr
 GAS1600_047_07 by Garvice, on Flickr
 GAS1600_047_08 by Garvice, on Flickr
 GAS1600_047_09 by Garvice, on Flickr
 GAS1600_047_10 by Garvice, on Flickr
 GAS1600_047_11 by Garvice, on Flickr
 GAS1600_047_12 by Garvice, on Flickr
I decided that instead of building new headers, that I would just modify the ones that came with the halfcut. Problem with the ones that came with the halfcut was that they basically came into two collectors right where the steering linkage sat. So I started by cutting out cylinders 1/4 to drop the bottom collector. I discovered that the top collector then missed the linkage in most of it's range, but still hit it in the locked position. I also didn't like how close the pipes were to the rubber bush of the steering linkage. So after rerouting the 1/4 collector and spending a bit of time on modifying the headers, I decided, stuff this and cut all 4 headers off close to the flange to start again.
I built a 4 into 1 collector and started routing the pipes from the head to the collector, only to realise that this was very hard to get the angles right. So for the third time I cut the pipes again and started at both the collector and the head at the same time so that I could get them to meet better. I didn't do equal length headers, but I did get them reasonably close in length. I also used some stainless 308ss mig wire but decided I would just use the standard argo-shield light gas that I had. It worked, but it did create a fair bit of splatter. Welding wasn't my best on the headers and my flapper disc was worn out when I was doing the final welding late last night/early this morning, so I didn't bother grinding all the welds down. I'll probably regret that latter on as some are near impossible to get to now.
Well all those words are basically explained in the last photo below.
GAS1600_047_01 by Garvice, on FlickrGAS1600_047_02 by Garvice, on FlickrGAS1600_047_03 by Garvice, on FlickrGAS1600_047_04 by Garvice, on FlickrGAS1600_047_05 by Garvice, on FlickrGAS1600_047_06 by Garvice, on FlickrGAS1600_047_07 by Garvice, on FlickrGAS1600_047_08 by Garvice, on FlickrGAS1600_047_09 by Garvice, on FlickrGAS1600_047_10 by Garvice, on FlickrGAS1600_047_11 by Garvice, on FlickrGAS1600_047_12 by Garvice, on Flickr
Last edited by Garvice on 30 Jul 2017 04:37, edited 1 time in total.

Re: GAS 1600
Yikes!!! Snakes!!!
All kidding aside,
I really like your creativity
BP
All kidding aside,
I really like your creativity
BP
1971 Datsun 510 2 door
08 VW R32
69 BSA 650 Firebird Scrambler
Too Many Bicycles
08 VW R32
69 BSA 650 Firebird Scrambler
Too Many Bicycles
-
PoorMtnKid

- Supporter
- Posts: 1219
- Joined: 28 Aug 2010 14:43
- Location: Las Vegas NV
Re: GAS 1600
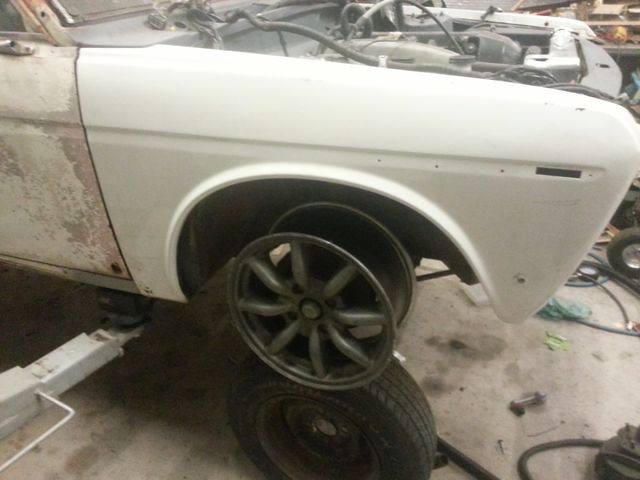
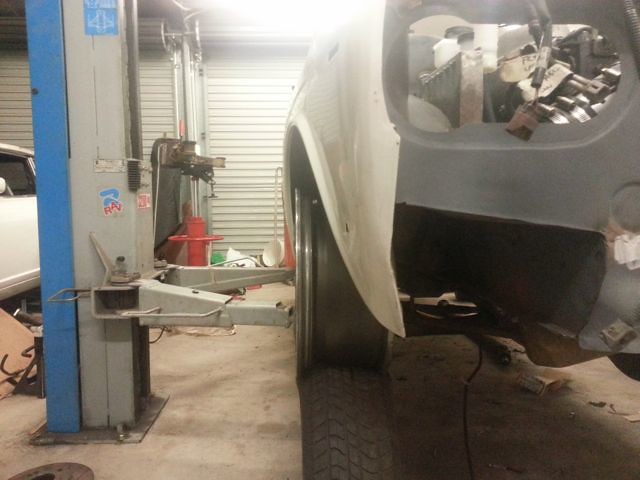
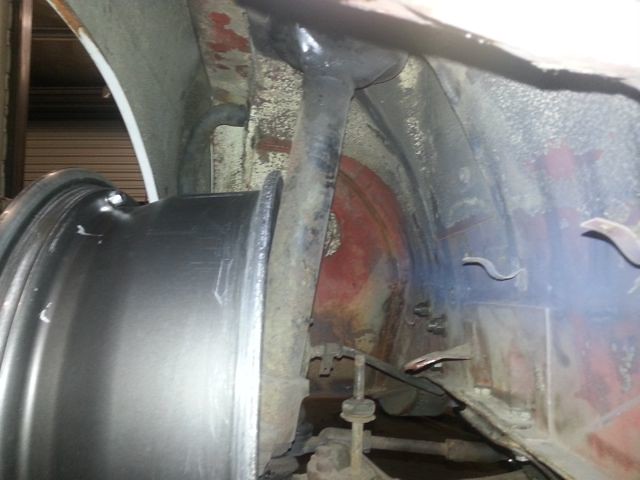
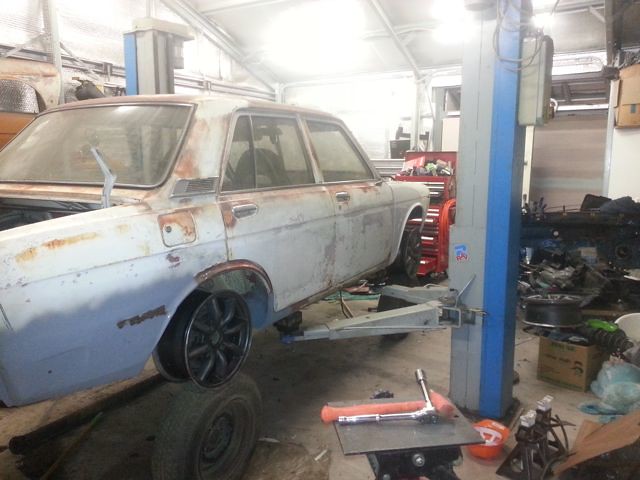
Got some rims for the car.
WATANABEs!
Offset isn't the best for the 510 or 200b struts, might need to go r31 struts. Might get a tire fitted and check the offset first.
 GAS1600_048_01 by Garvice, on Flickr
 GAS1600_048_02 by Garvice, on Flickr
 GAS1600_048_03 by Garvice, on Flickr
 GAS1600_048_04 by Garvice, on Flickr
 GAS1600_048_05 by Garvice, on Flickr
 GAS1600_048_06 by Garvice, on Flickr
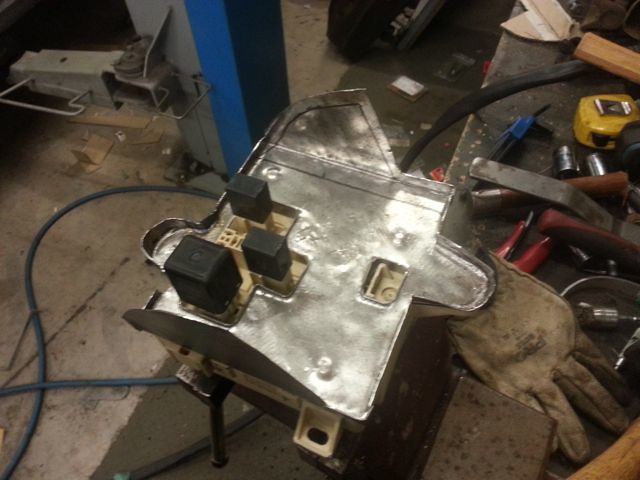
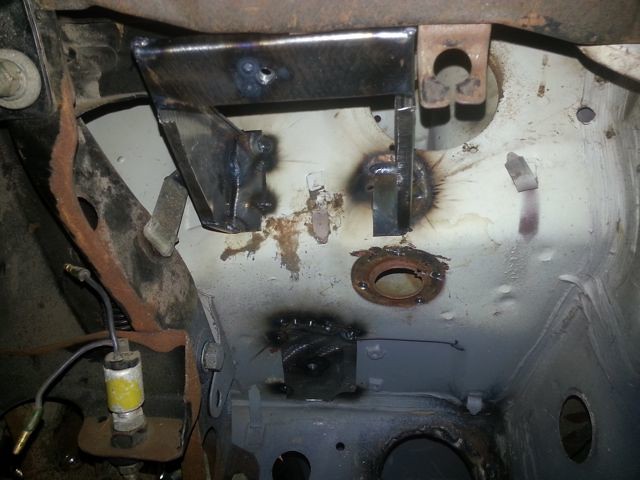
I also started making a bracket for one of the fuse boxes, but i've stuffed my welder liner with the stainless wire, so i'm going to need to get another liner before i finish it.
 GAS1600_048_07 by Garvice, on Flickr
WATANABEs!
Offset isn't the best for the 510 or 200b struts, might need to go r31 struts. Might get a tire fitted and check the offset first.
GAS1600_048_01 by Garvice, on FlickrGAS1600_048_02 by Garvice, on FlickrGAS1600_048_03 by Garvice, on FlickrGAS1600_048_04 by Garvice, on FlickrGAS1600_048_05 by Garvice, on FlickrGAS1600_048_06 by Garvice, on FlickrI also started making a bracket for one of the fuse boxes, but i've stuffed my welder liner with the stainless wire, so i'm going to need to get another liner before i finish it.
GAS1600_048_07 by Garvice, on Flickr
Last edited by Garvice on 30 Jul 2017 04:40, edited 1 time in total.
Re: GAS 1600
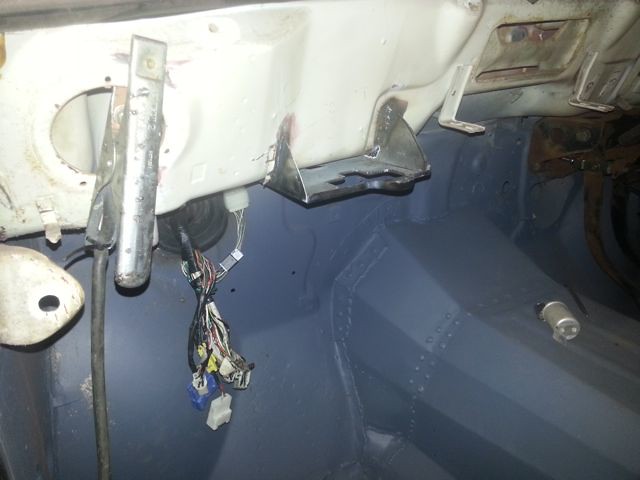
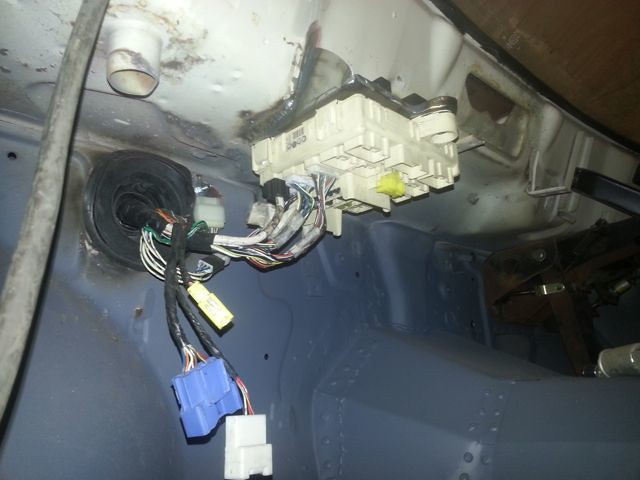
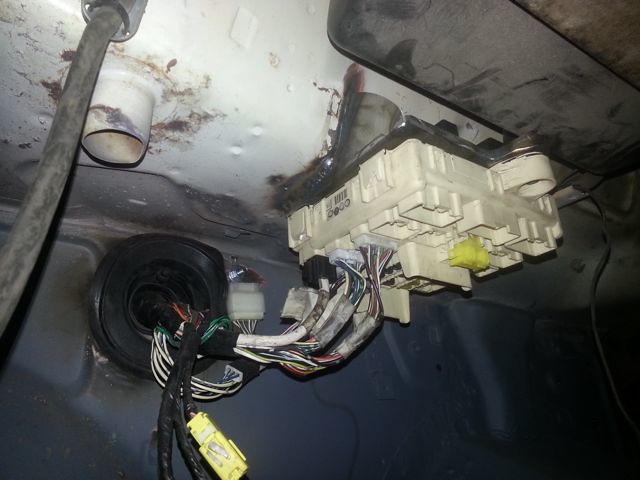
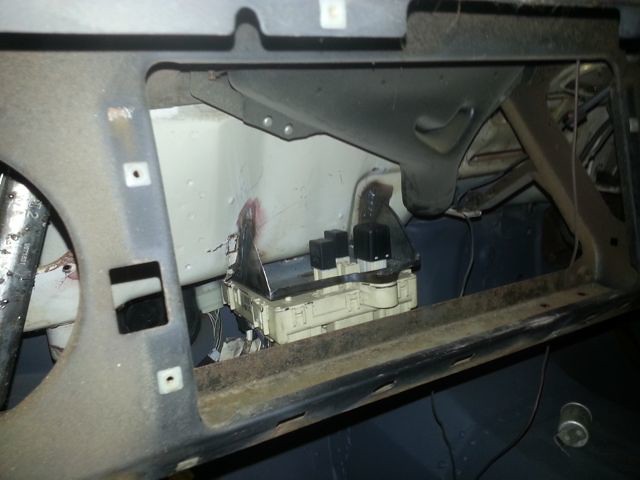
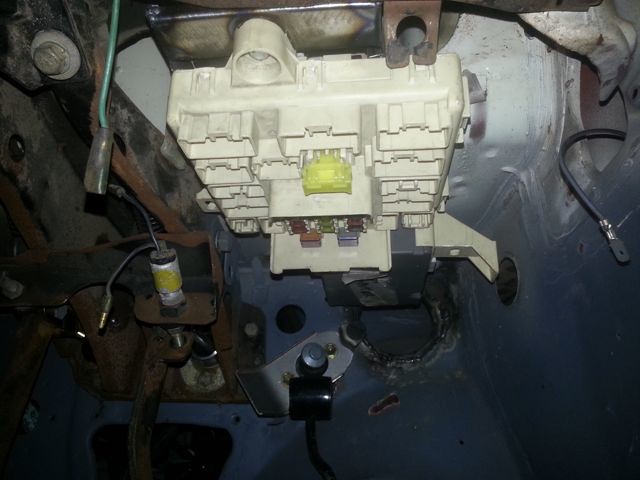
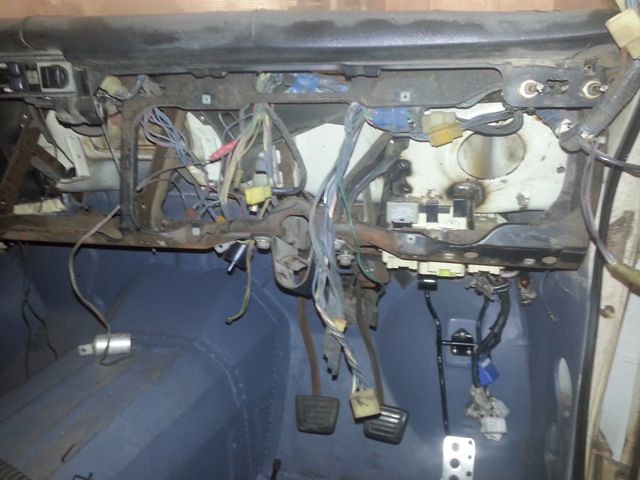
Little embarrassed how little slow/little some of these updates have been lately. Lots of pictures below, but really not much accomplished. All I've managed to do is mount the two internal junction boxes.
Passenger's side junction box, hides behind the glovebox.
 GAS1600_049_01 by Garvice, on Flickr
 GAS1600_049_02 by Garvice, on Flickr
 GAS1600_049_03 by Garvice, on Flickr
 GAS1600_049_04 by Garvice, on Flickr
Driver's side junction box, hides behind the instrument cluster. I decided to delete the water drain on the driver's side. It was the only way I could comfortably fit this in. I will seal it up and potentially add some drainage out the front into the engine bay.
 GAS1600_049_05 by Garvice, on Flickr
 GAS1600_049_06 by Garvice, on Flickr
 GAS1600_049_07 by Garvice, on Flickr
You can see in the last photo, I also mounted an accelerator pedal. Not real happy with how low the pedal ended compared to the brake pedal though. I think i'm going to have to raise the pedal, but unfortunately that is going to make the ratio quicker between idle and full throttle.
Passenger's side junction box, hides behind the glovebox.
GAS1600_049_01 by Garvice, on FlickrGAS1600_049_02 by Garvice, on FlickrGAS1600_049_03 by Garvice, on FlickrGAS1600_049_04 by Garvice, on FlickrDriver's side junction box, hides behind the instrument cluster. I decided to delete the water drain on the driver's side. It was the only way I could comfortably fit this in. I will seal it up and potentially add some drainage out the front into the engine bay.
GAS1600_049_05 by Garvice, on FlickrGAS1600_049_06 by Garvice, on FlickrGAS1600_049_07 by Garvice, on FlickrYou can see in the last photo, I also mounted an accelerator pedal. Not real happy with how low the pedal ended compared to the brake pedal though. I think i'm going to have to raise the pedal, but unfortunately that is going to make the ratio quicker between idle and full throttle.
Last edited by Garvice on 30 Jul 2017 04:43, edited 1 time in total.
-
Three B's Racing
- Supporter
- Posts: 1288
- Joined: 03 Mar 2009 11:58
- Location: New Hampshire
Re: GAS 1600
Just courious as to why you tied header tubes 4-3, then 1-2 together instead of 1-4 and 2-3 for exhaust scavenging?
"Lastnight the wife said oh boy when your dead you can't take nothing with you but your soul oh "Think"
- John Lennon
- John Lennon