I think your exhaust is impressive.
Can you clarify your rim size? Do you have 16"x7.4" (190mm) with +34mm offset? Are all 4 of your rims the same size and offset?
I pray you go with R31 struts!
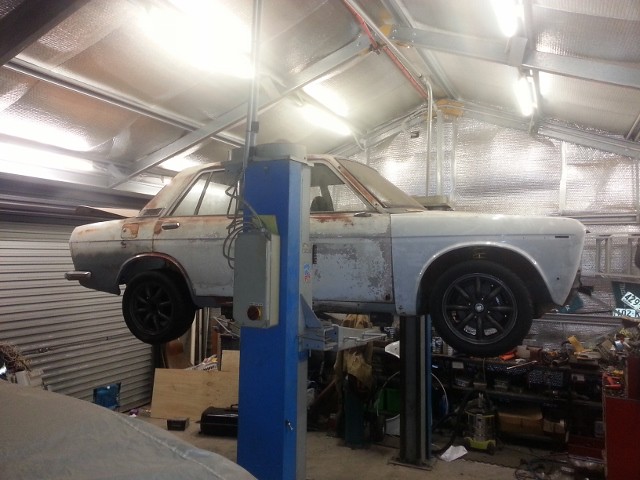
Thank you very much for taking pictures of the rims while the car is on a lift.
GAS 1600
-
greenthumb
- Posts: 261
- Joined: 19 May 2013 20:57
- Location: Langley, BC
Re: GAS 1600
+1 Joel! The sheer amount of ingenuity and perseverance on this build thus far is staggering. Hat's off to you sir for tackling this all yourself, including the unpleasant (to you) bitsMan, if that is how you do shit you don't like, your regular work must be fabtastic!! It looks beautiful!
Re: GAS 1600
Thanks guys. It looks good because its from far away ha. There are a couple of joins that use mig filler. Ha. I'll get some close up photos for you guys later.
Rims are 15". I'll look for a size on them, might have taken a photo without tyres. I am going with 200b struts and custom hubs.
Rims are 15". I'll look for a size on them, might have taken a photo without tyres. I am going with 200b struts and custom hubs.
Re: GAS 1600
I finished welding up the middle of my exhaust, just need to add a couple of hangers.
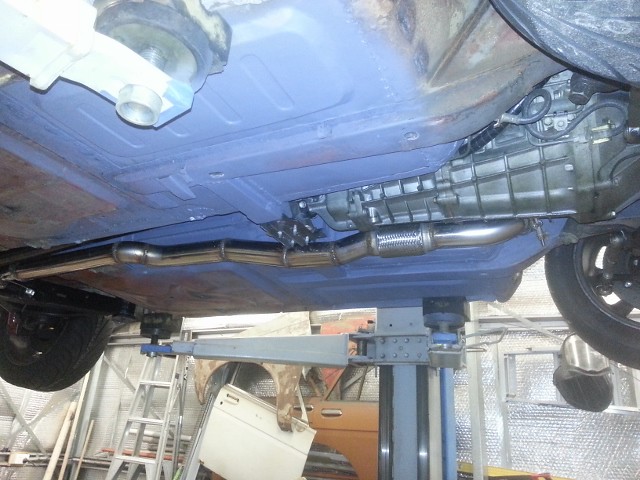 GAS1600_056_01 by Garvice, on Flickr
And I also received my front suspension from Maddat. Custom hubs on 200b struts with rx7 calipers and rotors. They fit nicely in a 15" wantanabe.
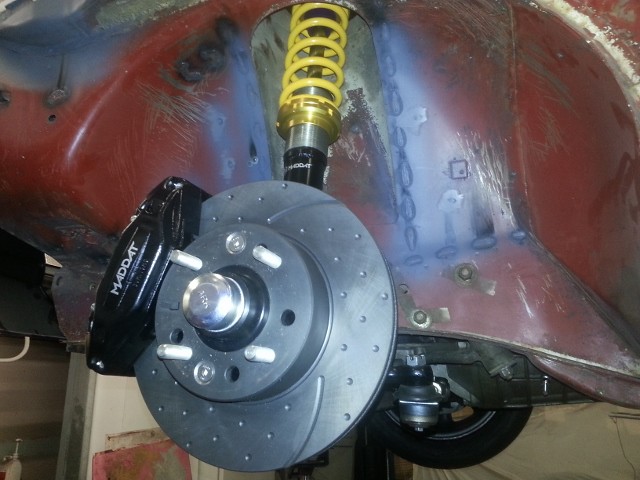 GAS1600_056_02 by Garvice, on Flickr
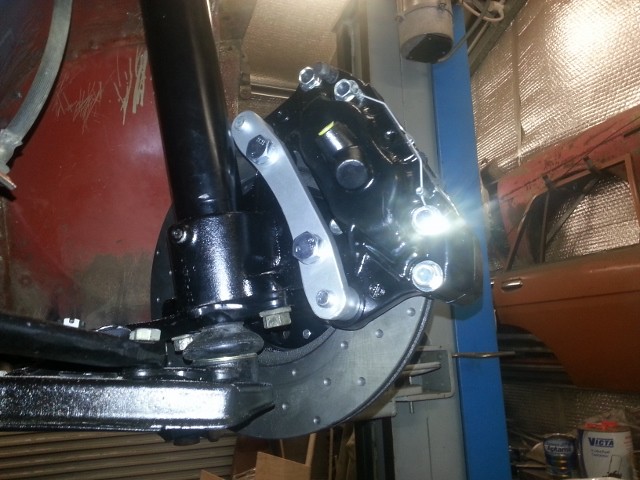 GAS1600_056_03 by Garvice, on Flickr
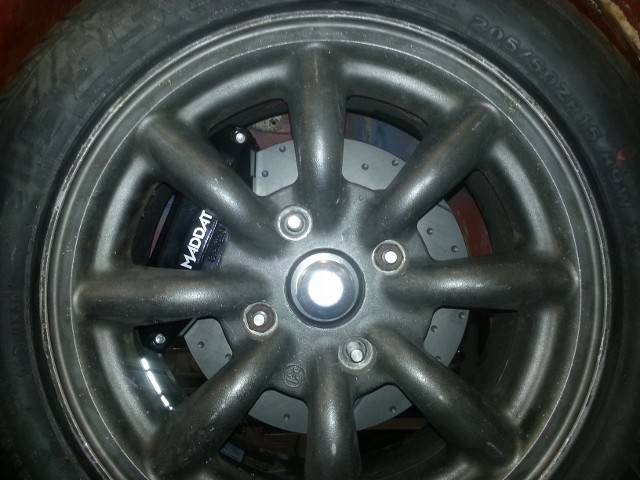 GAS1600_056_04 by Garvice, on Flickr
 GAS1600_056_05 by Garvice, on Flickr
I also mounted my control arms, steering arms, ball joints, steering linkage and steering box.
So now I can say "look ma, no hoist"
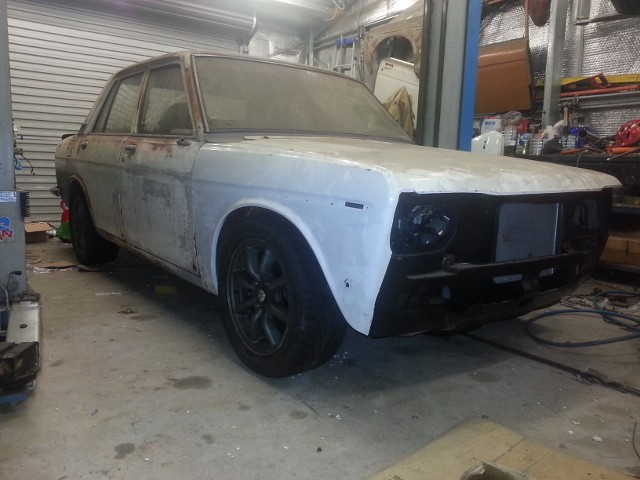 GAS1600_056_06 by Garvice, on Flickr
Jobs left to do before it can drive out of the shed under it's own power.
Some of the above jobs may not actually happen before the car gets driven out of the shed for a wash (maybe with someone holding a fuel pump in a jerry can and another holding a battery on the passenger seat, ha).
GAS1600_056_01 by Garvice, on FlickrAnd I also received my front suspension from Maddat. Custom hubs on 200b struts with rx7 calipers and rotors. They fit nicely in a 15" wantanabe.
GAS1600_056_02 by Garvice, on FlickrGAS1600_056_03 by Garvice, on FlickrGAS1600_056_04 by Garvice, on FlickrGAS1600_056_05 by Garvice, on FlickrI also mounted my control arms, steering arms, ball joints, steering linkage and steering box.
So now I can say "look ma, no hoist"
GAS1600_056_06 by Garvice, on FlickrJobs left to do before it can drive out of the shed under it's own power.
- Torque Rear Axle nuts (might put longer wheel studs in first, but that would mean pulling control arms out again)
Bolt and torque half shafts to axles
Get some intake fuel line and o-ring/retainer for the fuel sender so that I can mount up the tank
Run some wiring for the fuel pump
Mount battery and run some power feeds
Mount the steering column (wouldn't mind replacing the rubber connection with a unijoint, but that will come later)
Run one more short length of hard line for rear passenger brake
Make the brake line fixings more permanent
Mount the soft brake lines
Fluids- Transmission
Differential
Brakes
Clutch
Make a temporary mount for the gauges
Neaten up some of the wiring
Make an air intake/filter - Transmission
Some of the above jobs may not actually happen before the car gets driven out of the shed for a wash (maybe with someone holding a fuel pump in a jerry can and another holding a battery on the passenger seat, ha).
Last edited by Garvice on 30 Jul 2017 05:43, edited 1 time in total.
Re: GAS 1600
Garvice, I may be able to help you save the step of removing the rear arms again. When I bought my new wheels from Dave at Futofab, I also bought his longer wheel studs with the works. And in order to not disassemble the axle from the arm to get to the stub shafts, I drilled a hole directly below the brake adjuster. It was easy to install, but my other thought was that if I ever needed to change a damaged wheel stud, I could do it on the fly in the future, also without disassembly of the stub axle assembly.
Here's the link to my thread. I missed on the first attempt, but the second attempt right below the adjuster worked great. And since gravel roads are not in the cars future, the extra hole in the backing plat doesn’t bother me at all.
viewtopic.php?f=27&t=530&start=810
Byron
Here's the link to my thread. I missed on the first attempt, but the second attempt right below the adjuster worked great. And since gravel roads are not in the cars future, the extra hole in the backing plat doesn’t bother me at all.
viewtopic.php?f=27&t=530&start=810
Byron
Love people and use things,
because the opposite never works.
because the opposite never works.
Re: GAS 1600
Thanks Byron. I thought I would have press the studs in and out. Do you think pressing them in like you did but without the impact wrench would be ok? I don't have backing plates anymore so can potentially just do it how they are.
Re: GAS 1600
No backing plates - then yes it should be no problem. Place a nut and a spacer as I did in the shots in my Bronze build thread, but only take the nut up to 80 ft lbs, then give the stud a whack with a drift - preferably brass if available; re-torque nut - whack, re-torque nut - whack... until the stud is seated. You may be able to torque that stud to a higher level safely – my internet search says up to 130 ft lbs is good – but it’s unsubstantiated with any technical data, where at 80 ft lbs it is and deemed safe.
What one has to be careful with is that your new studs do have the correct size knurl on them - the same diameter as the ones removed - more less. The one removed might have lost .015-.025" when they got pressed in due to deformity, so they might be a bit smaller.
My thoughts on the subject, since you asked
Build is coming along awesome.
Byron
Love people and use things,
because the opposite never works.
because the opposite never works.
Re: GAS 1600
Thanks Byron. I appreciate the advice.
Re: GAS 1600
Well I feel like i've squandered my time in the shed this weekend, didn't get done what i would of liked.
Installed new longer wheel studs in the rear, but now they aretoo long for my watanabe wheel nuts, so will need to shorten them. Thanks for the advice Byron, 80ftlbs was enough to seat them.
Went to torque up the stub axles and worked out that my wrench only goes to 150ftlbs, workshop manual calls for 180 to 240ftlbs. If I cant find one to borrow I might have to buy one.
Ran the final brake hard line, connected the brake soft lines.
Also tried to mount the 180b steering column, but i'm not convinced its going to work, plus i lost the key so it stuck/locked.
- Jobs left to do before it can drive out of the shed under it's own power.
Torque Rear Axle nuts (might put longer wheel studs in first, but that would mean pulling control arms out again)
Bolt and torque half shafts to axles
Get some intake fuel line and o-ring/retainer for the fuel sender so that I can mount up the tank
Run some wiring for the fuel pump
Mount battery and run some power feeds
Mount the steering column (wouldn't mind replacing the rubber connection with a unijoint, but that will come later)
Run one more short length of hard line for rear passenger brake
Make the brake line fixings more permanent
Mount the soft brake lines
Fluids- Transmission
Differential
Brakes
Clutch
Make a temporary mount for the gauges
Neaten up some of the wiring
Make an air intake/filter - Transmission
Re: GAS 1600
Well I wanted my next post to be one with me driving the car out of the shed under it's own power at least, alas 3 months have passed and I feel I have been walking backwards.
I got the axle nuts torqued. Did a few calcs and used my torque wrench on a lever, then gave it a little more. Had to make up a holder to keep the axles stationary.
I have tightened all the halfshaft bolts (no issues there).
I got fluids in the diff and trans.
Went to do brake and clutch lines and chased my tail for ages. For some reason, hydraulic lines never agree with me. It took many bottles of fluid and plenty of goes trying to bleed the brakes before getting a mate over and doing it with two people properly. Had to refit the remote connection to the clutch master as it leaked, had to replace a 3way T as i had used a bubble flare T instead of a double flared T and got copious amounts of brake fluid all over my suspension components, so they will need a repaint. Eventually I got it sorted and I believe I now have working brakes (can't really test them yet).
Went to seal up my fuel tank and couldn't find my oring seal or the retainer for my fuel sender. Spent 2hours ripping the shed apart trying to find in only to decide I must have thrown them. Ordered a new seal (genuine) and a new retainer (had to get something from a holden). They arrived and the day I went to the shed with the new items I found my original ones. The same thing happened when I thought I had lost my rear springs. I have also lost my handbrake lever section that sits at the rear of the car. I am expecting that I will find it as soon as I have fabricated a replacement.
I installed my fuel pump in the tank and sealed it up and realised i hadn't down a hydro test on the tank before painting. Luckily I had only put a litre of fuel in the car when I discovered a few pinholes leaking through my soldered in pickup and a missed weld on my sump. Tried multiple times to resolder the pickup but found that each time the tank cooled the solder connection to the tank would crack. Chased my tail on this for a while before finally succumbing this weekend and buying an epoxy kit to seal the pickup and a tank resealing kit to paint the inside of the tank. Will hopefully be fully cured in time to test next weekend (how I convince the wife that I need to be in the shed on mother's day might be a bit tricky).
I'll also need to repaint the tank again and remount the fuel pump/re-seal the top.
I mounted my battery in the boot and bought some cables (this is probably the only thing that deserves some pictures, but will take them later). I discovered that battery boxes are rubbish items with no way to hold down the battery. So I had to make a battery tray inside in the box and mount the tray through the bottom of the box. Kind of negates the purpose of the box now. I might go to a VRLA battery with a vent tube through the floor yet. I mounted a fuse to the top of the box, welded earth connections to the boot and the firewall and put bulkhead mounting studs for both earth and power in the firewall. Cleaned up the wiring in the engine bay for the main power and earth connections. I was sent the wrong colour lug insulators so might go back and replace them now that i have the right colour.
I've bought a spal 14" fan, but since i have my radiator offset, the top radiator connection fouls the radiator sitting in the centre. I will need to offset the fan to the bottom drivers side to make it fit. Started on this this afternoon but wasn't liking how it was sitting, so moved onto another job. Thought about properly mounting the fuel/brake lines but realised i couldn't get in to the tunnel area properly with my transmission/exhaust/driveshaft to drill proper holes. So will have to leave this job till i can get in there. (Read, no work accomplished this afternoon).
Jobs left to do before it can drive out of the shed under it's own power (underlined is struck out).
Torque Rear Axle nuts
Bolt and torque half shafts to axles
Get some intake fuel line and o-ring/retainer for the fuel sender so that I can mount up the tank
Run some wiring for the fuel pump
Mount battery and run some power feeds
Mount the steering column (wouldn't mind replacing the rubber connection with a unijoint, but that will come later)
Run one more short length of hard line for rear passenger brake
Make the brake line fixings more permanent
Mount the soft brake lines
Fluids
Transmission
Differential
Brakes
Clutch
Make a handbrake mount
Make a temporary mount for the gauges
Neaten up some of the wiring
Make an air intake/filter
Re: GAS 1600
Amazing...congratulations!
-
two_68_510s

- Supporter
- Posts: 3894
- Joined: 18 Apr 2010 11:20
- Location: Ben Lomond California
Re: GAS 1600
Great sound, nice to see it running after all it has been through!!
Joel
2 '68 510 2 door sedans
'95 240SX
“We will either find a way, or make one.” – Hannibal
2 '68 510 2 door sedans
'95 240SX
“We will either find a way, or make one.” – Hannibal
Re: GAS 1600
"woah! ha ha haaa" - that made my day!

Re: GAS 1600
Fantastic build, wow!