Noobie's 510 project

View and post your 510 project(s)
User avatar
DADZSUN
Supporter
Posts: 581
Joined: 08 Aug 2011 18:35
Location: Ottawa, ON

Re: Noobie's 510 project

Post by DADZSUN »

Really? I don't think it's *that* much roll - especially for a street car.

Having said that, I tend to prefer a softer car. Here's a pic of my BSP 350z on a FTD run at the 2006 Nationals.
SoloNationals.JPG
SoloNationals.JPG (51.1 KiB) Viewed 4893 times
Last edited by DADZSUN on 23 May 2016 18:33, edited 1 time in total.
'72 Datsun 510 - MS KA24e, Watanabe, STI R180 & CV axles, R&P assisted steering
'76 Datsun 620 - VQ35DE, CD009, G35 suspension & brakes.
'76 Datsun 280z - Future track toy
Creativity outlet: www.datsunrestomods.com
User avatar
DADZSUN
Supporter
Posts: 581
Joined: 08 Aug 2011 18:35
Location: Ottawa, ON

Starter question

Post by DADZSUN »

Last year I had my starter rebuilt. Since that day I'd still get intermittent starter issues. It would be anywhere from 1-3 tries to get the starter to crank, otherwise I'd get a 'click'.

I took the starter out and brought it back to the rebuilder, they told me everything was in spec and showed on the test bench that it worked fine. I installed a relay to ensure the ignition wire voltage wasn't an issue. The problem persisted and I kind of lived with it to chase other issues.

That problem came to a head when the starter died altogether this weekend, during autocross no less. Yes, I push-started the car for each of my 5 runs and my son's 5 runs, plus one to get home.

In summary, I would get all of these issues with the starter:
  • 'clicks'
    a slow cranking action like the battery is nearly dead (it wasn't)
    a 'clunk' like starter pin would engage with the flywheel but not enough power to turn, and;
    nothing/silence like the battery was completely dead (wasn't lights were fine). Although it did intermittently start to work again later at home until again it died.
Battery voltage is 12.5v, ignition/small wire voltage is showing 12.3v when unplugged and ignition is in cranked position. When plugged into the solenoid the same wire shows 11.3v during ignition at crank (starter is NOT cranking) and the wire gets hot after repeated tries. Most telling I think, I tried shorting the starter by connecting the positive battery feed to the solenoid spade and all I got was one mini clunk then sparks.

Any thoughts as to what it is? I'm wondering if the start shows fine on the test bench under no load, but then starts to act up when loaded against a flywheel?
'72 Datsun 510 - MS KA24e, Watanabe, STI R180 & CV axles, R&P assisted steering
'76 Datsun 620 - VQ35DE, CD009, G35 suspension & brakes.
'76 Datsun 280z - Future track toy
Creativity outlet: www.datsunrestomods.com
User avatar
bertvorgon
Supporter
Posts: 12017
Joined: 04 Aug 2003 20:45
Location: White Rock, B.C. Canada

Re: Noobie's 510 project

Post by bertvorgon »

Sorry, I forget that not everyone has the same vision as I do, with an end goal the same. My car was built as a pure solo car.
"Racing makes heroin addiction look like a vague wish for something salty" - Peter Egan

Keith Law
1973 2 Door Slalom/hill climb/road race / canyon carver /Giant Killer 510
1971 Vintage 13' BOLER trailer
User avatar
DADZSUN
Supporter
Posts: 581
Joined: 08 Aug 2011 18:35
Location: Ottawa, ON

Re: Noobie's 510 project

Post by DADZSUN »

No need to appologize Keith. Your feedback is always appreciated and considered - as a result I'll be dialing up the compression on my Tokicos for the next event.

It turns out my starter issue was the solenoid. Thankfully the problem was reproduced at the rebuilder and after a quick swap I now have a have a perfect starter. It will be even more pleasant to take out for chores. :D
Westboro.jpg
Westboro.jpg (186.25 KiB) Viewed 4836 times
With the starter issue rectified, next on the Solo2 prep list is fixing the fuel that lightly drips out of the fuel filler line when cornering hard to the left. Its actually originating near the filler cap, from a slightly cracked vent tube that feeds from the top of the tank. Are there any 1-way check valves that can be pressed into the rubber connectors or something?
'72 Datsun 510 - MS KA24e, Watanabe, STI R180 & CV axles, R&P assisted steering
'76 Datsun 620 - VQ35DE, CD009, G35 suspension & brakes.
'76 Datsun 280z - Future track toy
Creativity outlet: www.datsunrestomods.com
User avatar
DADZSUN
Supporter
Posts: 581
Joined: 08 Aug 2011 18:35
Location: Ottawa, ON

Better torso retraint

Post by DADZSUN »

The most recent autocross reminded me that I had to address the lack of torso restrain in the 510. Regardless of performance needs, the current shoulder belt is mounted so high that it's pretty much impossible to setup comfortably, or in a way to prevent eating the steering wheel in an accident.

Several ideas when through my head on how to attack this:

The first plan was to leverage the existing rear mounts on the C pillars. Perhaps using a direct-mount Schrother Rallye 3 belt.
Rear_Harness_Mount.jpg
Rear_Harness_Mount.jpg (62.39 KiB) Viewed 4787 times
Rear_Harness_Bar.jpg
Rear_Harness_Bar.jpg (67.72 KiB) Viewed 4787 times
Rear_Harness_Mount_4.jpg
Rear_Harness_Mount_4.jpg (68.2 KiB) Viewed 4787 times
That idea quickly failed when I realised just how low the mount was compared to the rear backrest - and I wasn't going to give up the back seats.
Rear_Harness_Mount_3.jpg
Rear_Harness_Mount_3.jpg (57.78 KiB) Viewed 4787 times
I then thought of building an elevated harness bar so the belts cleared the rear backrest.
Rear_Harness_Mount_2.jpg
Rear_Harness_Mount_2.jpg (58.13 KiB) Viewed 4787 times
Not bad but my 260z seats with their wide integrated headrest wouldn't allow the belts to sit properly over my shoulder. I could always purchase some harness slots and cut the seat, but if that failed things could get ugly quick. Vintage JDM bucket seat proved to be expensive and the width would be questionable for my 36" waist. :oops:

Eventually I abandoned that train of thought because the cost of new seats, the belts, and harness bar material would quickly mount. I needed something more cost effective. I decided to use the existing shoulder mounts and simply drop them ~8" to a reinforced location approximately mid-B pillar.
Seatbelt_5.jpg
Seatbelt_5.jpg (142.33 KiB) Viewed 4787 times
This new location is not ideal from a perspective of structural strength, but it is a far superior fit than before, and hopefuly the B pillars could shave some energy off before potential failure. Regardless, it's likely a toss up if the 40 y/o webbing would snap before the B pillars would flex/fail. Seriously, I'm going to get those rewebbed this winter.
Seatbelt_4.jpg
Seatbelt_4.jpg (80.23 KiB) Viewed 4787 times
It was a little scary drilling and cutting the B pillar but it actually went pretty good. I managed to re-weld the access slots with the same pieces of OEM metal. Slowly, my welding is getting better, that was thin metal with a good 1/2mm gap to fill.
Seatbelt_3.jpg
Seatbelt_3.jpg (77.41 KiB) Viewed 4787 times
The new location is perfect for casual & spirited driving. For competitive driving I'm still not anchored as much as I'd like, but the 260Z seat don't offer enough bolstering or frame stiffness to really expect more.
Seatbelt_1.jpg
Seatbelt_1.jpg (77.29 KiB) Viewed 4787 times
The passenger side was also complete. Almost looks OEM.
Seatbelt_Brackets.jpg
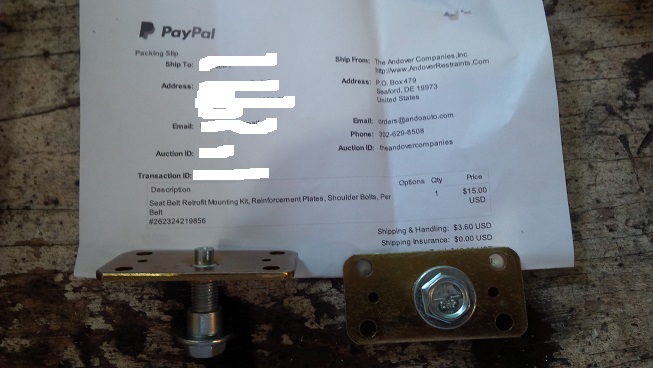
Seatbelt_Brackets.jpg (77.29 KiB) Viewed 4787 times
'72 Datsun 510 - MS KA24e, Watanabe, STI R180 & CV axles, R&P assisted steering
'76 Datsun 620 - VQ35DE, CD009, G35 suspension & brakes.
'76 Datsun 280z - Future track toy
Creativity outlet: www.datsunrestomods.com
User avatar
okayfine
Supporter
Posts: 14154
Joined: 12 Nov 2007 23:02
Location: Newbury Park, CA

Re: Noobie's 510 project

Post by okayfine »

Bummer you didn't post up your problem and desire to get your stuff rewebbed. The gotbelts.com guys offer an OE-look latch belt with an 8" drop, which fits the 510 perfectly and is retractable. ~$180 for a pair, can't really be beat.
Because when you spend a silly amount of money on a silly, trivial thing that will help you not one jot, you are demonstrating that you have a soul and a heart and that you are the sort of person who has no time for Which? magazine. – Jeremy Clarkson
User avatar
DADZSUN
Supporter
Posts: 581
Joined: 08 Aug 2011 18:35
Location: Ottawa, ON

Re: Noobie's 510 project

Post by DADZSUN »

okayfine wrote:Bummer you didn't post up your problem and desire to get your stuff rewebbed. The gotbelts.com guys offer an OE-look latch belt with an 8" drop, which fits the 510 perfectly and is retractable. ~$180 for a pair, can't really be beat.
Hey Julian,

Thanks for the suggestion but I was already well aware of gotbelts.com and after several conversations with the owner I realised it didn't fill my needs for several reasons:
  • The owner told me that their 8" shoulder drop belt is NOT fixed. In hard deceleration or an accident that 'virtual' shoulder mounting point (off the 8" drop) will pivot forwards before the inertia reel even begins to lock. That eats precious distance between my head and the steering wheel I'm looking to avoid, and it offers little to enhance the feeling of my upper torso being more secure during spirited driving. My new setup offers maybe an inch of free torso movement.

    Their $180 quote was for non-locking belts. If I recall it was another $50 or $230USD to get a locking mechanism which manually engaged the inertia reel. It sounded a little gimmicky, requiring me to reach back to the reel on the floor to engage, and only released when slack is introduced. Keeping my OEM setup allows for a more simplified cinching locked setup and total investment was only $20USD (rewebbing is about $120USD I believe).

    Gotbelts is not as clean. There's almost double the length in exposed belts and a large reel mounted to the floor. Yes, my new setup has an exposed hole in the headliner where the OEM mount was located, but I will purchase a painted cap to cover it for now. I hope to redo the interior/exterior when (if ever?) the kids move out.

    OEM setup offers more of an authentic feel which follows the theme of my 510. I purposely avoid power brakes, R&P steering and EFI to keep some 'engaging' quirks of the 510 era. Nothing is more quirky (sets the ambiance?) than screwing around with 3 belts when you first sit in the car.
No offense to those who purchased those belts. I'm convinced they fill a role for some projects which unfortunately wasn't in synch with my goals.

My setup has it's own flaws (potentially weaker mount and depending on 40 y/o belts), but for now the good outweighs the bad. I will likely send my OEM belts to gotbelts for rewebbing this winter, which will address one of the flaws. When I redo the interior I might further reinforce the entire B pillar to mitigate the other flaw.
'72 Datsun 510 - MS KA24e, Watanabe, STI R180 & CV axles, R&P assisted steering
'76 Datsun 620 - VQ35DE, CD009, G35 suspension & brakes.
'76 Datsun 280z - Future track toy
Creativity outlet: www.datsunrestomods.com
User avatar
okayfine
Supporter
Posts: 14154
Joined: 12 Nov 2007 23:02
Location: Newbury Park, CA

Re: Noobie's 510 project

Post by okayfine »

Totally understand your points. It wasn't my experience (especially with the locking reel, I didn't have a manual switch and never saw that it was an option), but things could change since I last ordered last year for Barney.
Because when you spend a silly amount of money on a silly, trivial thing that will help you not one jot, you are demonstrating that you have a soul and a heart and that you are the sort of person who has no time for Which? magazine. – Jeremy Clarkson
User avatar
Byron510
Moderator
Posts: 12658
Joined: 01 Jul 2003 23:06
Location: Maple Ridge, BC

Re: Noobie's 510 project

Post by Byron510 »

I always wondered what the rational was behind moving the belts up to the roof line on the 510. All 68's and I believe 69's in Canada came with the belt in the location where you moved yours to. Granted, there is factory reinforcement in the B pillar which was omitted once the mount location was moved. However I have never been given a good reason for this change having been made. Was it possible that the post simply wasn't strong enough?

At any rate, I agree with your change in mounting location. This effects taller guys more as we sit back further and the belt becomes a neck sawing device - most annoying!

I went back through my Ole Blue L 13 thread and found these two picture of the factory belt mount locations. As you can clearly see, the lower belt position works across my rather large frame -noted on the exterior photo.

Byron
Attachments
Exterior.jpg
Exterior.jpg (57.89 KiB) Viewed 4743 times
Interior.jpg
Interior.jpg (60.76 KiB) Viewed 4743 times
Love people and use things,
because the opposite never works.
User avatar
DADZSUN
Supporter
Posts: 581
Joined: 08 Aug 2011 18:35
Location: Ottawa, ON

Re: Noobie's 510 project

Post by DADZSUN »

Thanks for the pics Byron.

Would you know if the 2 door has it's B pillar mounted further rearward? If so, that would have helped with fitment somewhat as well.

I'm curious as to the type of reinforcement you said was provided in the earlier models. Was it thicker metal, seam welding, or an extra brace that ran the full length of the B pillar?
'72 Datsun 510 - MS KA24e, Watanabe, STI R180 & CV axles, R&P assisted steering
'76 Datsun 620 - VQ35DE, CD009, G35 suspension & brakes.
'76 Datsun 280z - Future track toy
Creativity outlet: www.datsunrestomods.com
User avatar
Byron510
Moderator
Posts: 12658
Joined: 01 Jul 2003 23:06
Location: Maple Ridge, BC

Re: Noobie's 510 project

Post by Byron510 »

Yes, the 2dr pillar is 4" or so further backward.

I don't recall exactly what the reinforcement is, I just remember years ago noting that it was there. Anyone with a 68 or 69 with the lower belt points have a photo of their inner B pillar without the headliner in place?

Byron
Love people and use things,
because the opposite never works.
indy510
Posts: 1470
Joined: 24 Aug 2007 14:40
Location: San Fransciso, CA

Re: Noobie's 510 project

Post by indy510 »

I think I measured the 2dr door at 6" longer than a 4dr front door. But the pillars have a different angle, so the seat belt hole probably isn't exactly 6" further back.
User avatar
DADZSUN
Supporter
Posts: 581
Joined: 08 Aug 2011 18:35
Location: Ottawa, ON

New filler neck

Post by DADZSUN »

As I'm driving the car more this year than ever before, little 'issues' are becoming more prominent with accelerated wear. The smell of gas was previously subtle when driving hard but it became more noticeable this year, and that it occured on left hand turns. Andrew casually mentioned on my last visit about how fuel can slosh back up the filler neck and out the cap. In my case I think it was leaking out of the rubber connector just inside the quarter panel. A wet spot would always appear after an autocross run. Either way, it had to be fixed.

A quick (fun!) trip to the Kenny Pick N Pull helped me locate a donor. I felt like a perv peeking under dozens of car's rear wheels to see if their filler neck was what I was looking for. I eventually settled on a Subaru Outback (1995-1999) due to it's ideal vent tube location, larger piping size, and the fact that it was a Japanese make (along with my LSD).
Donor.jpg
Donor.jpg (237.57 KiB) Viewed 4612 times
A quick check at home showed that this had good potential.
SeamSealed.jpg
SeamSealed.jpg (210.4 KiB) Viewed 4612 times
I repurposed/welded the Datsun's fuel door front plate as a new backplate for the neck. I cut a new front cover plate for asthetic purposes only.
BackPlateWeldedOn.jpg
BackPlateWeldedOn.jpg (290.99 KiB) Viewed 4612 times
For the tubing, I used only the Subaru's piping and a small exhaust flare to match the tank's OD piping.
FinishedProduct.jpg
FinishedProduct.jpg (316.03 KiB) Viewed 4612 times
Once it was all welded up, I seam sealed the joins then tested with water to ensure no liquid would escape.
TestFit.jpg
TestFit.jpg (162.8 KiB) Viewed 4612 times
When test fitting I noticed the quarterpanel would flex surprisingly easy if I wiggled the filler neck, so I welded a brace onto the neck which bolts up to an existing hole on the chassis' structure. It's rock-solid now. You can also see the cork 'spacer' I fabbed to offset the door's inner lip which flared inwards, this allowed the filler neck's backplate to seat flush to the quarterpanel.
AnchorPoint.jpg
AnchorPoint.jpg (167.75 KiB) Viewed 4612 times
Once the brace's welding was done I POR15 everything.
FlareToTank.jpg
FlareToTank.jpg (189.34 KiB) Viewed 4612 times
The orientation of the trap door when mounted was pretty much bang-on. And yes, I'll purchase some matching bolts when I get the time.
ViewFromDoor.jpg
ViewFromDoor.jpg (173.08 KiB) Viewed 4612 times
A 'modern' gas cap to prevent to prevent leaking will be nice.
GasCap.jpg
GasCap.jpg (158.7 KiB) Viewed 4612 times
Overall I'm quite pleased with how the project turned out. I've removed a lot of rubber out of the equation, I have a hinged door and tight cap to control sloshing/leaking, and there's no issues with the trunk's hing hitting the vent tube. It took me maybe 4 hours of work and cost only $5 (not a typo LOL) for the Subaru part and approx $10.50 for the exhaust flare.
After.jpg
After.jpg (213.15 KiB) Viewed 4612 times
For the vent line that came off the charcoal canister to the filler neck, I simply capped it as the other line still vents out under the trunk.
'72 Datsun 510 - MS KA24e, Watanabe, STI R180 & CV axles, R&P assisted steering
'76 Datsun 620 - VQ35DE, CD009, G35 suspension & brakes.
'76 Datsun 280z - Future track toy
Creativity outlet: www.datsunrestomods.com
User avatar
DADZSUN
Supporter
Posts: 581
Joined: 08 Aug 2011 18:35
Location: Ottawa, ON

Lucas to the rescue?

Post by DADZSUN »

My 510 is sooo close to being pretty much to the point that I could feel comfortable driving it across the country, or using it for DD if I had to.

My last hurtle is the lifters and their persistent noise. I've spent a fair bit of time trying to resolve this:
  • I've replaced all the lifters ($$)
    I've swapped oil from 10w30 to 10w40
    I replaced just the oil pump gasket
    I then replaced the oil pump
Each helped, but never resolved it completely. The new lifters gave me a quiet drive until the oil heated up & thinned out. Moving to heavier oil definitely delayed the onset of the ticking.

A new high volume (ie: KA24e) oil pump bumped the pressure up a bit and steadied things at higher RPM.
OilPump_1.jpg
OilPump_1.jpg (108.21 KiB) Viewed 4589 times
My latest (and hopefully final) attempt before giving up and dropping $550USD for mechanical lifters and cam was to try thicker oil 20w50. At Cdn tire I noticed a bottle of Lucas oil stabilizer which I've read as a potential solution for some KA24e owners. Rather than ditch the existing oil which is only 1000km old, I decided to try this solution first.
LucasOilStabilizer.jpg
LucasOilStabilizer.jpg (115.78 KiB) Viewed 4589 times
I poured about 1/3 bottle when the motor was still hot and the ticking persisted after restart and a short drive. Knowing that things 'reset' when the engine is cool I decided to reserve judgement until the next day. I took the car out today and after a good hour of driving and several engine restarts I still have a quiet motor!!! :D I will not declare this resolved just yet until I get a good week or two of silence but it's certainly looking promising!
'72 Datsun 510 - MS KA24e, Watanabe, STI R180 & CV axles, R&P assisted steering
'76 Datsun 620 - VQ35DE, CD009, G35 suspension & brakes.
'76 Datsun 280z - Future track toy
Creativity outlet: www.datsunrestomods.com
User avatar
bertvorgon
Supporter
Posts: 12017
Joined: 04 Aug 2003 20:45
Location: White Rock, B.C. Canada

Re: Noobie's 510 project

Post by bertvorgon »

Maybe you do not know..but...you can shim that pump. behind that BIG nut head is the blow off spring. If you put a very thin washer there, that will give you more oil pressure. Start THIN so as not to blow up the oil filter.... :lol:
"Racing makes heroin addiction look like a vague wish for something salty" - Peter Egan

Keith Law
1973 2 Door Slalom/hill climb/road race / canyon carver /Giant Killer 510
1971 Vintage 13' BOLER trailer
Post Reply