Page 2 of 10
Re: Five-Hundred and Ten
Posted: 17 Jan 2018 05:33
by bertvorgon
Did you see if the diff was there?
Re: Five-Hundred and Ten
Posted: 17 Jan 2018 09:08
by MarkReidHRC
Yes. Sent you a PM
Re: Five-Hundred and Ten
Posted: 18 Jan 2018 19:09
by MarkReidHRC
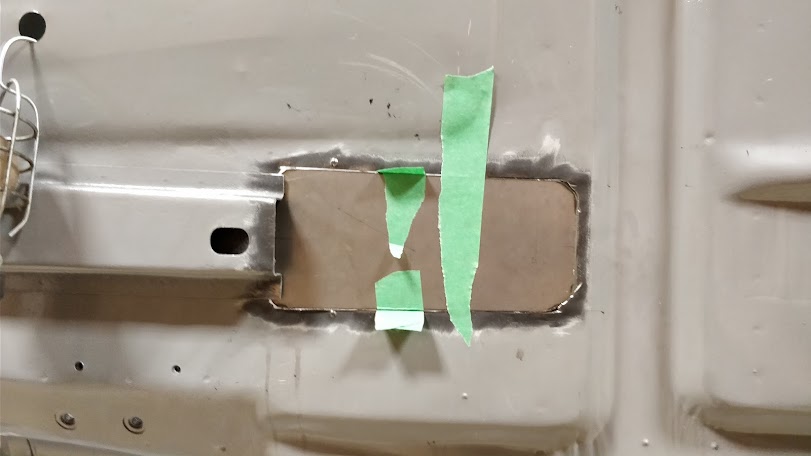
Started on some rust removal. Started on the floor where the finished product in not super critical. This is the first time we will be doing patchwork. Watched some Youtube so were all good right?
Cut the rusty floor support out

Cut out the floor and install a patch
Pattern for the floor support

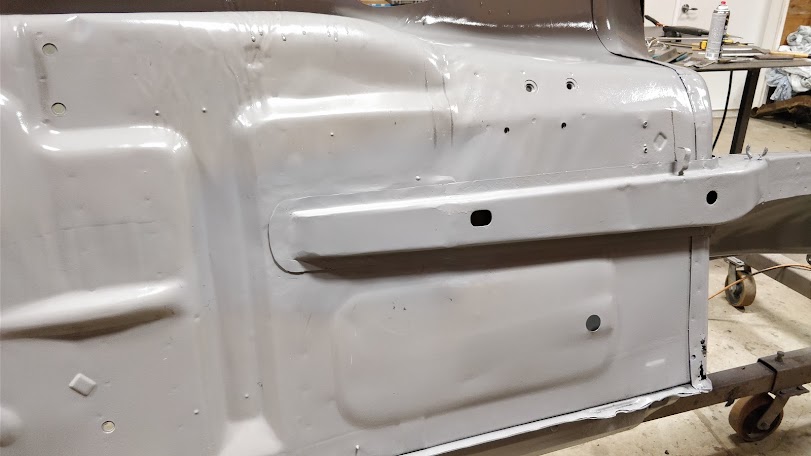
Floor support ready to be installed.

Patch and support in and primed.
Re: Five-Hundred and Ten
Posted: 18 Jan 2018 19:28
by two_68_510s
Clean, looks good.
Re: Five-Hundred and Ten
Posted: 18 Jan 2018 19:57
by Fred_L-P
looks very good indeed, especially for a first time. Mine is rusted at the exact same spot. It gives me a bit of confidence since I've never done any patchwork either.
Keep it up!
Re: Five-Hundred and Ten
Posted: 18 Jan 2018 20:31
by Heinrich
nice.awesome work, especially for a first timer.
youtube has also been my saving grace.
Re: Five-Hundred and Ten
Posted: 19 Jan 2018 08:56
by MarkReidHRC
Picked up the body panels and Futofab sent. Also started work on the rear cross member.
Body panels

K-Brezy carefully removing inner control arm bracket to make way for bigger exhaust and Byron brackets.
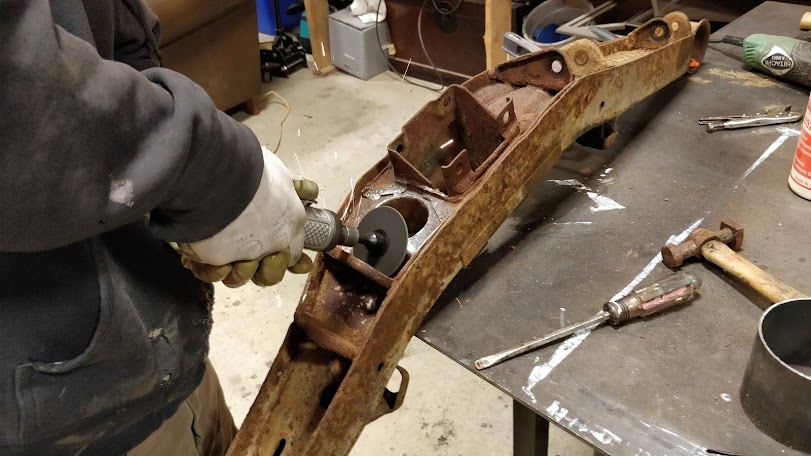
Bigger exhaust hole in the cross member to allow for the proper sound to exit the tailpipe.
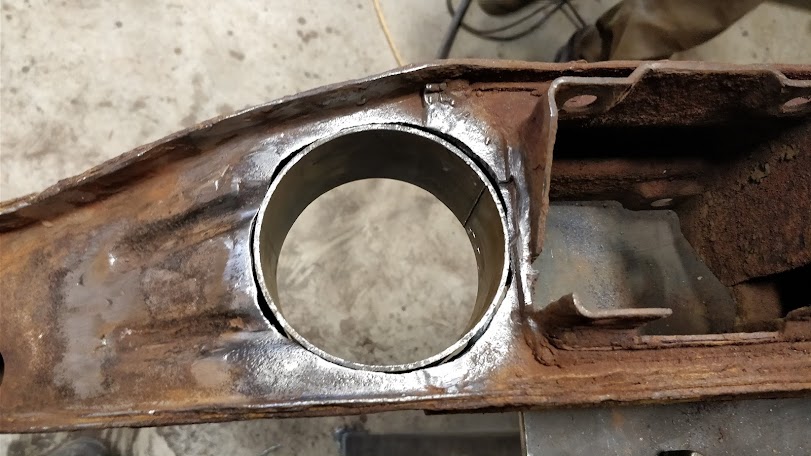
All welded up

Re: Five-Hundred and Ten
Posted: 19 Jan 2018 09:02
by MarkReidHRC
I post a few of the pictures I take along the way on this forum but not all.
If any one is interested here is a link to all the pictures I take of the project.
https://photos.app.goo.gl/4yFs4FReGdygkJ7X2
Re: Five-Hundred and Ten
Posted: 20 Jan 2018 05:01
by qwik510
Welcome to the Realm. Looks like a great project. Great work!
Nice score on the ZX struts.
Can't wait to see more.
Re: Five-Hundred and Ten
Posted: 20 Jan 2018 06:18
by Byron510
Just browsed through your photo album, great to see your documentation by photos.
I am glad to see that your crossmember was not rotted through behind the factory inner bracket when you removed it. I have found a number of crossmembers lately- ones that looked much better than yours on the surface - where road debris gets between the two sandwiched together metal parts, holds the moisture and rots the crossmember out. The problem is that you can’t know the rust is there until you remove the factory welded on brackets. The outters seem to be more susceptible than the inner brackets for this issue.
It looks like you have the space to spread out a little. And it looks like your son will be honing his welding skills! But it also looks like your car was complete with all trim items and interior parts which is a huge help.
I look forward to your updates as progress looks to be moving forward at a nice rate.
What are your plans for power (did I miss this in your intro?). How about interior and suspension modifications?
Byron
Re: Five-Hundred and Ten
Posted: 20 Jan 2018 19:45
by MarkReidHRC
Saturday was a cold, wet, and windy day outside, but a great day in the shop. I had my 2 sons helping so we got quite a bit accomplished. We took the car off the rotisserie because we had borrowed it from the sandblaster. Made a make shift one by bolting a couple of fence pipes bent into circles onto the cart we had previously made. It's not as nice as the proper rotisserie but it will work.
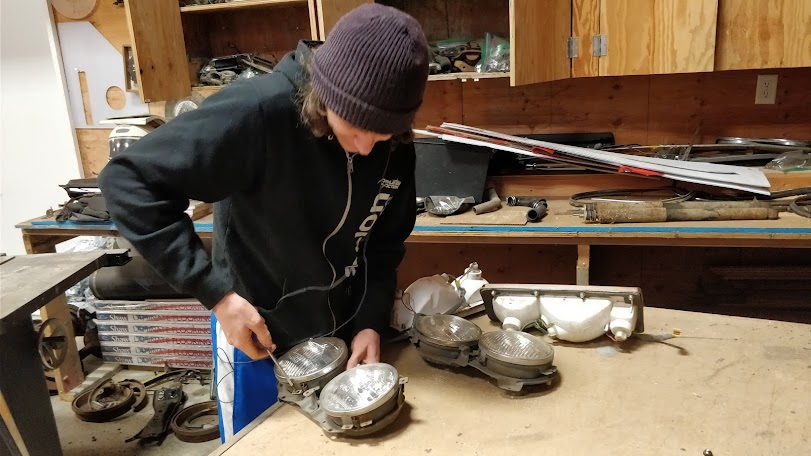
K-Breezy did some welding on the cross member while J-rod disassembled headlight units. Oh yes always lots of clean up to do.
J-Rod working on headlight units. Powder Coat or re plate?
K-Breezy Tig welding on a Byron bracket.

Self taught (Youtube is amazing)

Make shift rotisserie

Re: Five-Hundred and Ten
Posted: 20 Jan 2018 20:15
by MarkReidHRC
Byron510 wrote:Just browsed through your photo album, great to see your documentation by photos.
I am glad to see that your crossmember was not rotted through behind the factory inner bracket when you removed it. I have found a number of crossmembers lately- ones that looked much better than yours on the surface - where road debris gets between the two sandwiched together metal parts, holds the moisture and rots the crossmember out. The problem is that you can’t know the rust is there until you remove the factory welded on brackets. The outters seem to be more susceptible than the inner brackets for this issue.
It looks like you have the space to spread out a little. And it looks like your son will be honing his welding skills! But it also looks like your car was complete with all trim items and interior parts which is a huge help.
I look forward to your updates as progress looks to be moving forward at a nice rate.
What are your plans for power (did I miss this in your intro?). How about interior and suspension modifications?
Byron
So far our plans for the car are:
Engine- I have two L20B's I have had for 30 years. Would like to get a Rebello 2.3 but that is $$$. You can't beat the classic Datsun sound!
5 Speed Transmission. I have also been storing it for 30 years
I would like to install air suspension but I'm not sure yet. Kind of a cool idea to change ride height with the touch of a button.
R-180 LSD rear end and CV's
Interior was in almost perfect condition so planning to go stock.
I like the hidden wires in the engine bay idea.
Still getting lots of ideas from the 510realm.
Would like to have mostly stock look but go kinda fast. A bit of a sleeper.
We will see where time and money will take us...
Re: Five-Hundred and Ten
Posted: 21 Jan 2018 11:34
by JordanTr
Your boys are lucky to sink their teeth into a project like this with you. I'm sure there will be lots of learning and good times for all. I say this because I was in their shoes 10 years ago and I wouldn't have had it any other way!
Such a cool rotisserie idea as well! Will you brace the hoops any further or is it strong enough as is? What material/cross section are the hoops?
It sounds like you have a great plan going forward. I'm biased toward EFI but to each their own.

We look forward to more updates.
Re: Five-Hundred and Ten
Posted: 26 Jan 2018 07:25
by MarkReidHRC
JordanTr wrote:Your boys are lucky to sink their teeth into a project like this with you. I'm sure there will be lots of learning and good times for all. I say this because I was in their shoes 10 years ago and I wouldn't have had it any other way!
Such a cool rotisserie idea as well! Will you brace the hoops any further or is it strong enough as is? What material/cross section are the hoops?
It sounds like you have a great plan going forward. I'm biased toward EFI but to each their own.
We look forward to more updates.
The hoops are made of 1-1/4 sched 40 pipe. A 20' length makes about a 78" dia. hoop. Seems to be strong enough as is.
Rear cart attach points

Front cart attach points

The hoops bolt onto the front and back of the cart. The front hoop has a vertical brace to the top of the hoop to stop the hoop from wobbling. The hoops are also joined at the top to prevent the rear hoop from wobbling. I may build a couple sets of concave wheels for the hoops to roll in but for now this works fine. I have the space to roll the car and can manage it myself.

Re: Five-Hundred and Ten
Posted: 26 Jan 2018 07:45
by MarkReidHRC
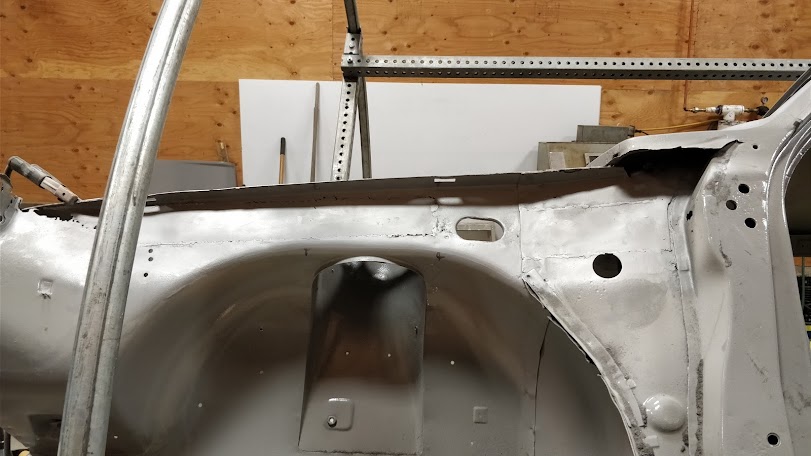
Steady progress on the car in the last few days.
Since the sandblasting removed the rust there are areas of the car that are "missing."

Patch in some new metal.

Welded and primed.
Remove the old.
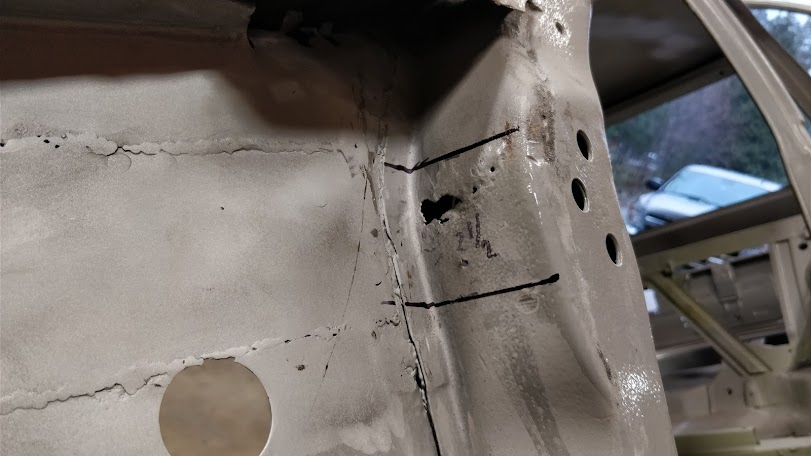
Weld in new.
