Blue '71 Project
-
RONSLYCHUK
- Supporter
- Posts: 783
- Joined: 12 Sep 2004 19:42
- Location: Abbotsford B.C.
Re: Blue '71 Project
Nice job. Very clean install.

Re: Blue '71 Project
Great looking battery kill switch! Where did you source that?
Regards,
Owen
70 Datsun 510 2 door - SR20DET - https://www.the510realm.com/viewtopic.php?t=34572
64 Studebaker Daytona - Supercharged 289 4 speed
65 Sunbeam Tiger MkI
Owen
70 Datsun 510 2 door - SR20DET - https://www.the510realm.com/viewtopic.php?t=34572
64 Studebaker Daytona - Supercharged 289 4 speed
65 Sunbeam Tiger MkI
Re: Blue '71 Project
Thanks guys. I got that switch from Amazon, it's just your basic battery cut-off switch and I made that little metal box to mount it in.
Chris
'71 510 4-Door Sedan
'76 280z
'71 510 4-Door Sedan
'76 280z
Re: Blue '71 Project
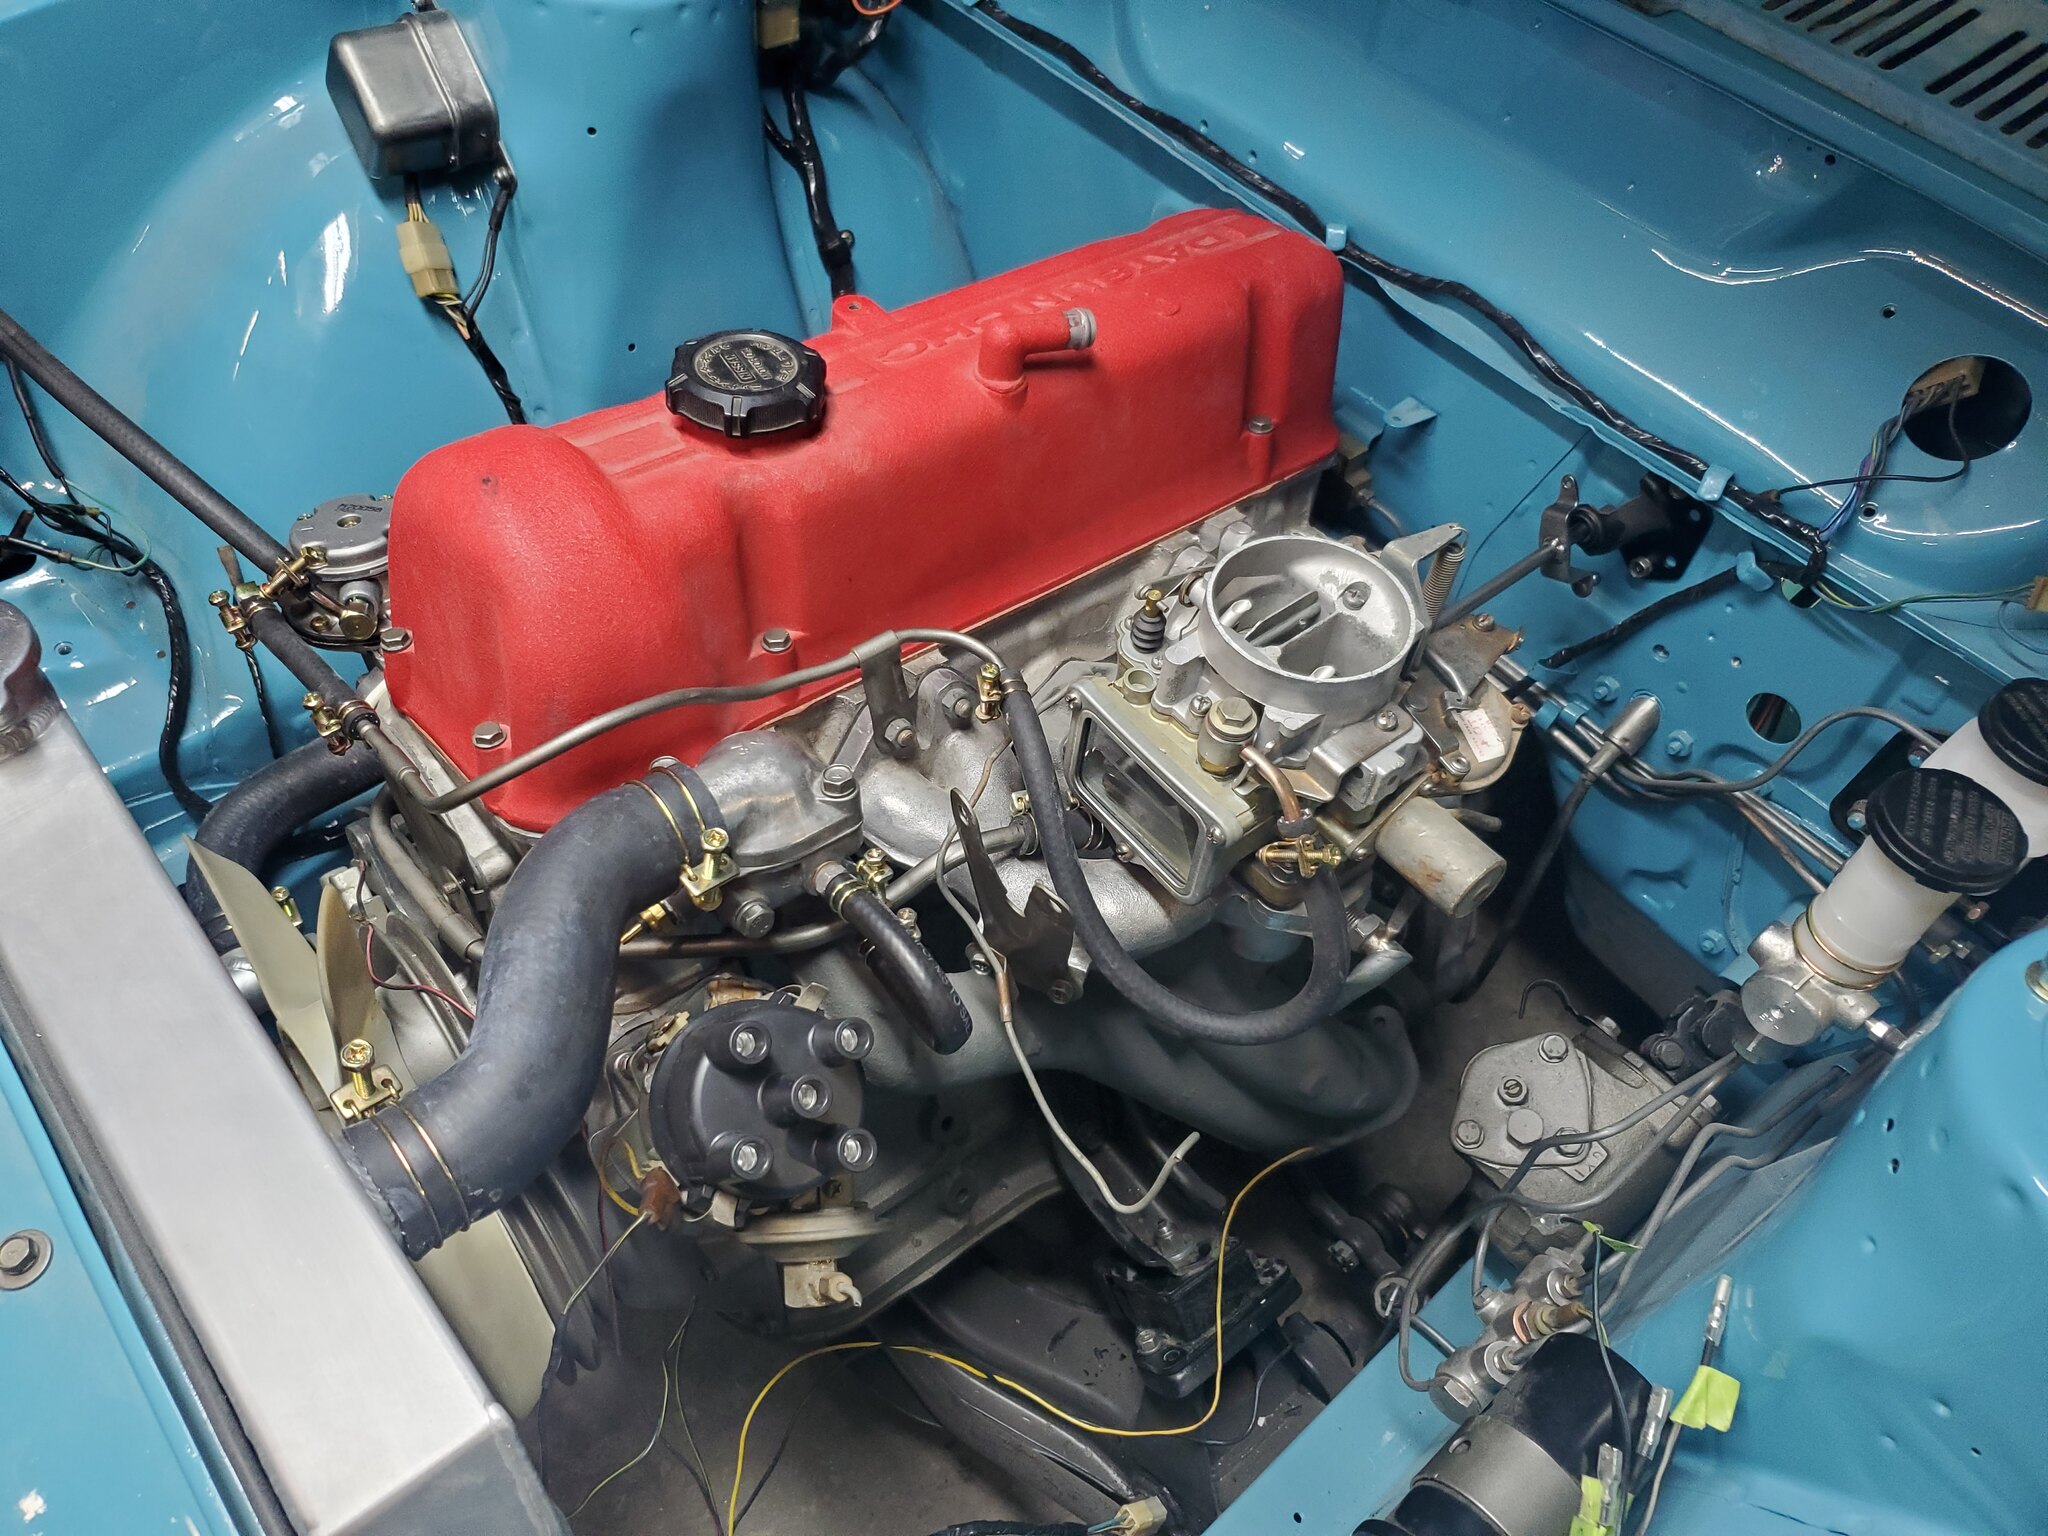
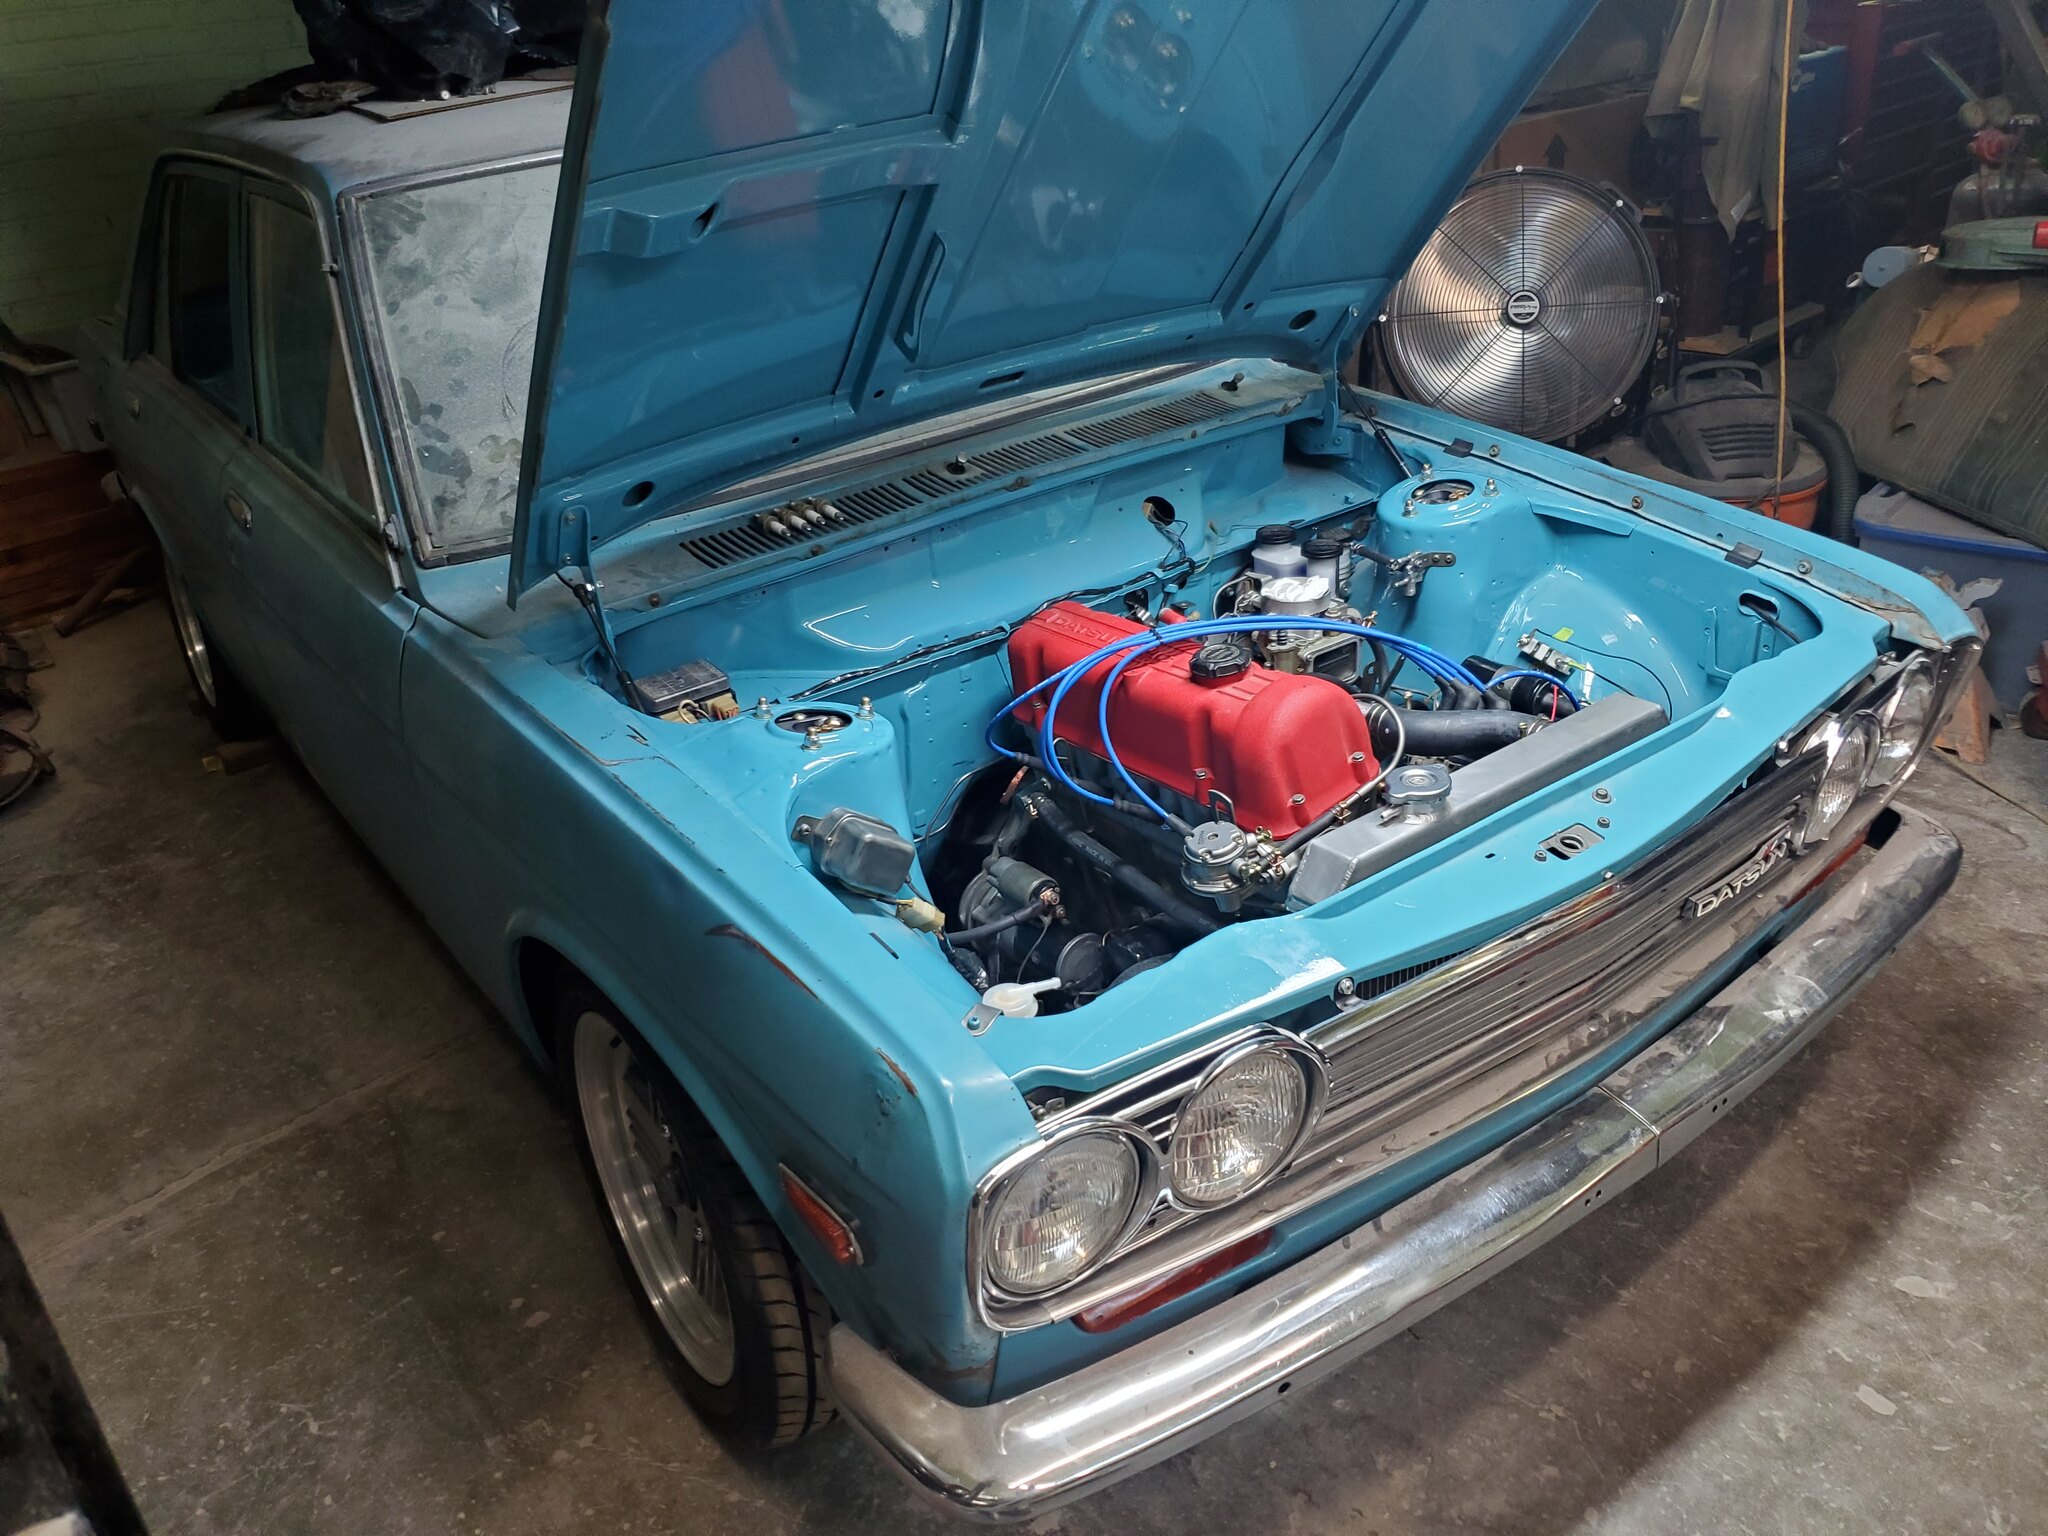
Made a little more progress. Installed the starter and made the last battery cable, also installed the distributor, carb and various coolant and fuel hoses. Not a huge fan of the color of the NGK plug wires, but it's what I've got so they'll work for now. I need to bleed the brakes/clutch, fill everything with fluids, then hopefully see if it'll run sometime soon.


Chris
'71 510 4-Door Sedan
'76 280z
'71 510 4-Door Sedan
'76 280z
-
slowerthantime
- Supporter
- Posts: 246
- Joined: 06 Mar 2017 19:47
- Location: Summerland B.C.
Re: Blue '71 Project
Looking good Chris.
Re: Blue '71 Project
I got the car running last weekend, so that was pretty cool. Adjusted the timing and it seems to be running fairly well, it's a little cold natured, but it cranks right up and idles nicely. I let it run a few times checking the oil pressure, water temp and looking for any leaks or abnormal sounds. Only a small oil leak from the valve cover gasket and I'll probably need to adjust the valves a bit.
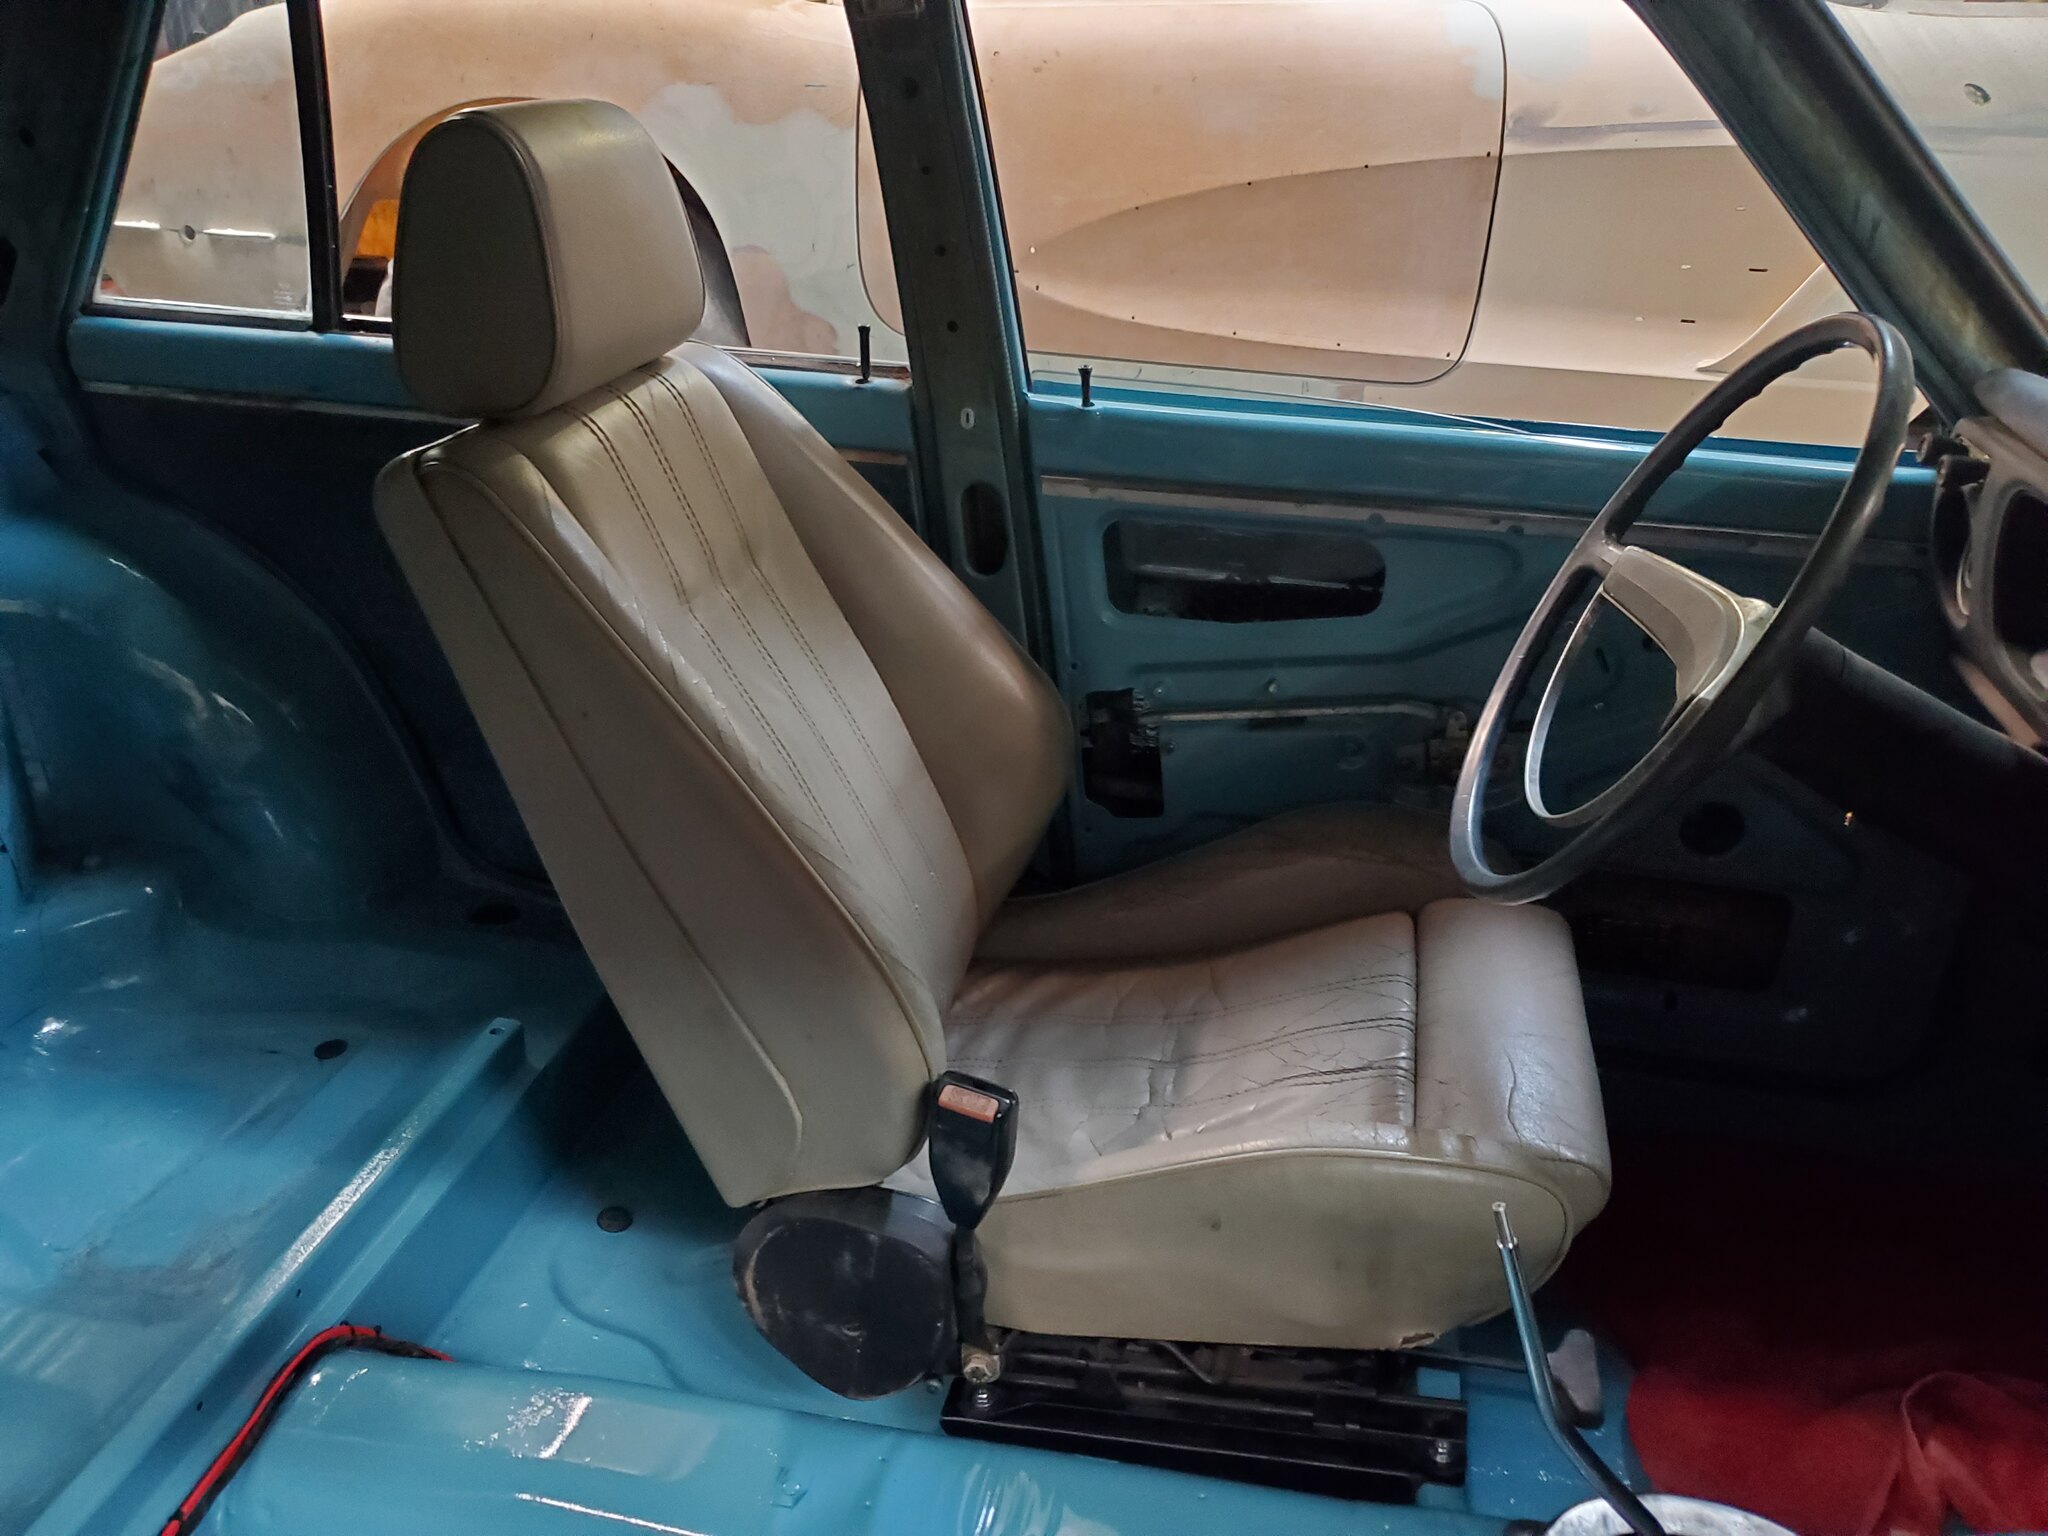
I mounted the drivers seat so I could test drive it. I'm using a pair of E30 sport seats. The color is terrible but they need to be recovered anyway so I'll do that later, they are good enough to use for the moment. I used the original 510 seat risers/brackets and just drilled new holes to match the bolt pattern of the E30 seats. They sit slightly higher than I'd like, but they aren't too bad.
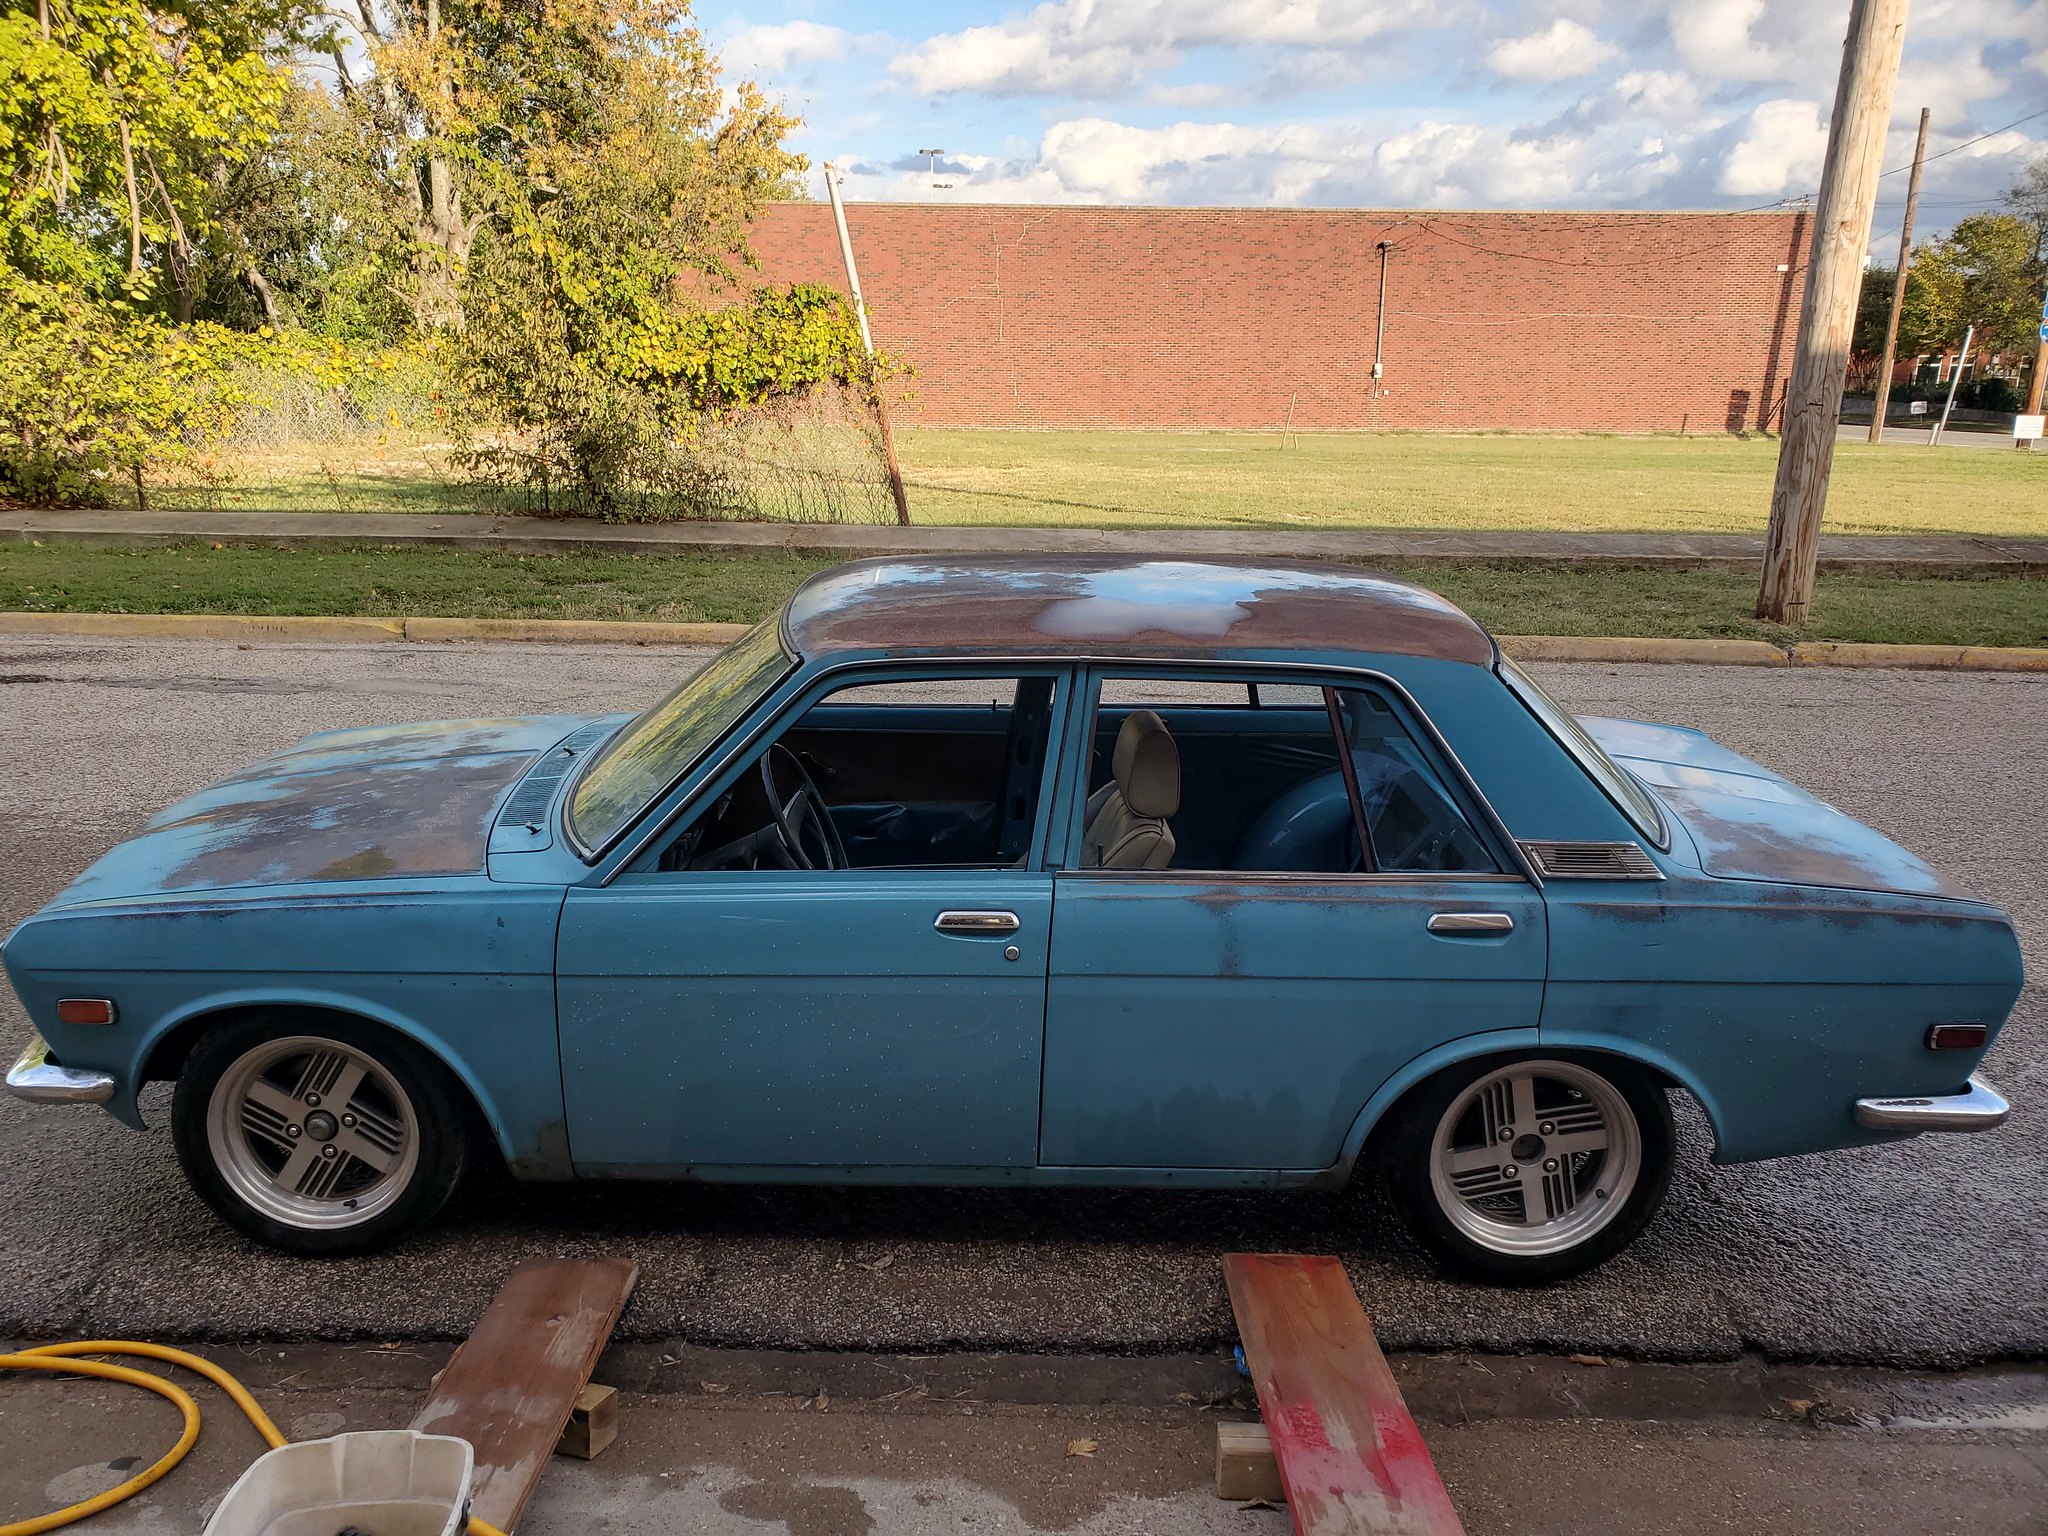
Then I pulled it out of the shop for the first time in almost 4 years, washed it off and took it around the block a few times, seems to be doing alright so far. I need to get a full exhaust made for it, right now I'm just using a piece of the old original exhaust.
All lights work except my headlights and turn signals, so I need to dive into that and figure out what's going on there.
I mounted the drivers seat so I could test drive it. I'm using a pair of E30 sport seats. The color is terrible but they need to be recovered anyway so I'll do that later, they are good enough to use for the moment. I used the original 510 seat risers/brackets and just drilled new holes to match the bolt pattern of the E30 seats. They sit slightly higher than I'd like, but they aren't too bad.
Then I pulled it out of the shop for the first time in almost 4 years, washed it off and took it around the block a few times, seems to be doing alright so far. I need to get a full exhaust made for it, right now I'm just using a piece of the old original exhaust.
All lights work except my headlights and turn signals, so I need to dive into that and figure out what's going on there.
Chris
'71 510 4-Door Sedan
'76 280z
'71 510 4-Door Sedan
'76 280z
Re: Blue '71 Project
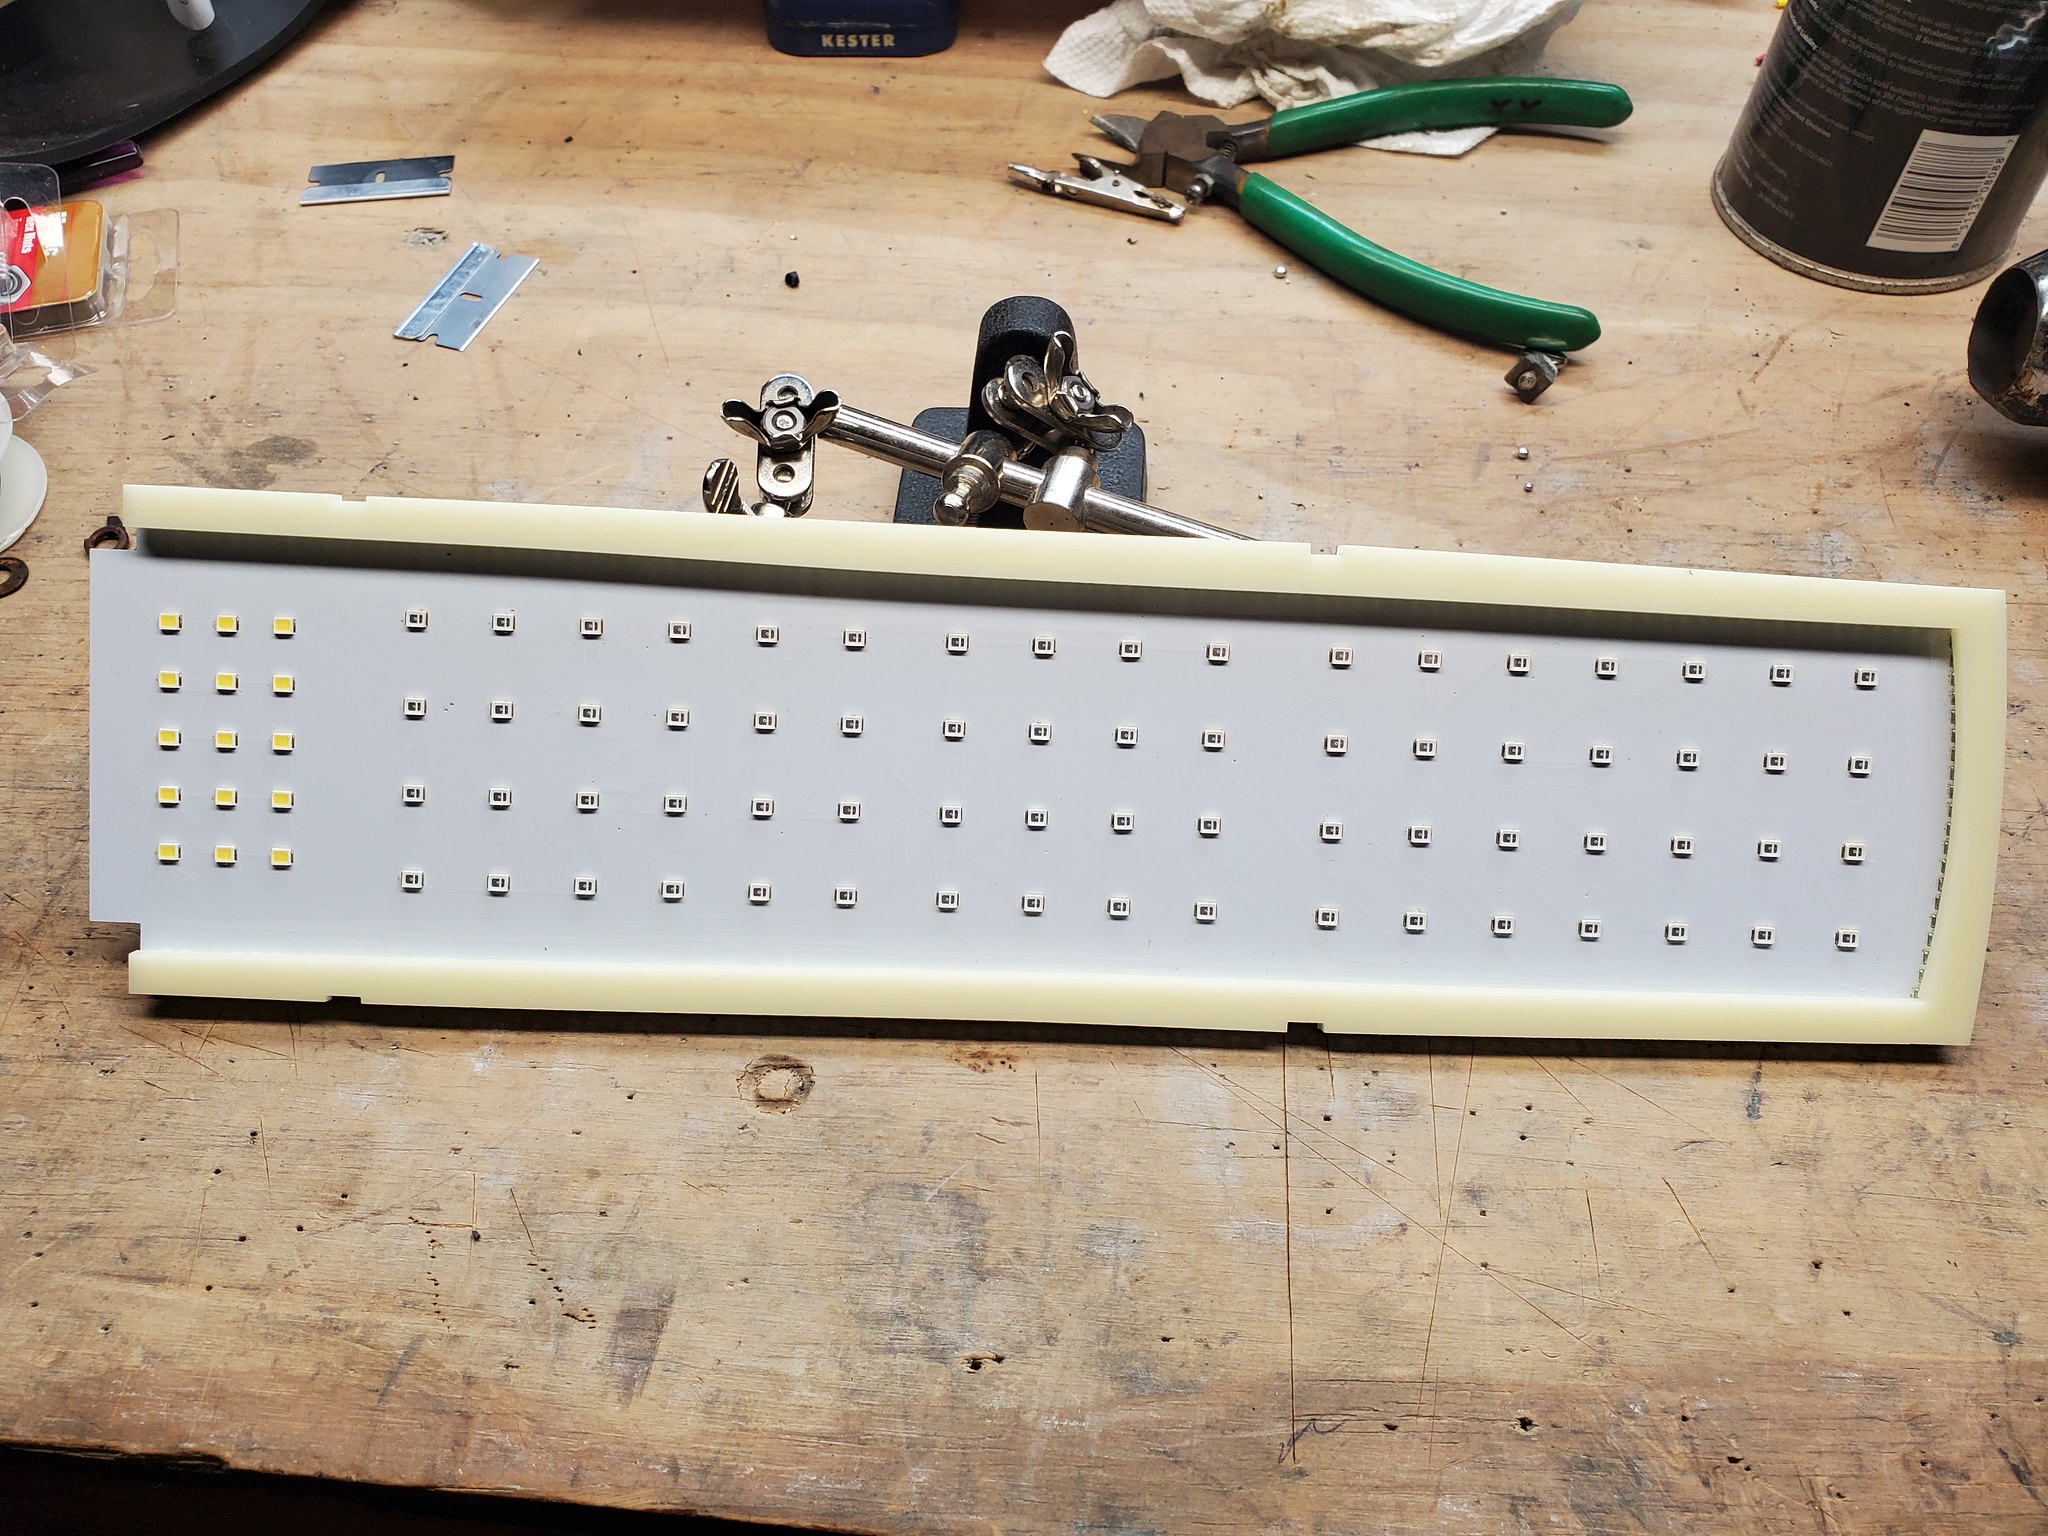
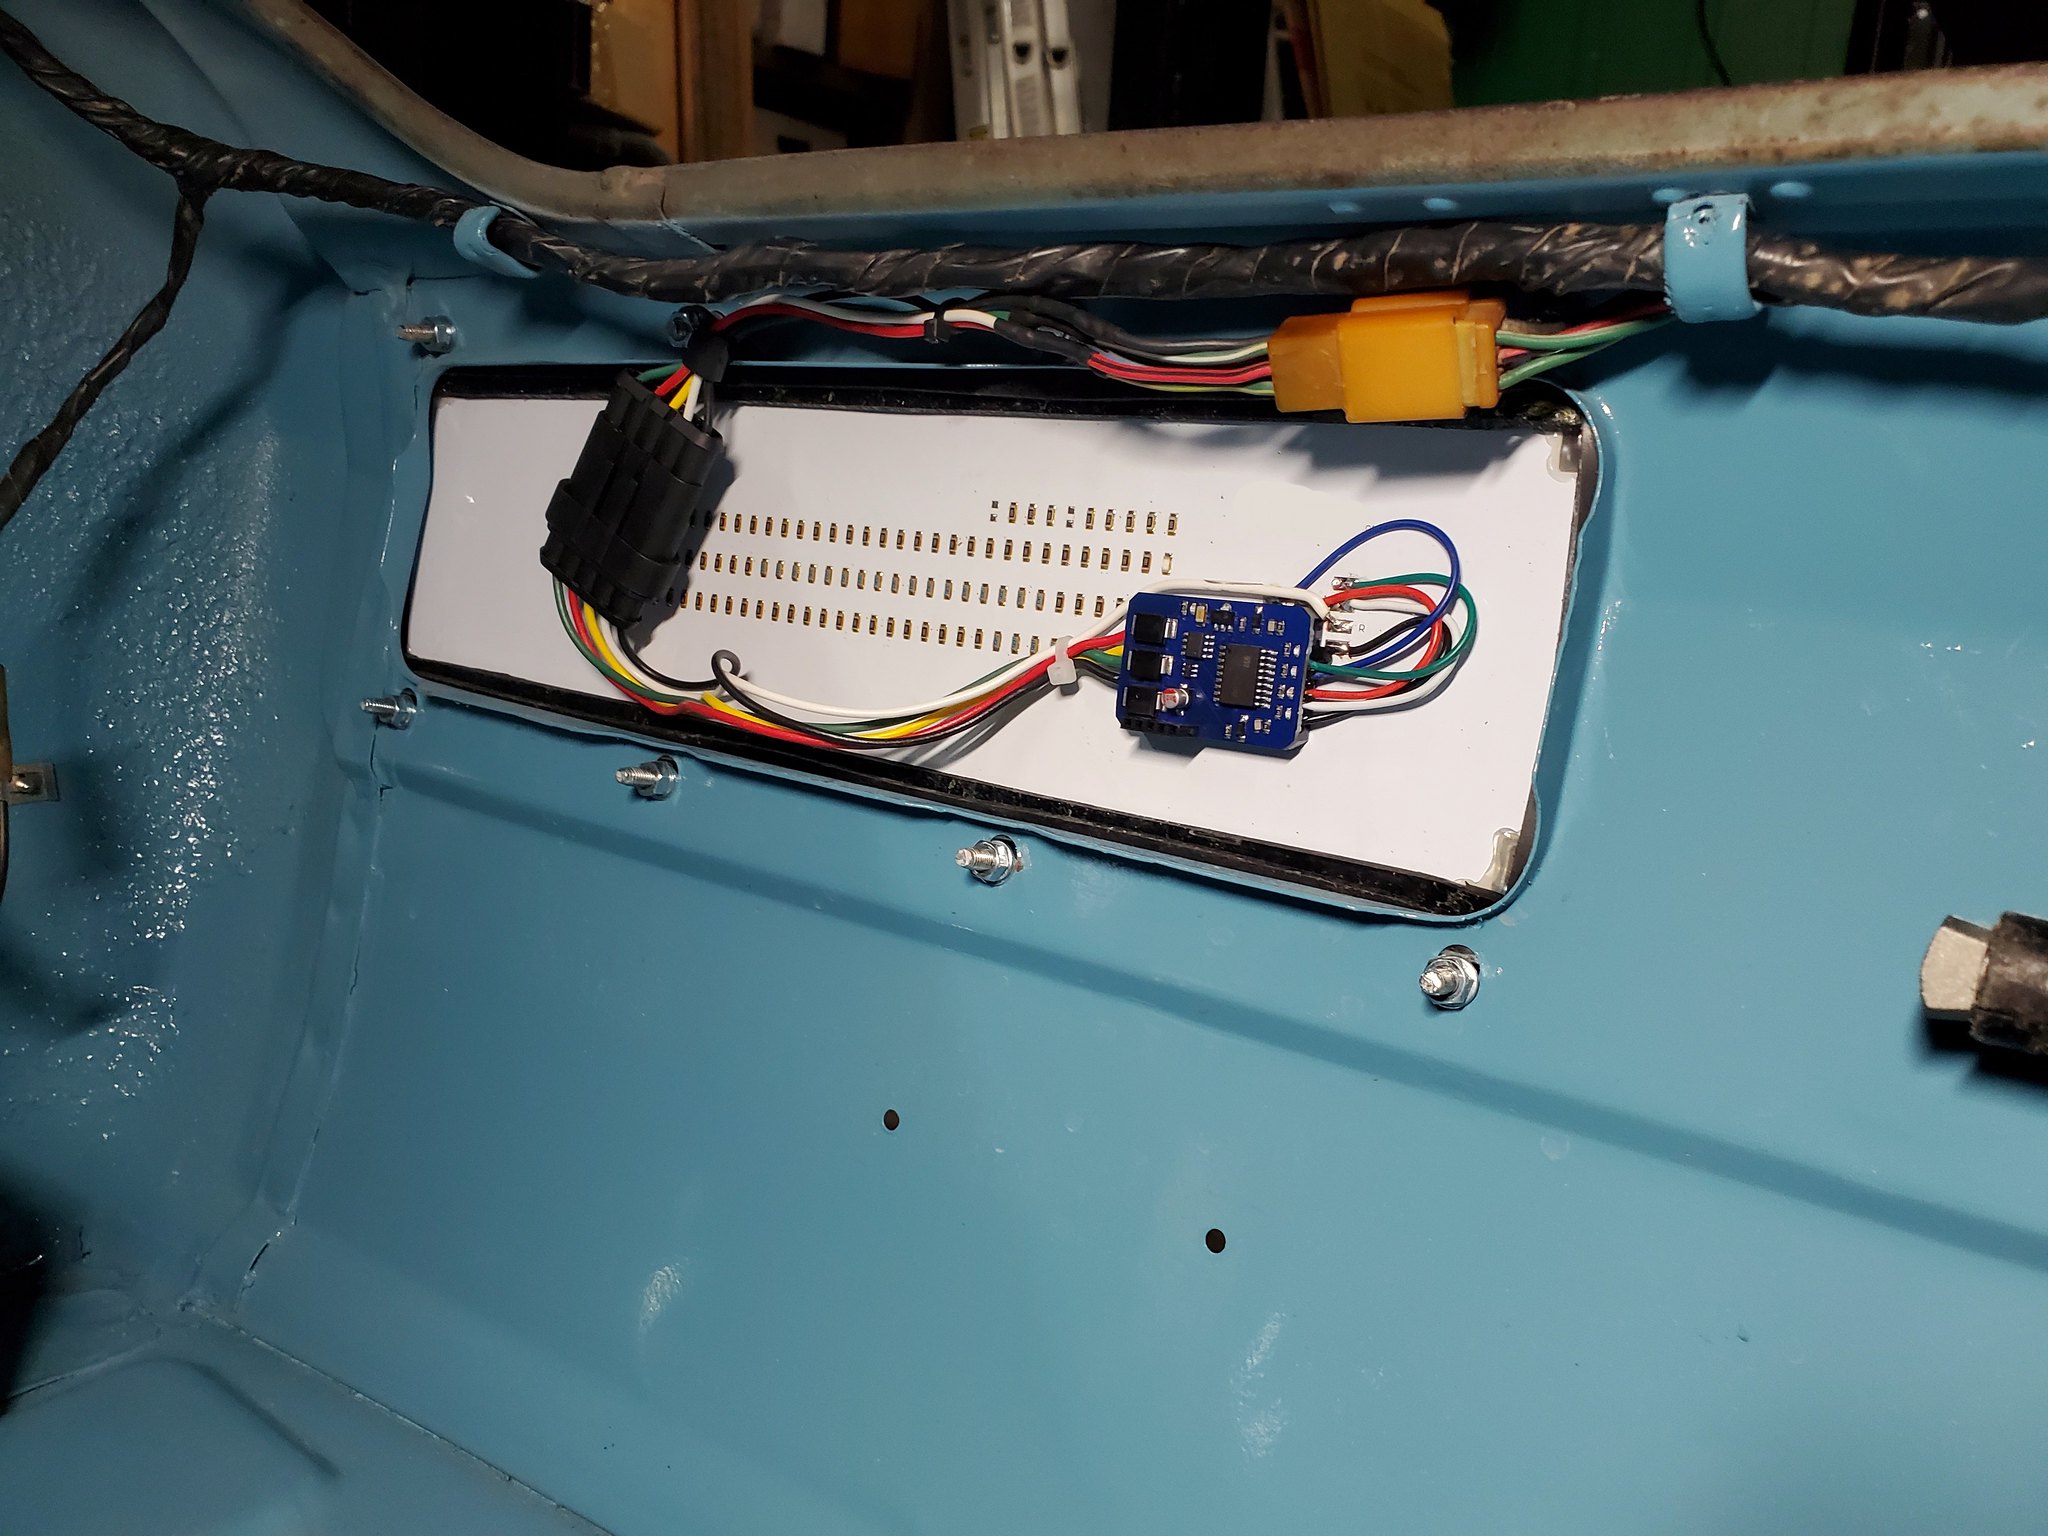
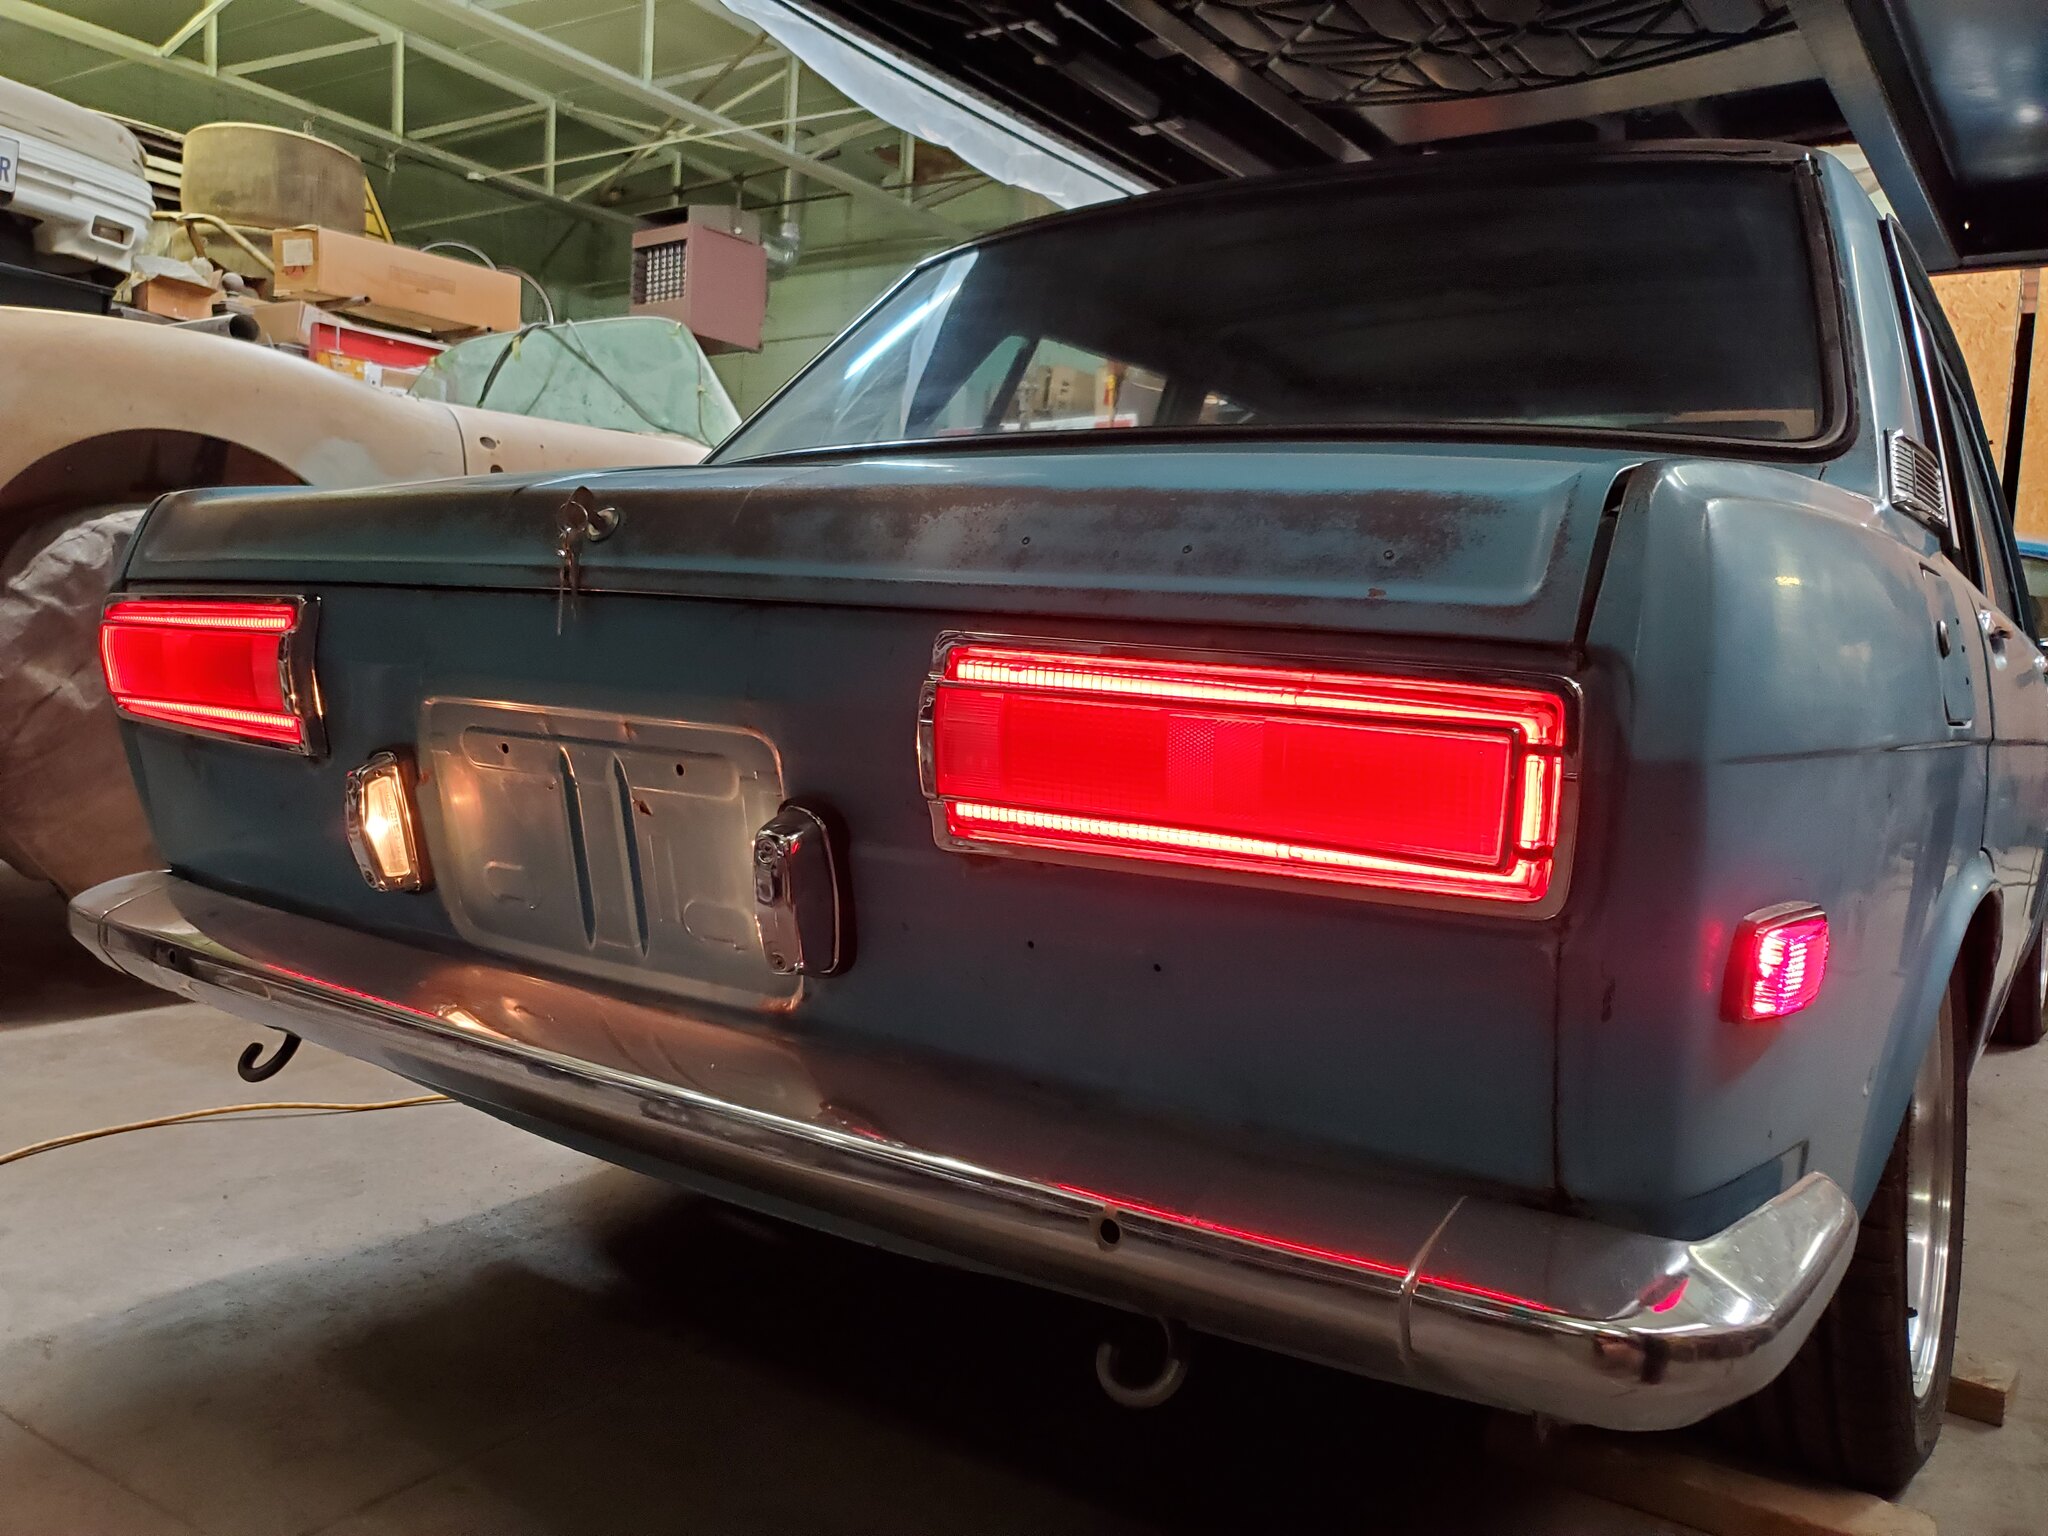
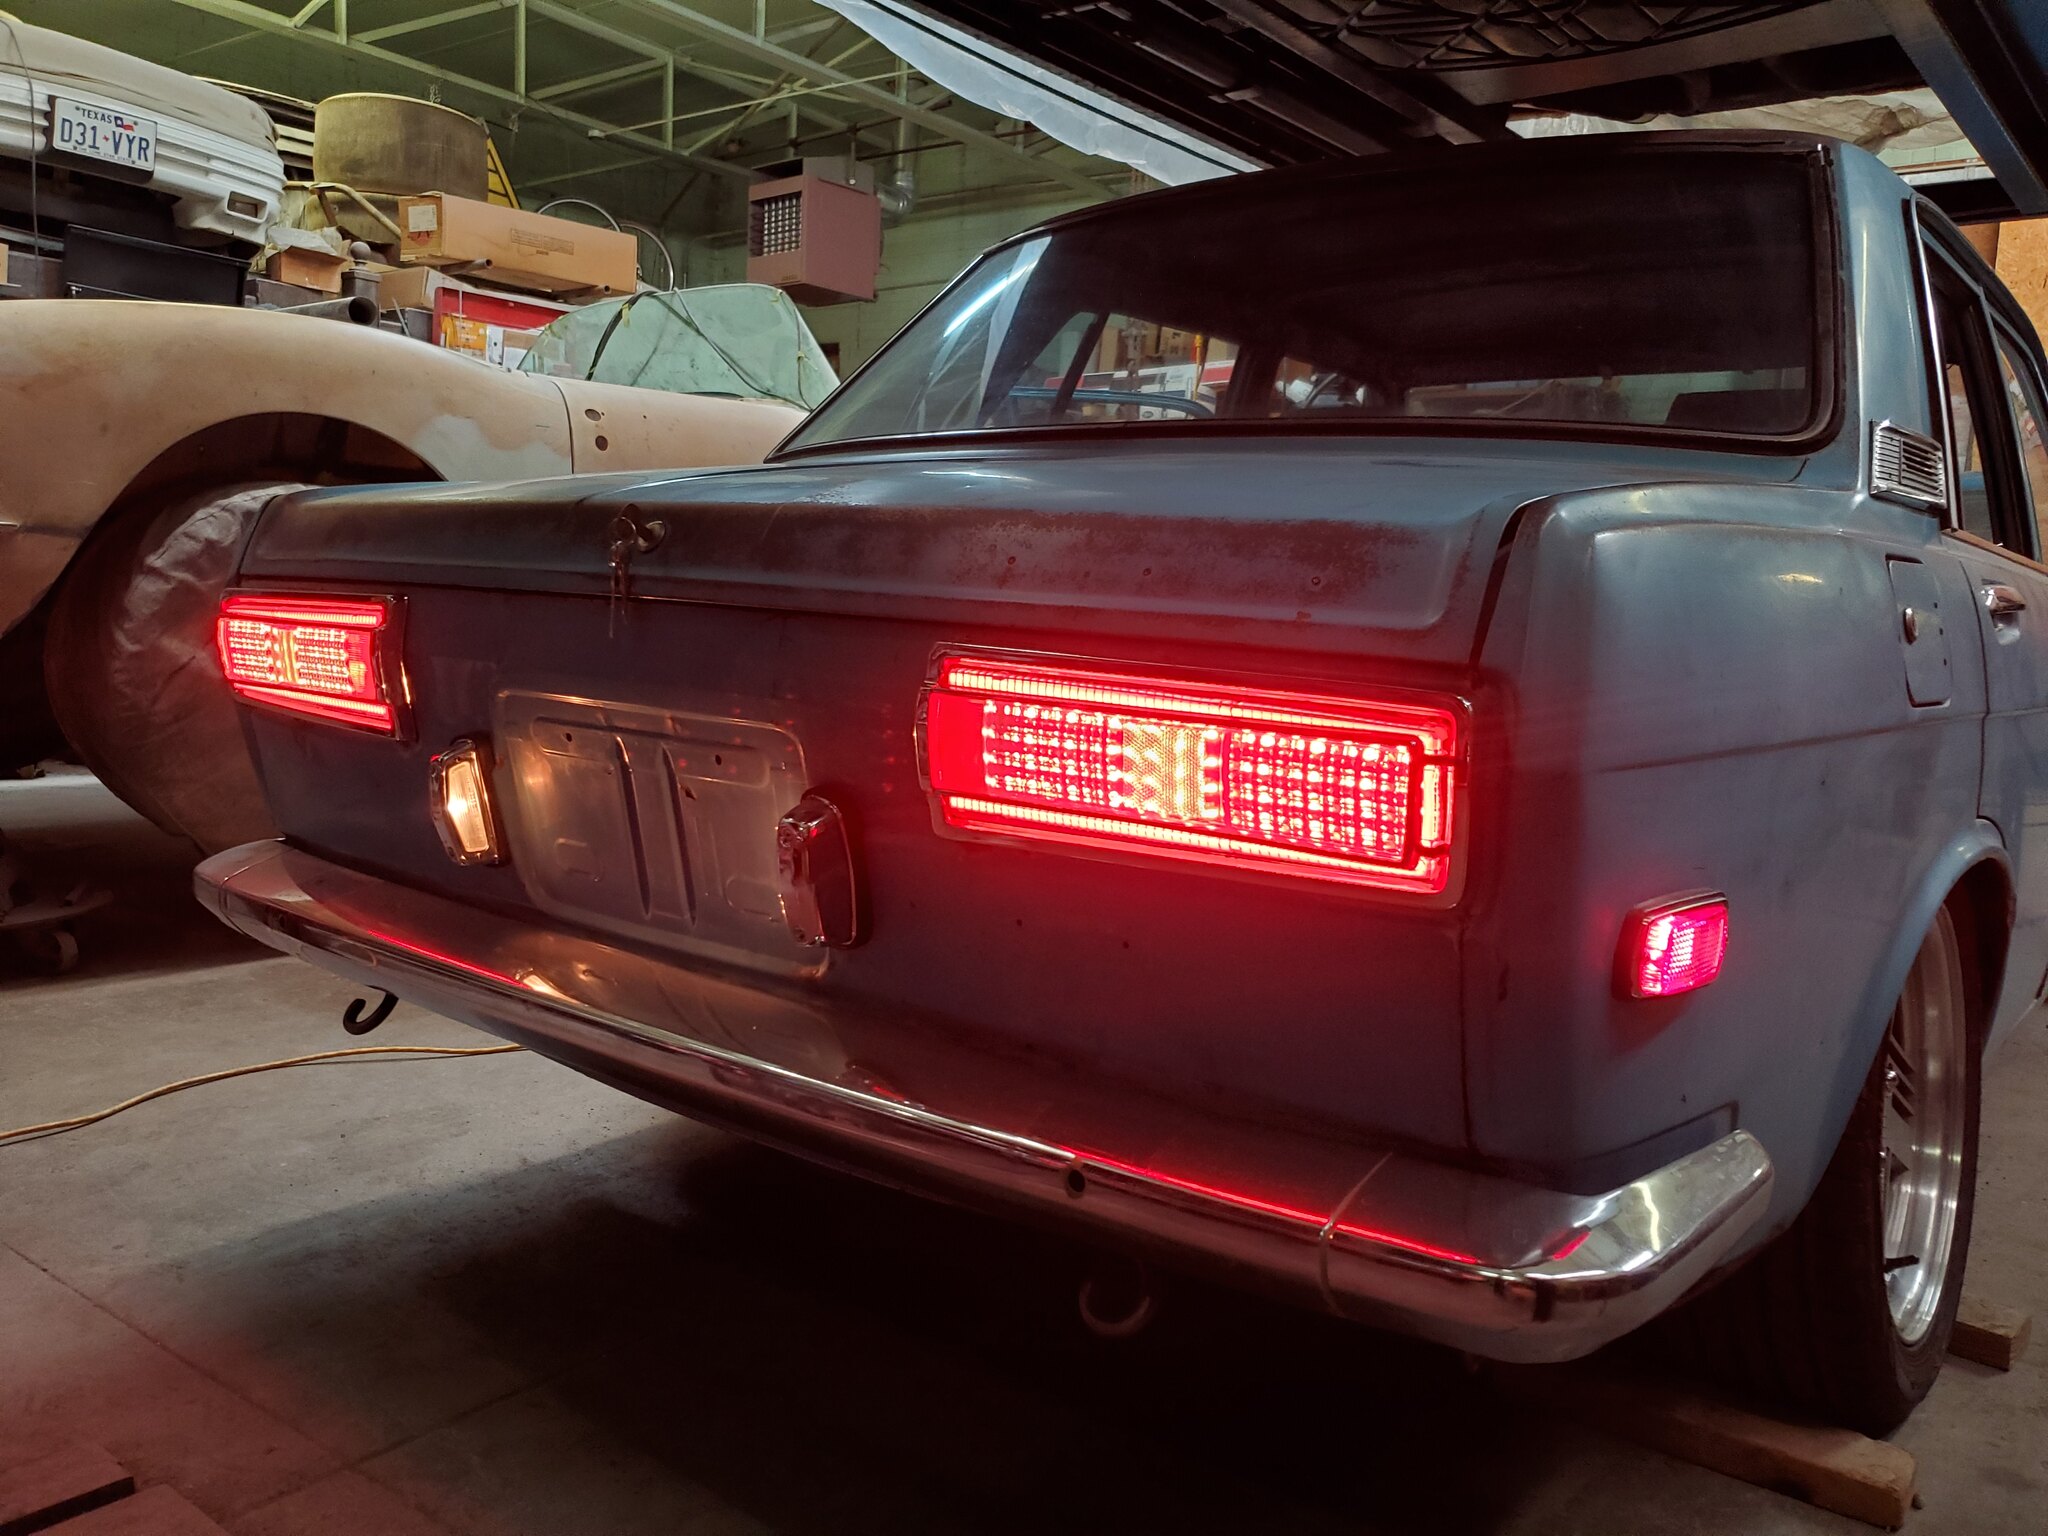
The plastic tail light buckets from my car were in pretty terrible shape, very brittle and falling apart. I had always wanted to do some sort of LED tail lights so they'd be brighter and hopefully keep me from getting rear ended. Almost a year ago I commissioned a guy to build some custom LED tail lights for me, and I just recently got them in the mail.
Since I wasn't using the original light buckets or wiring, I cut off the original plug from the tail light harness and spliced it together with the new LED panel wiring so they would just plug straight into the 510 body harness. I then made some custom rubber gaskets to make up for the missing light bucket, I ended up with about a 1/4" thick gasket that took the place of both original gaskets and the bucket. The design I wanted, was the tail light illuminates around the perimeter on 3 sides, the brake light is the entire center section, and when the turn signal is on it takes over the outer portion of the brake light where the original signal would be, then reverse is in the normal place. I only have the tail and brake lights working right now, so that's all I have pictures of. I still need to connect my reverse light wiring on the transmission and figure out what's wrong with the turn signals.
The perimeter tail lights would probably look better without the center trim ring on the lens, but I like the way the trim looks with the lights off, so I've left them on for now.
Chris
'71 510 4-Door Sedan
'76 280z
'71 510 4-Door Sedan
'76 280z
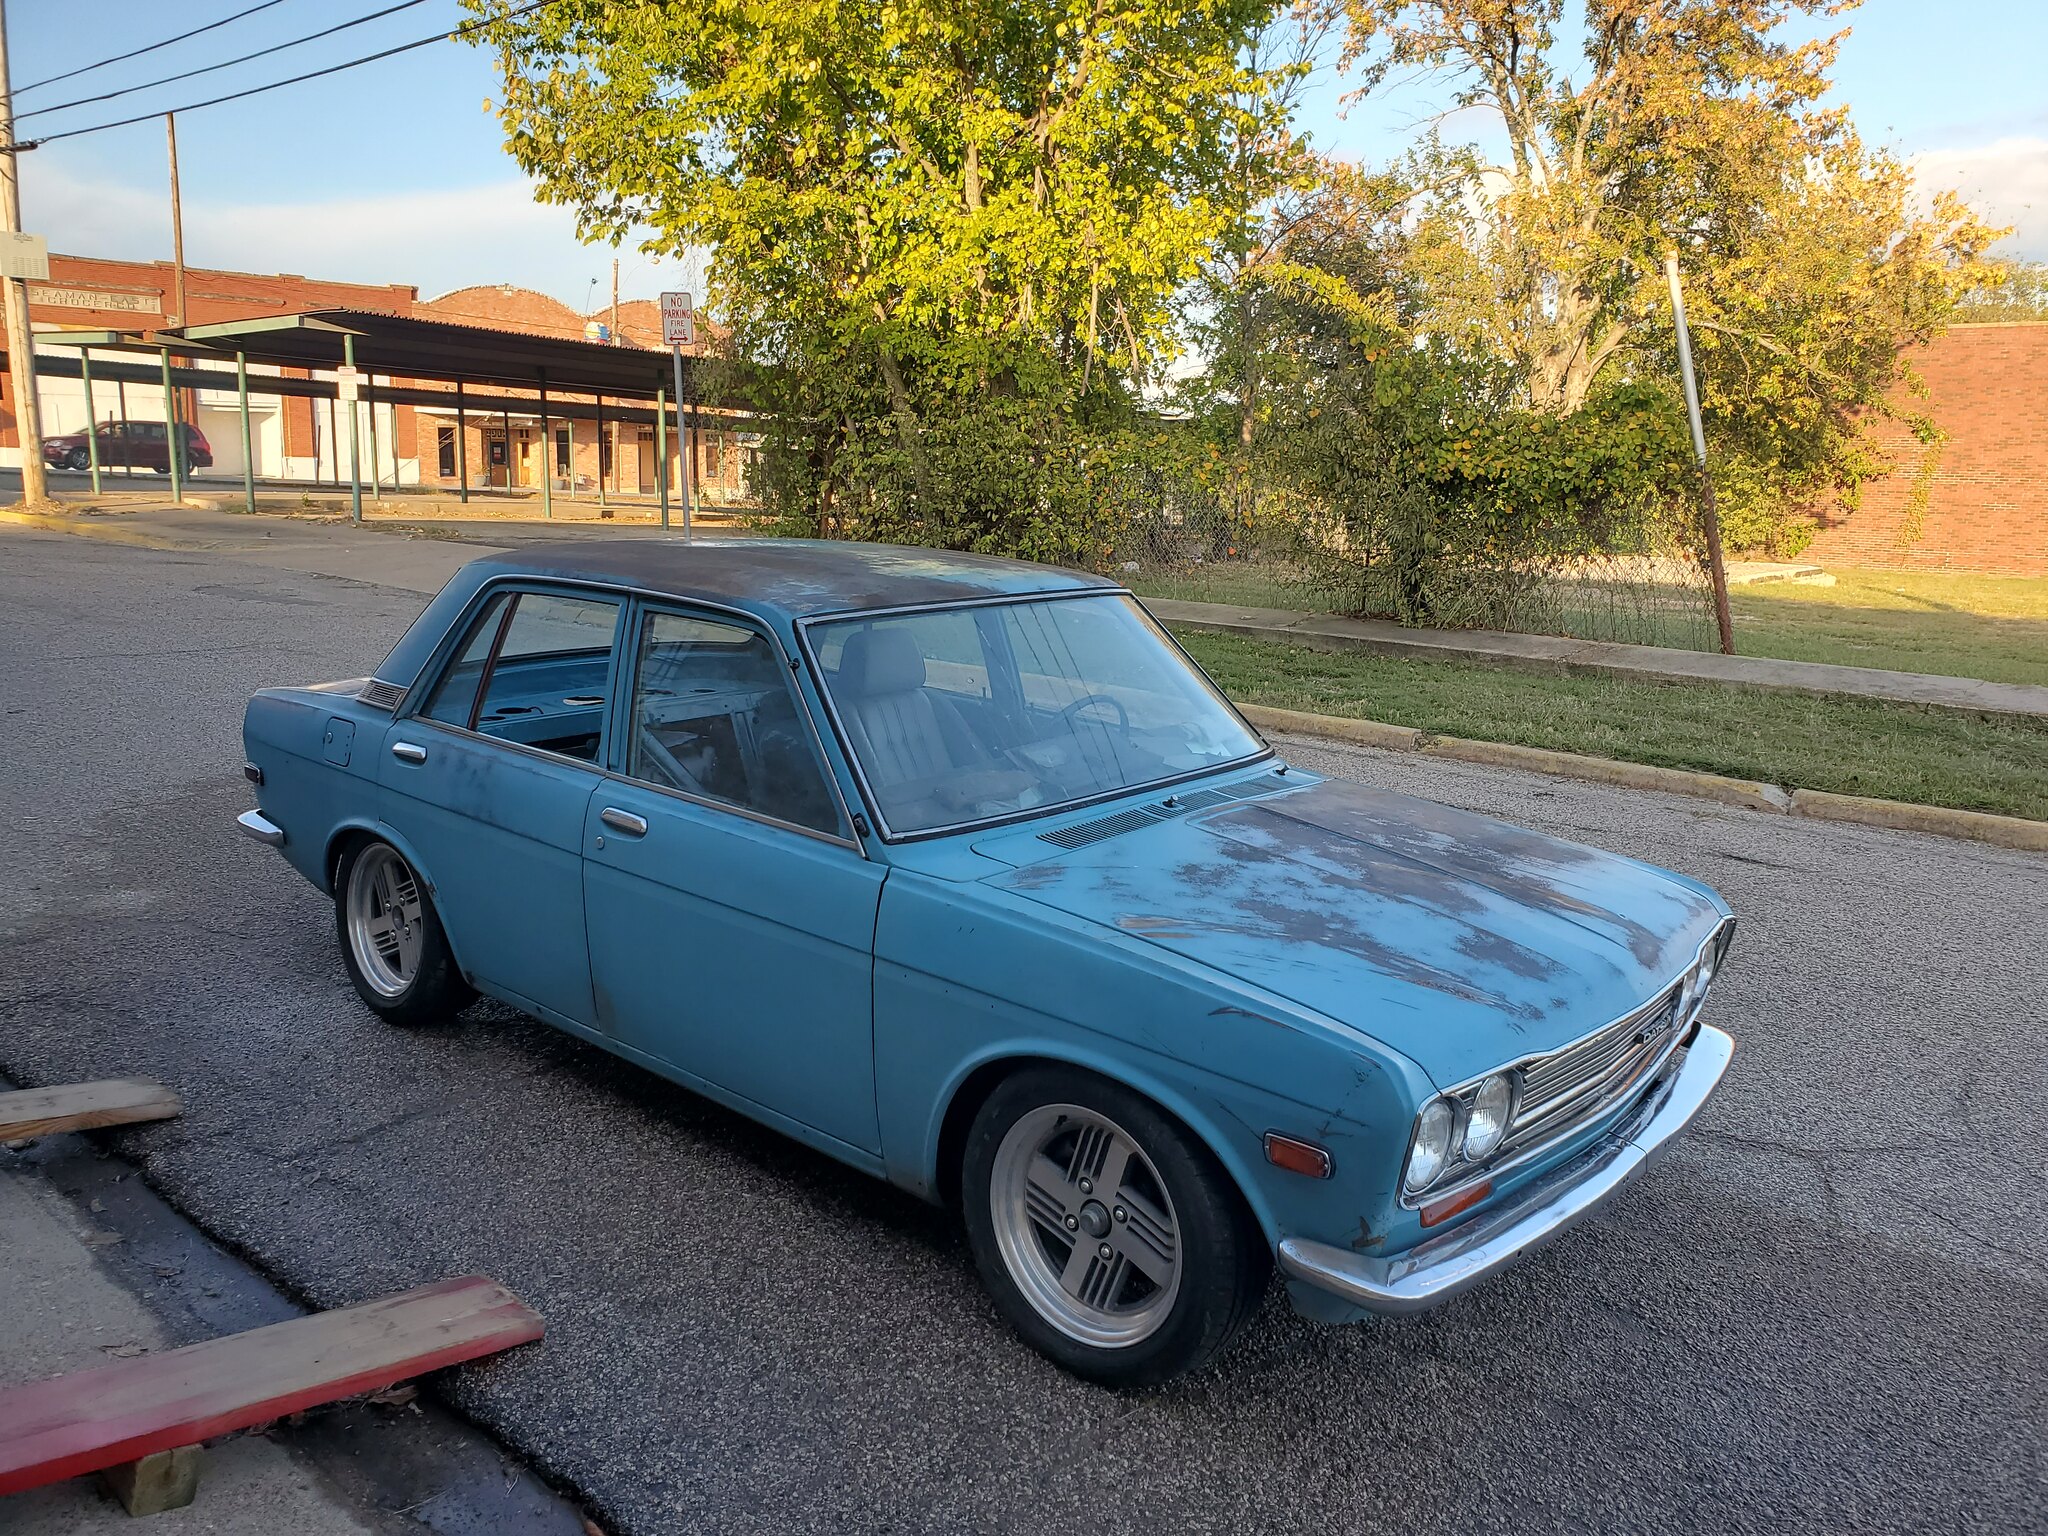
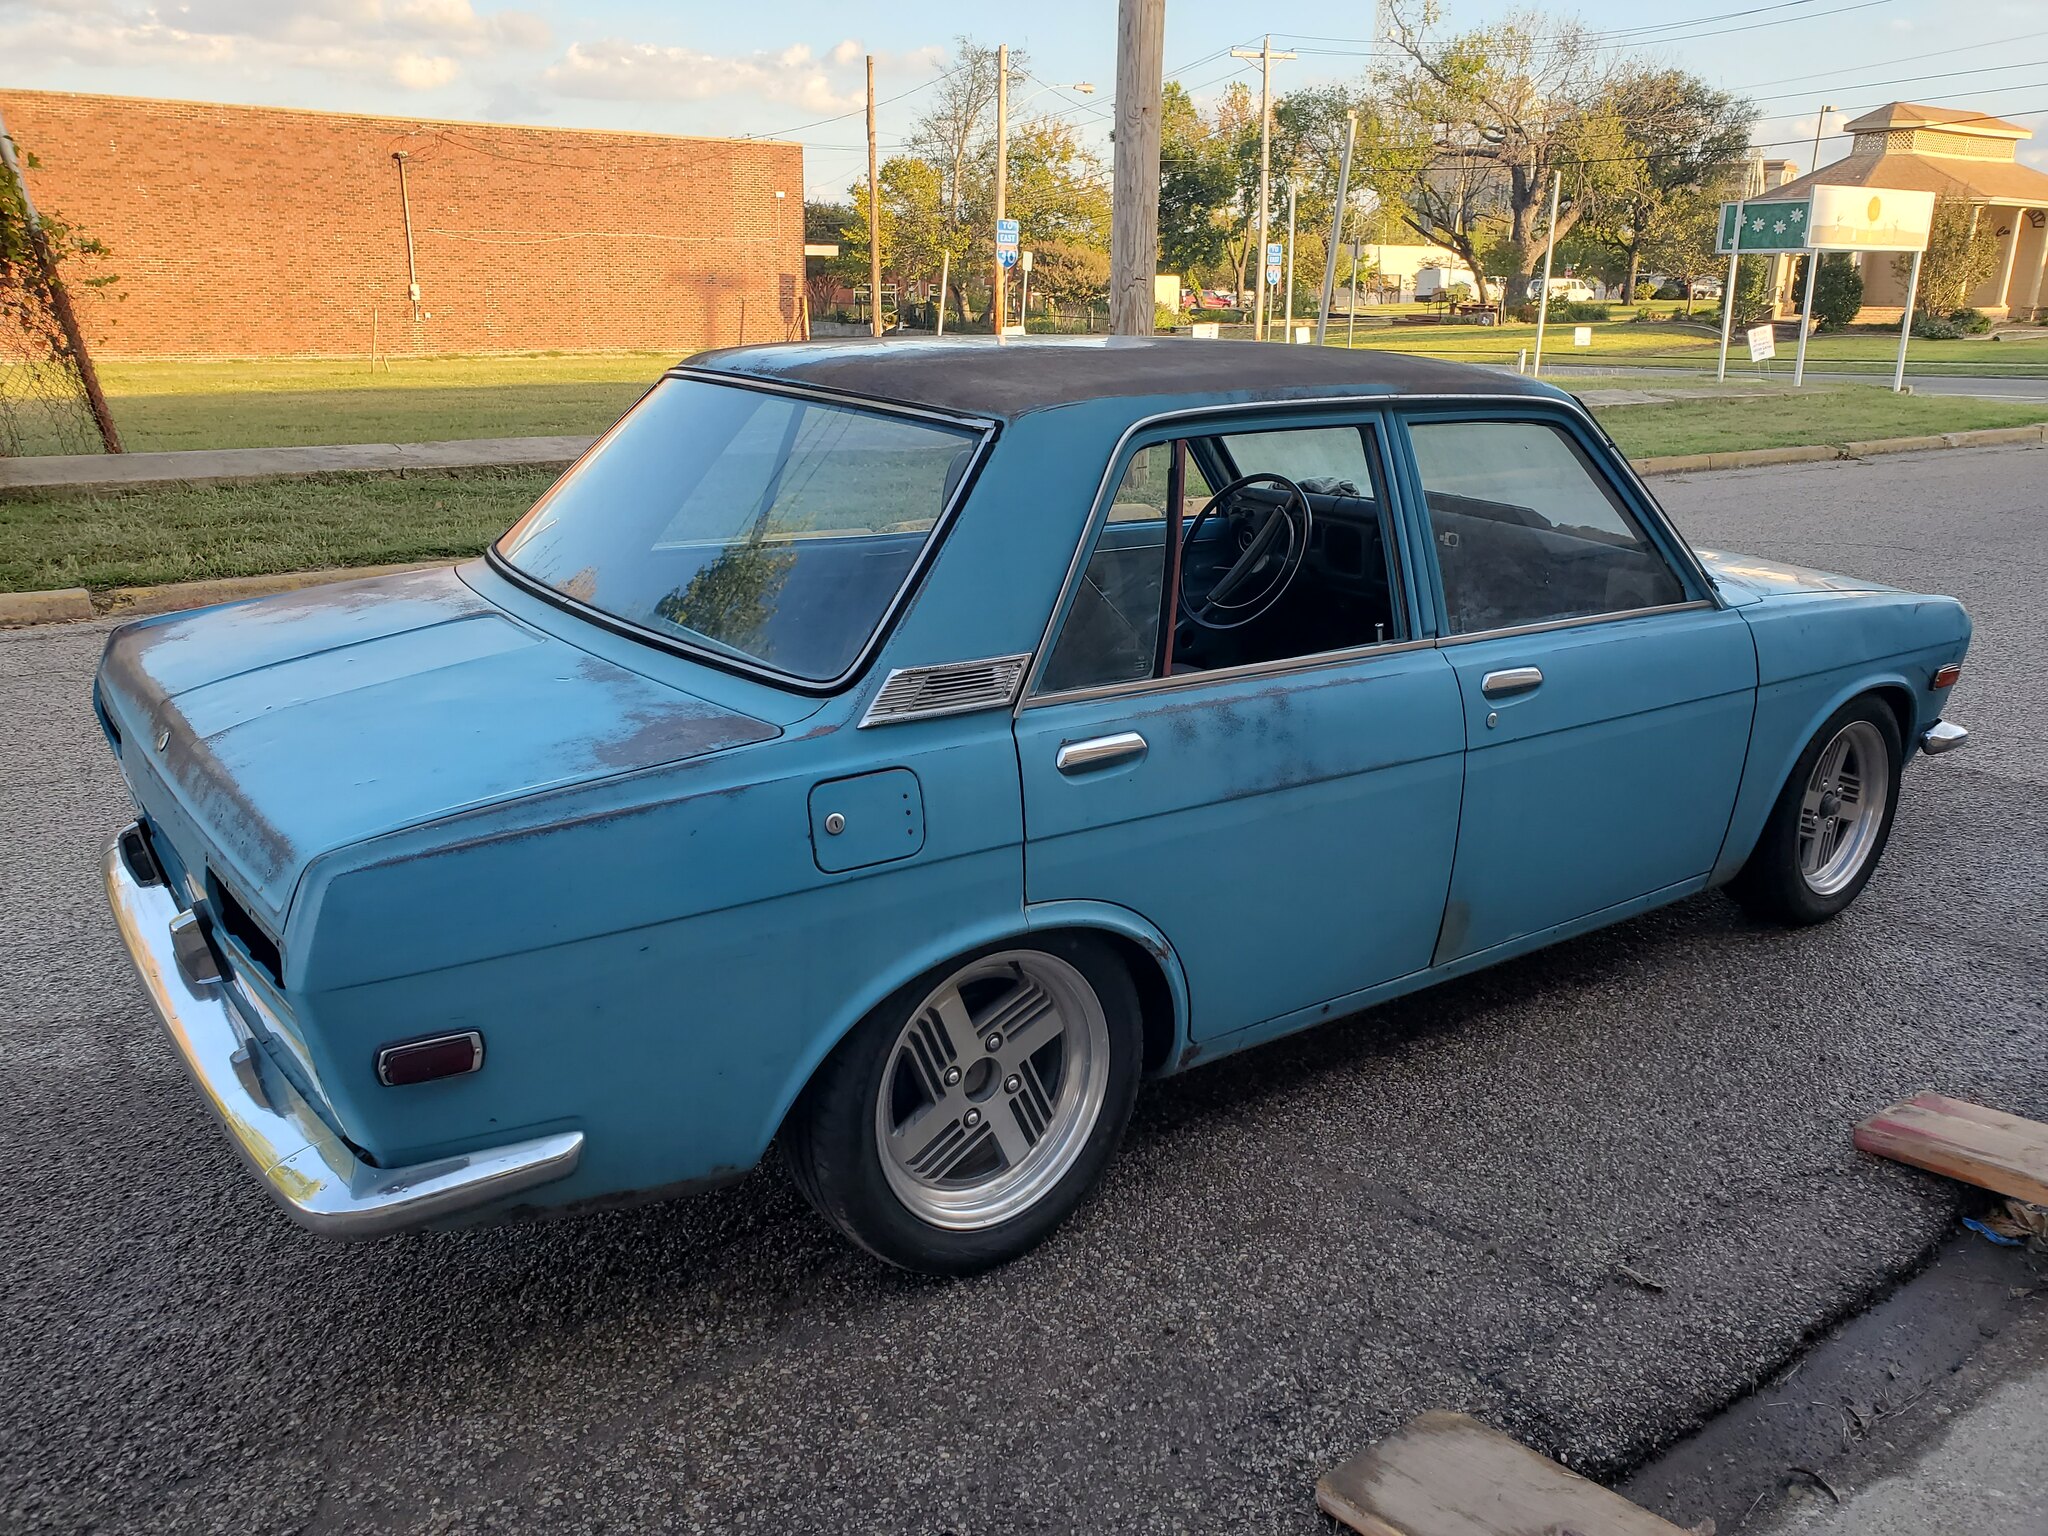
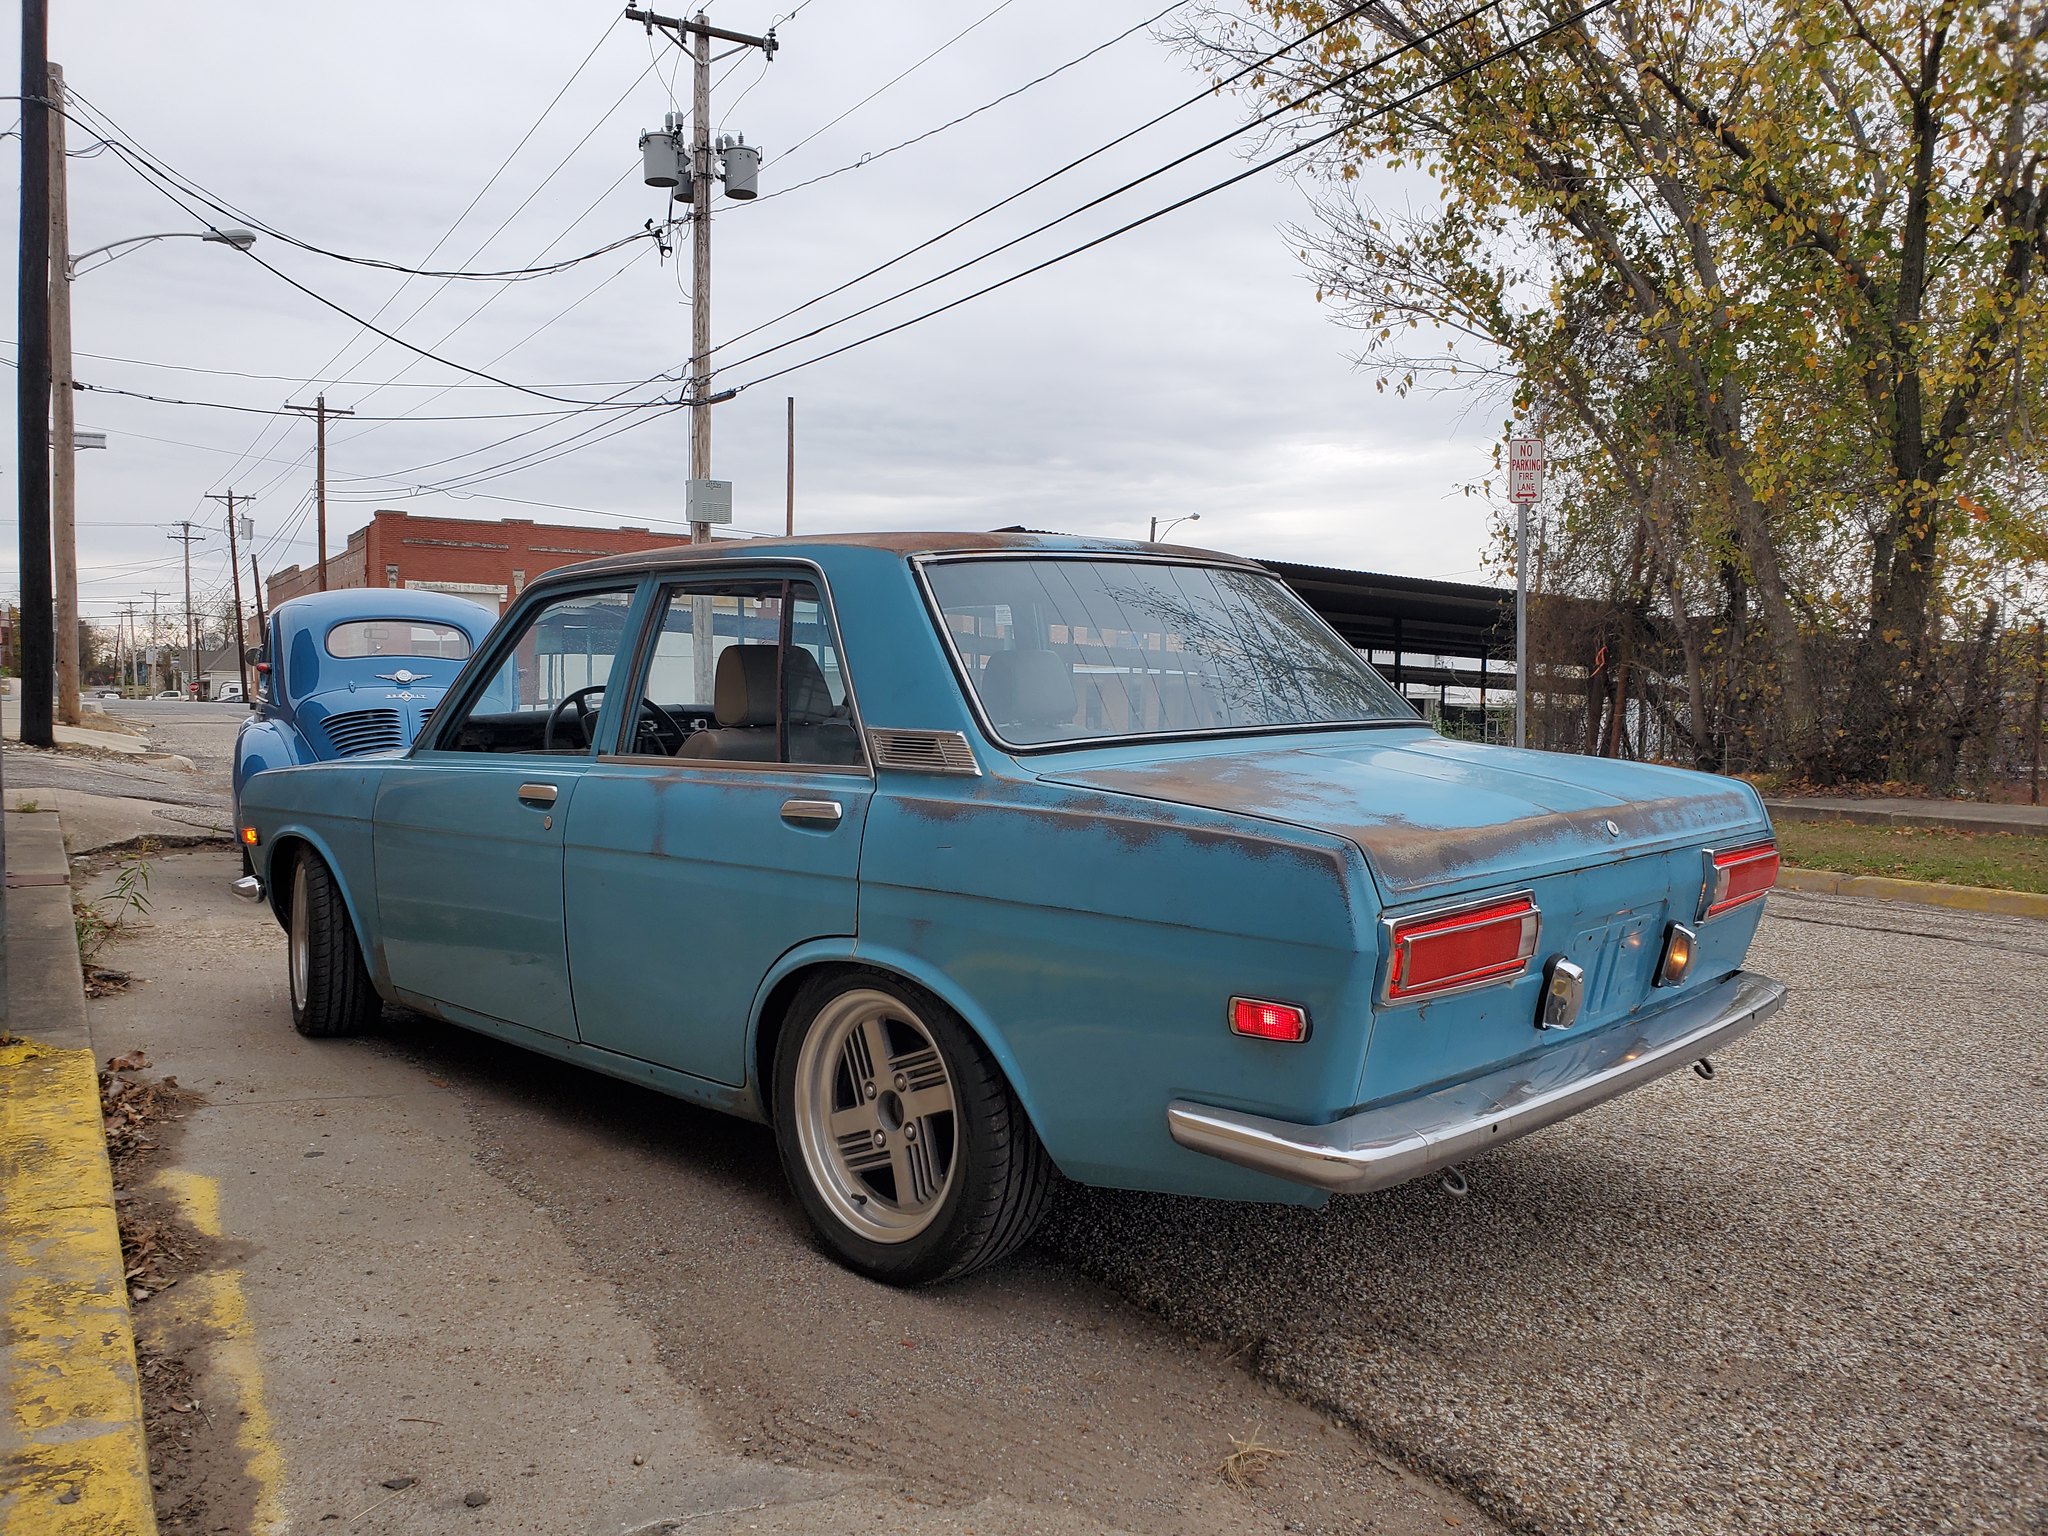
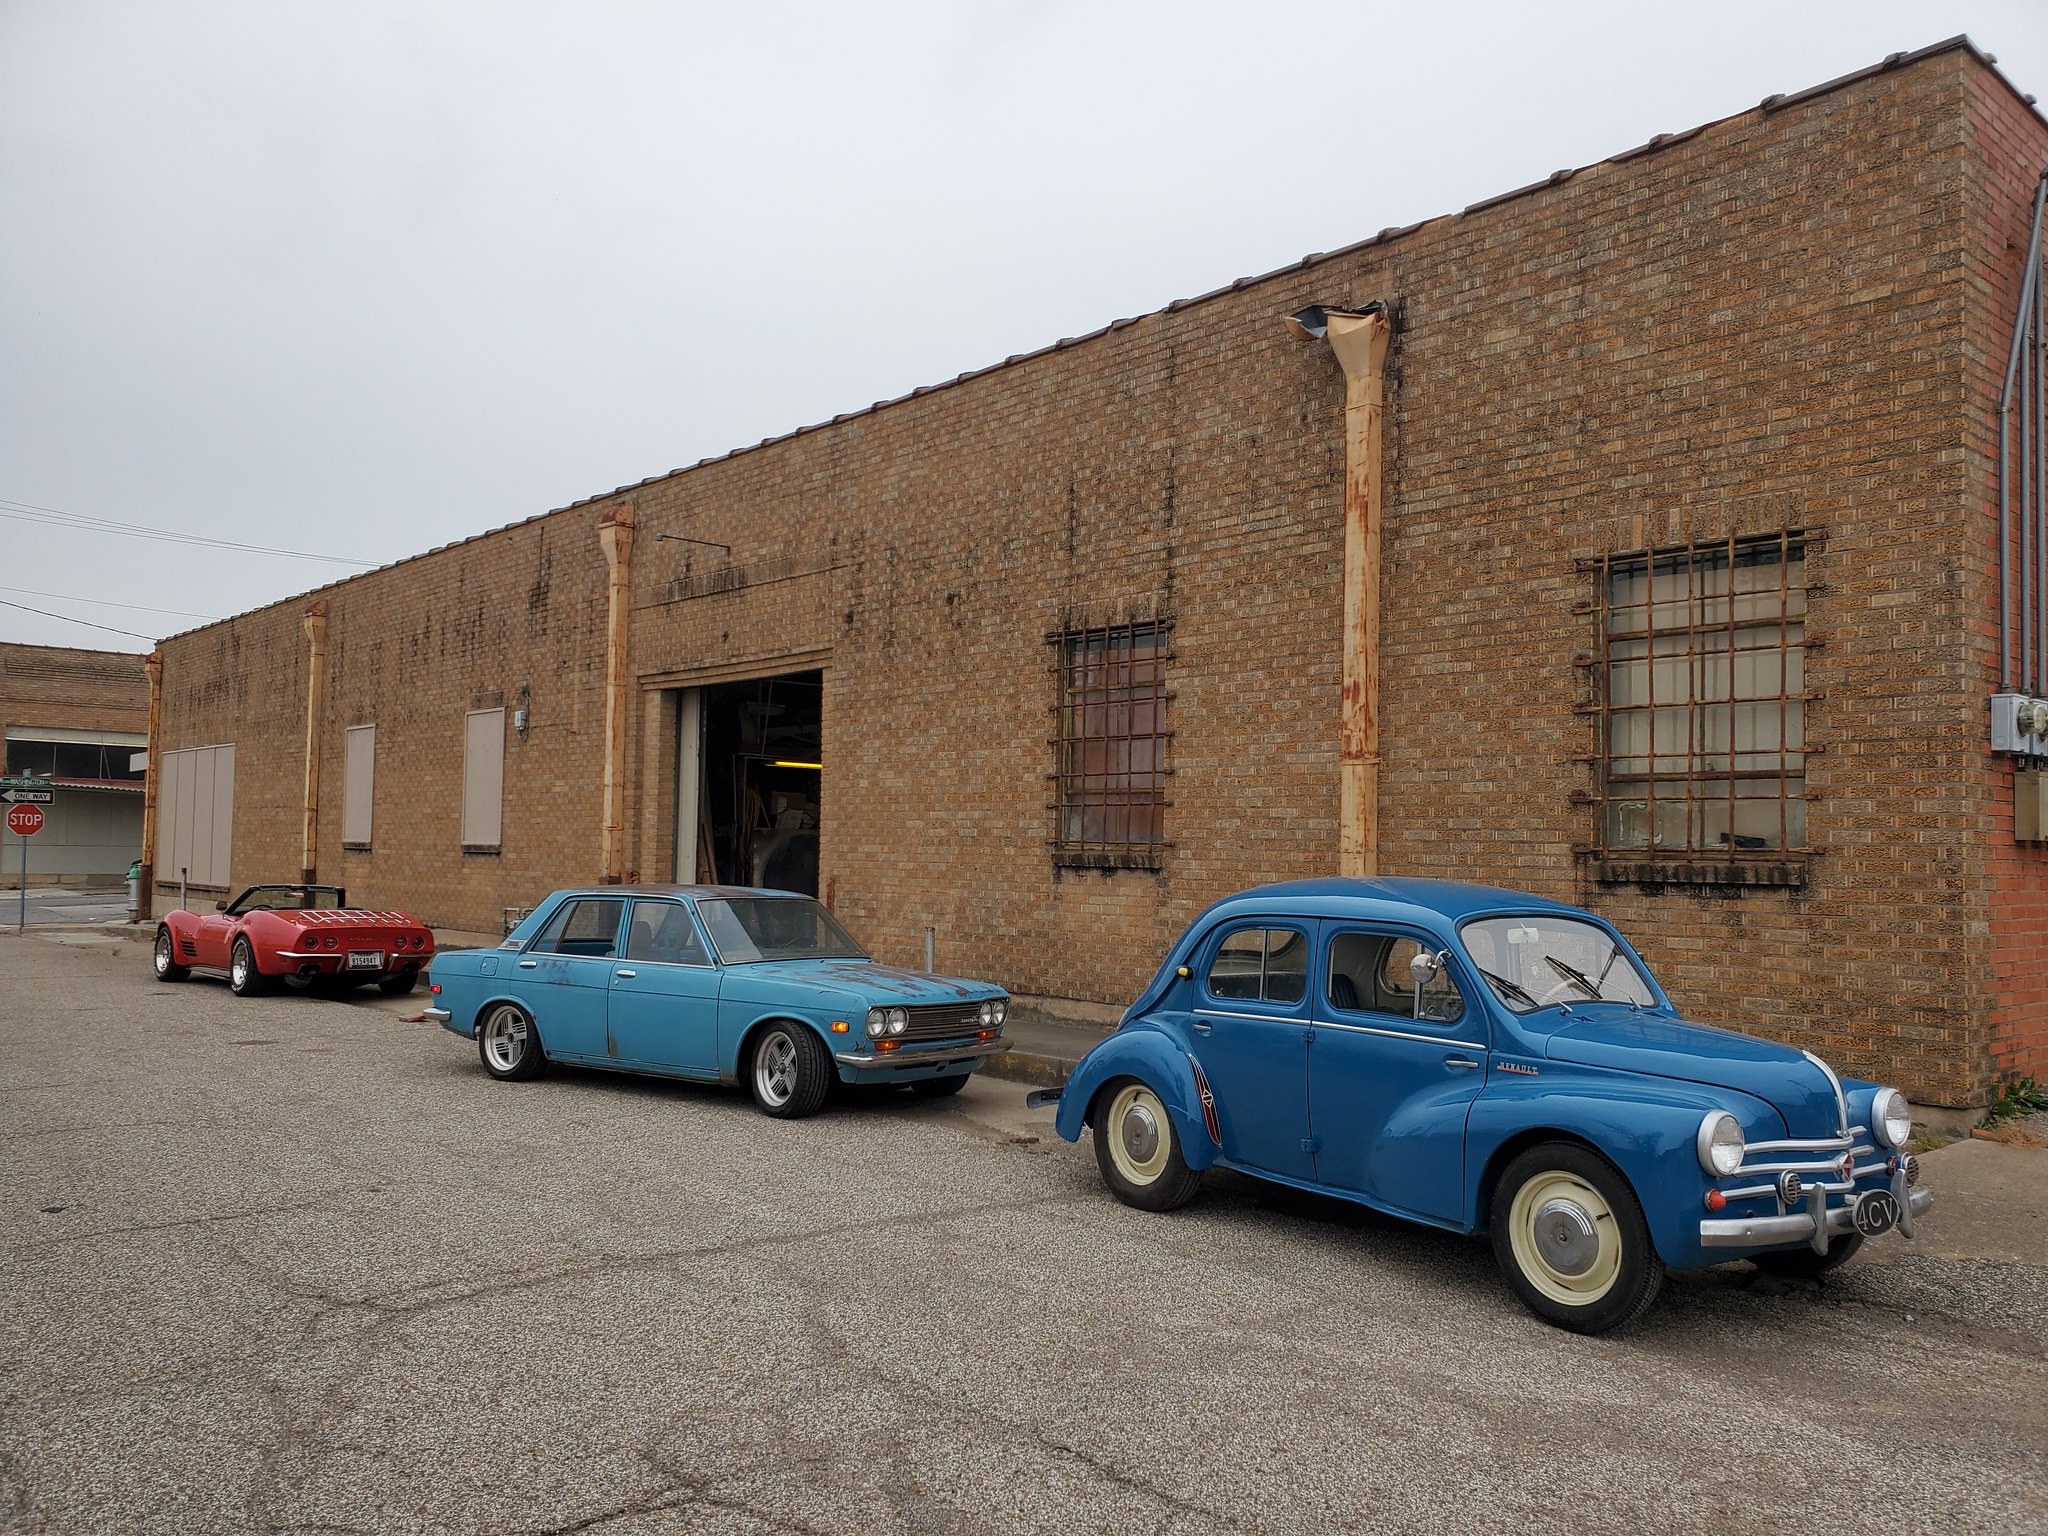
Re: Blue '71 Project
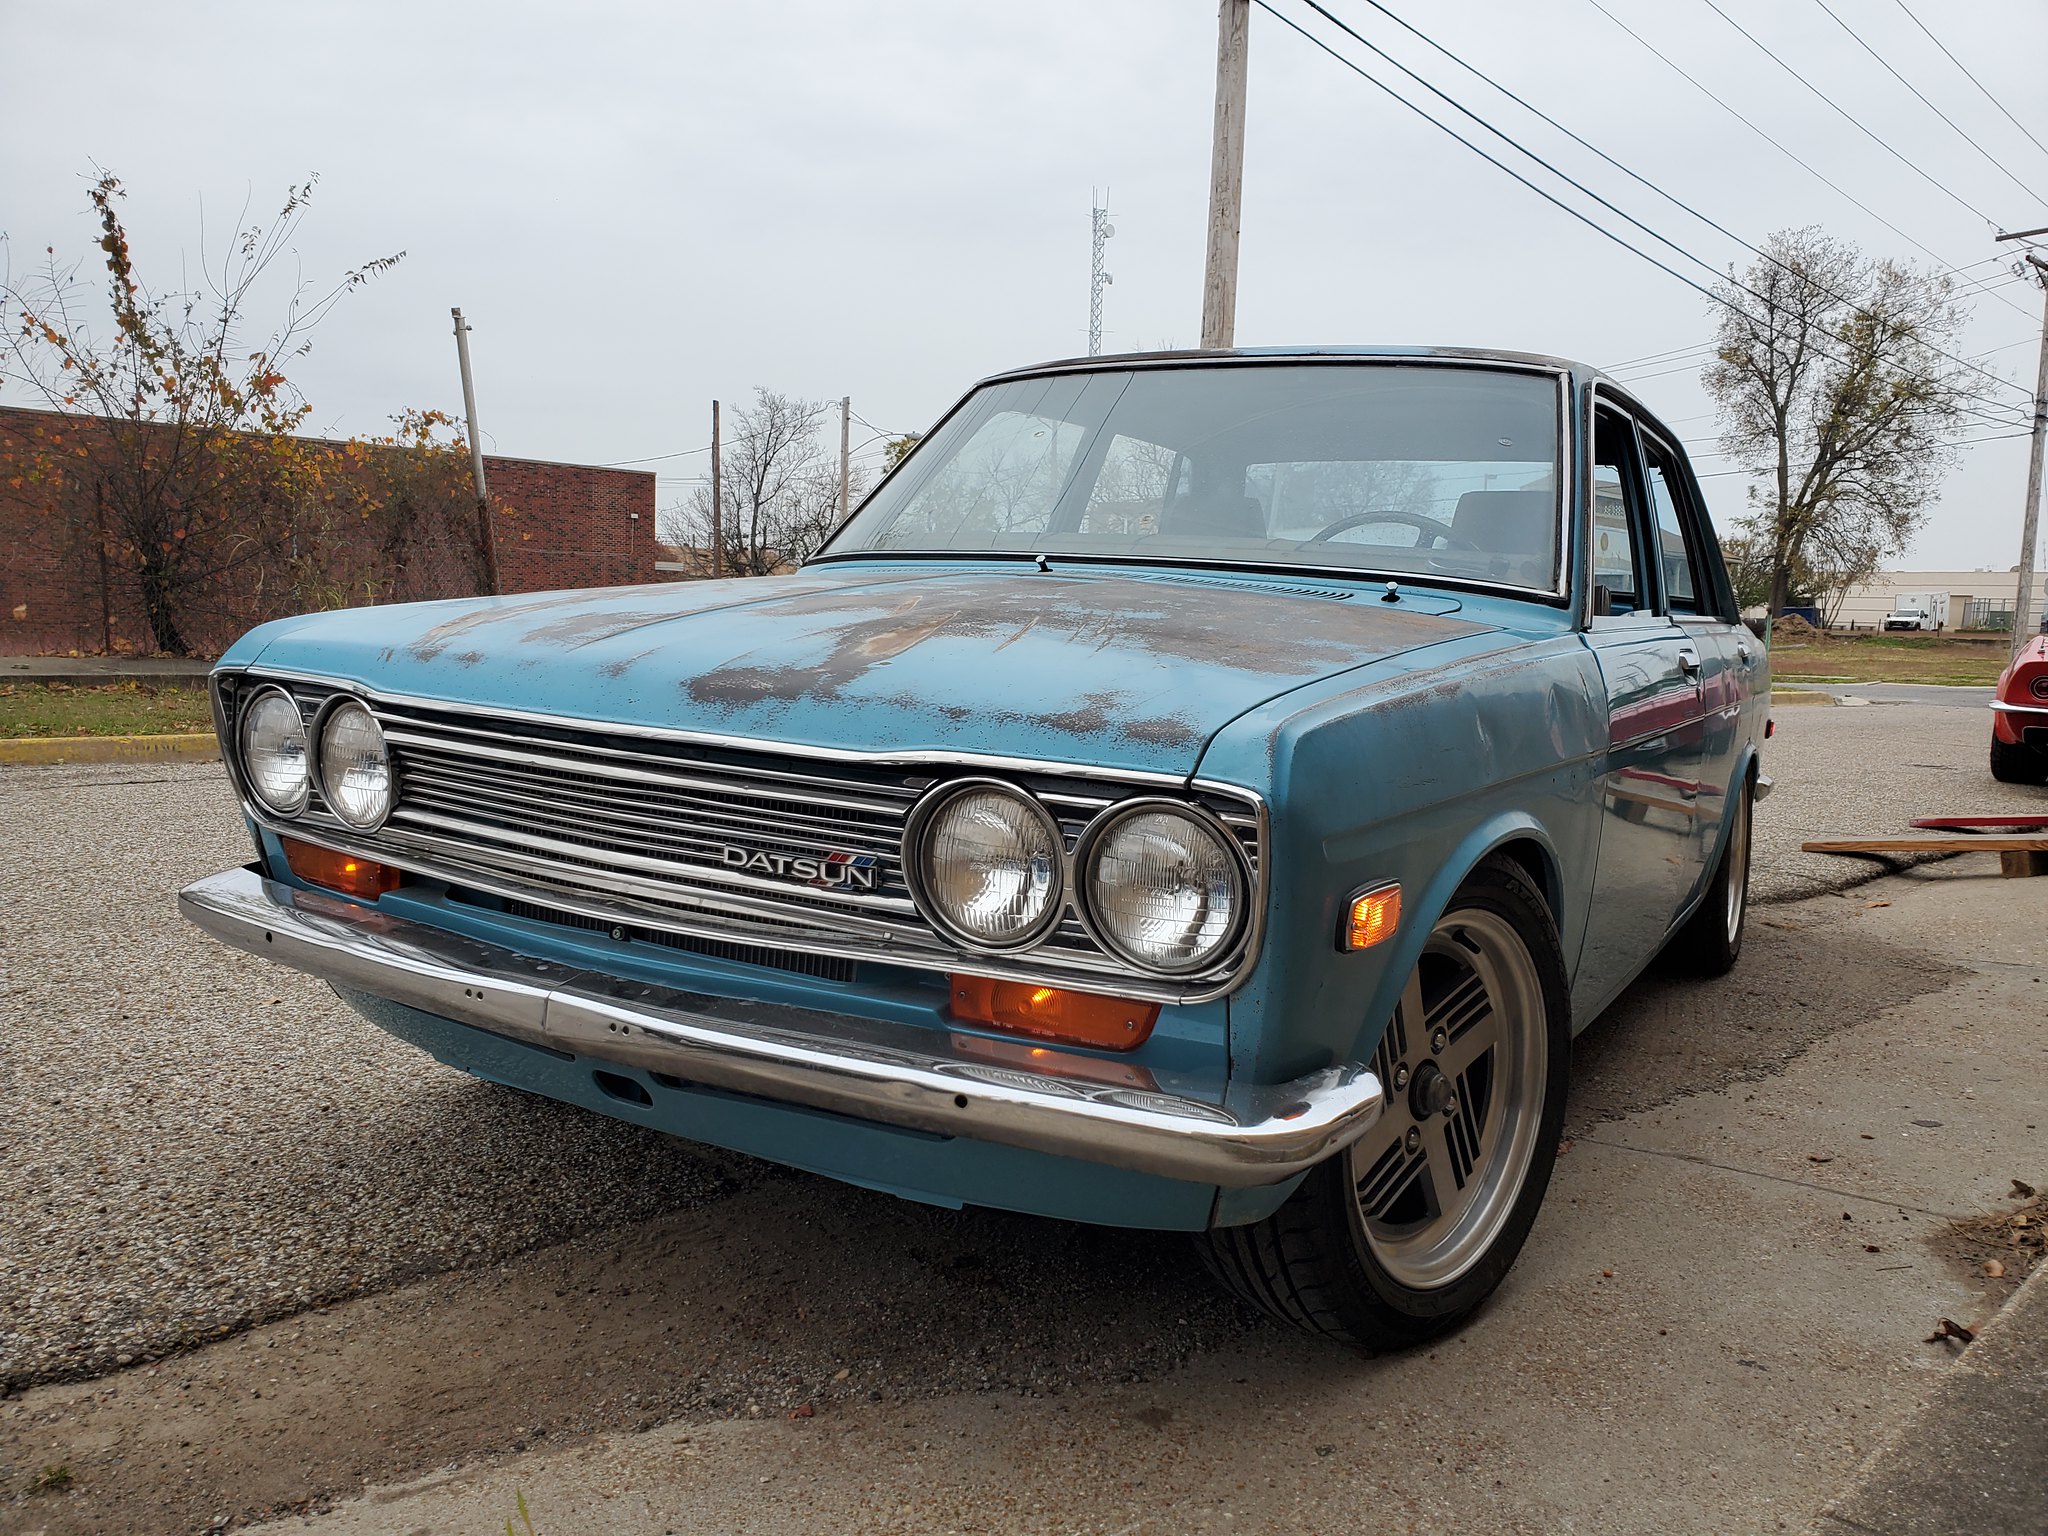
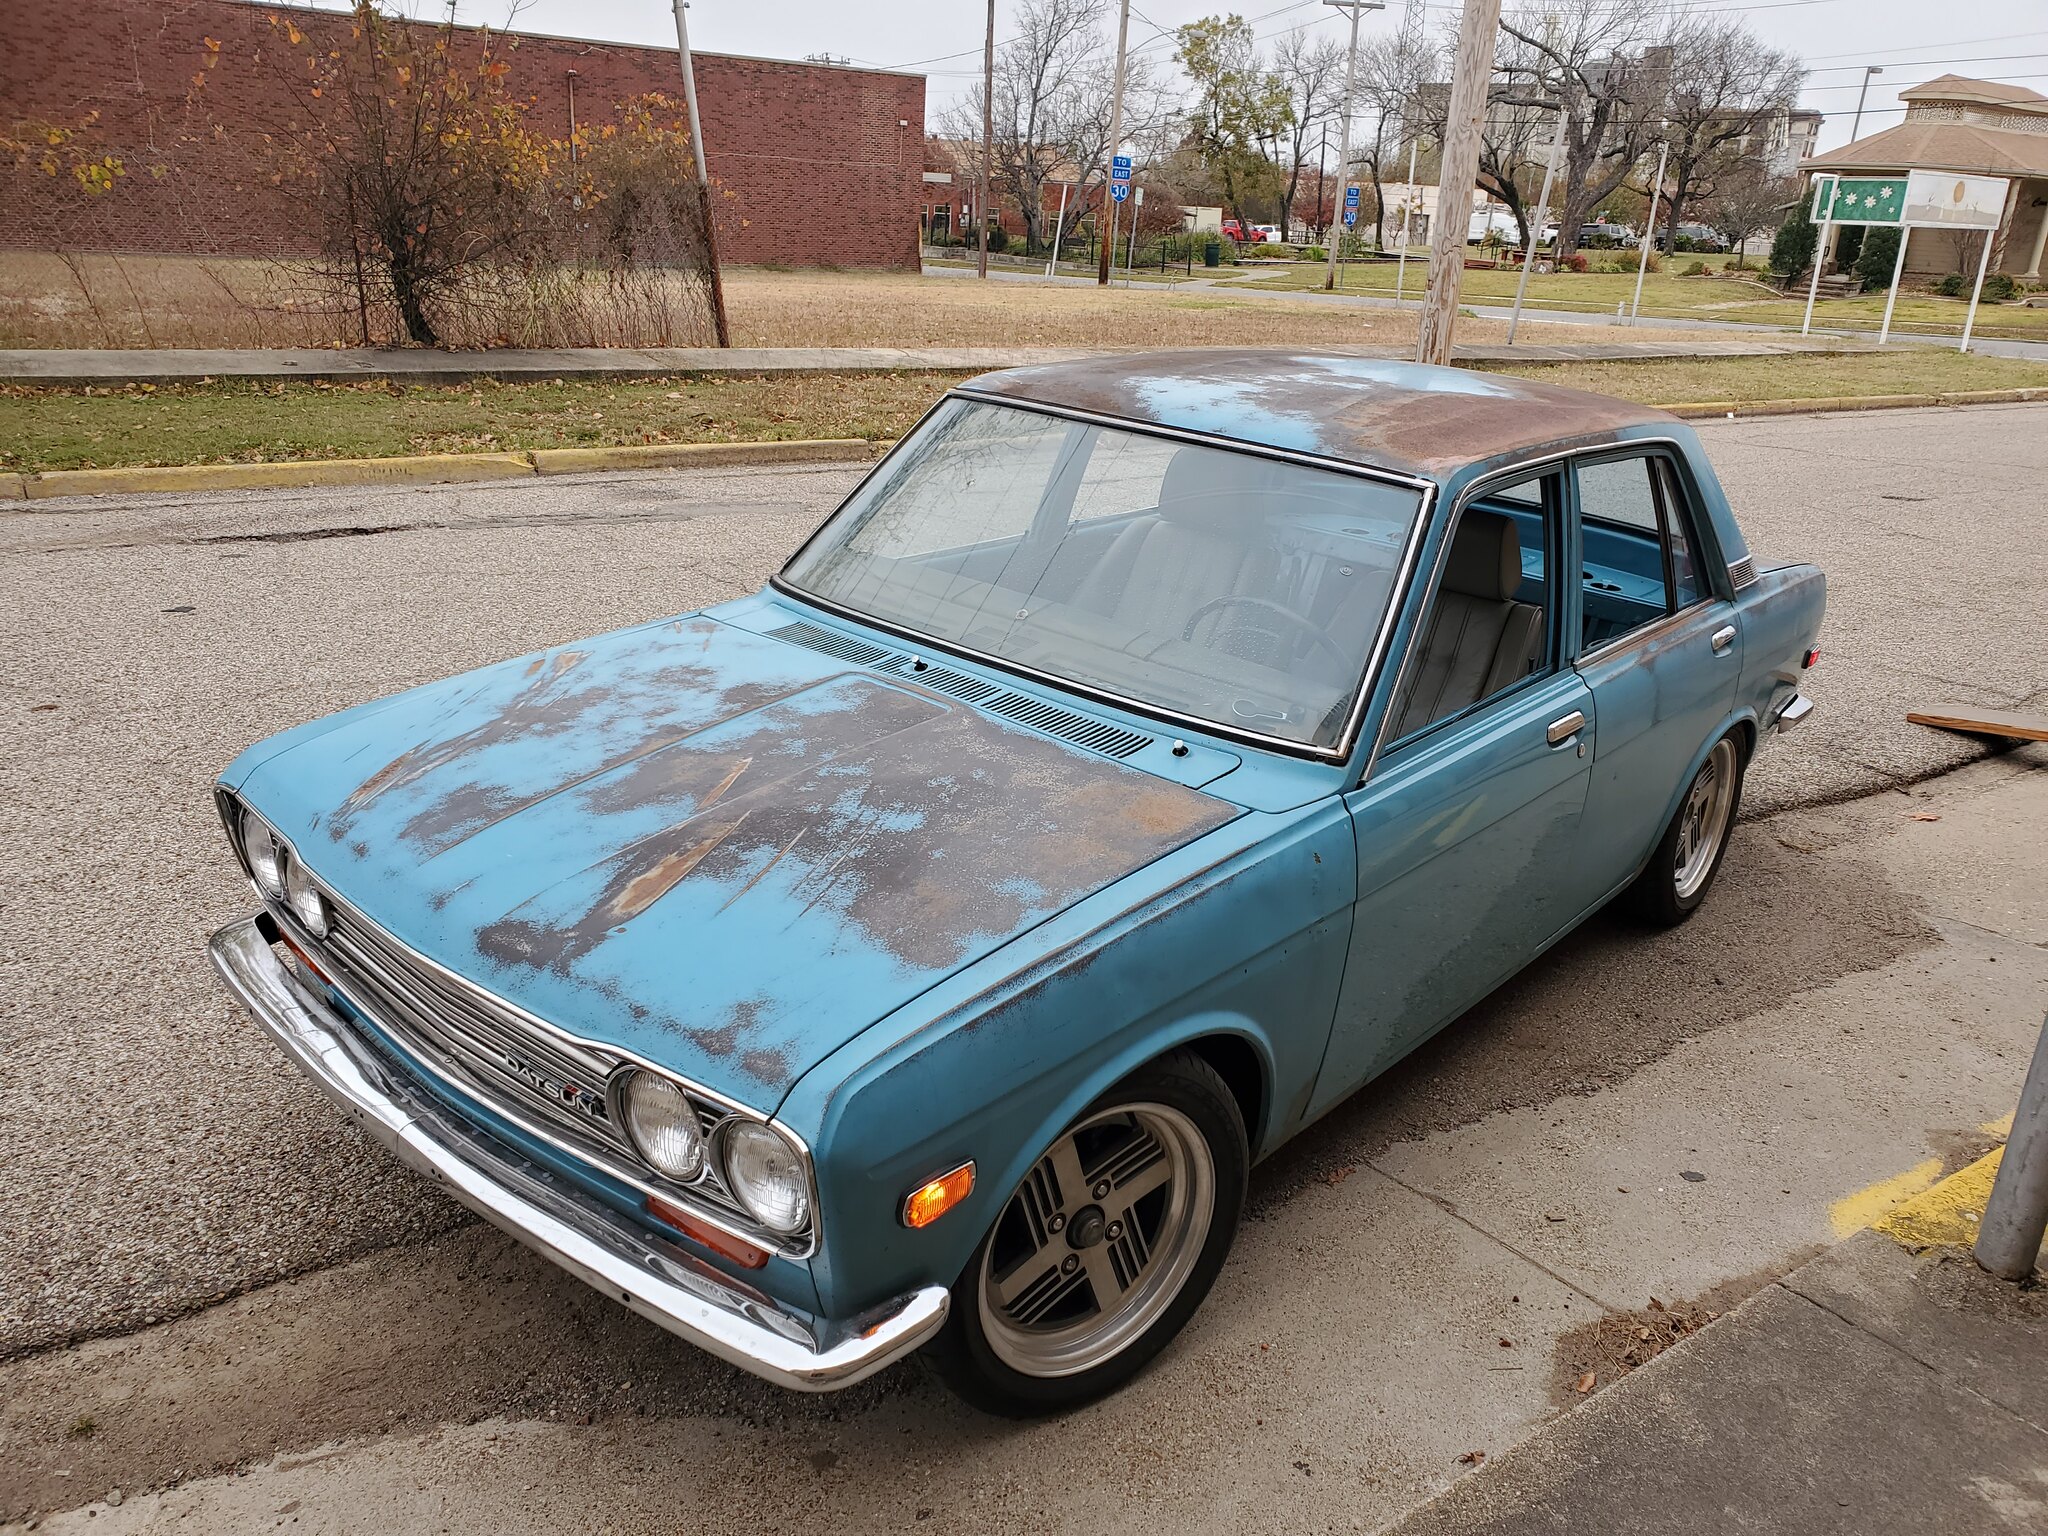
I put the car on the lift last weekend and did a bolt check on everything. Connected the reverse light wires and got them working, adjusted the rear camber a bit, adjusted the front toe, and greased all of the ball joints/steering components. The headlights also work now, there was just a loose connection in the switch wiring. I've got a muffler and exhaust tip for it, hopefully next month I can take the car down the street to the muffler shop and have them build the rest. A few pics of the car outside the shop while shuffling cars around...


Chris
'71 510 4-Door Sedan
'76 280z
'71 510 4-Door Sedan
'76 280z
-
eastbaysolo_73

- Supporter
- Posts: 705
- Joined: 18 May 2014 09:28
- Location: Northern California
Re: Blue '71 Project
Those are some nice looking LED taillights you made there. Great looking car. Patina!
1970 2 door sr20det cookie cutter build
My build thread
http://www.the510realm.com/viewtopic.php?f=3&t=30772
Nor Cal Meng !
My build thread
http://www.the510realm.com/viewtopic.php?f=3&t=30772
Nor Cal Meng !
-
jeffball610

- Posts: 341
- Joined: 15 Sep 2006 14:12
- Location: Nashville, TN
Re: Blue '71 Project
I'm not sure what you're referring to with your turn signals, but be aware that since LEDs take less current to illuminate that incandescent bulbs, you need a resistor for the stock turn flasher to work or an aftermarket flasher made for LEDs.
I'm sure you knew that, but just letting others know before diving into a mod like this.
I'm sure you knew that, but just letting others know before diving into a mod like this.
1972 Datsun 510
7-bolt 4G63T, EVO 9 pistons & rods, FP 6851S, "Flipped" Stock Intake Manifold, Toyota R154, Z31 R200 w/ CVs
7-bolt 4G63T, EVO 9 pistons & rods, FP 6851S, "Flipped" Stock Intake Manifold, Toyota R154, Z31 R200 w/ CVs
-
bertvorgon

- Supporter
- Posts: 12028
- Joined: 04 Aug 2003 20:45
- Location: White Rock, B.C. Canada
Re: Blue '71 Project
viewtopic.php?f=32&t=30781&hilit=LED+flasher
This might help for any LED flasher questions in our 510's. Mine has worked flawlessly for years now.
This might help for any LED flasher questions in our 510's. Mine has worked flawlessly for years now.
"Racing makes heroin addiction look like a vague wish for something salty" - Peter Egan
Keith Law
1973 2 Door Slalom/hill climb/road race / canyon carver /Giant Killer 510
1971 Vintage 13' BOLER trailer
Keith Law
1973 2 Door Slalom/hill climb/road race / canyon carver /Giant Killer 510
1971 Vintage 13' BOLER trailer
Re: Blue '71 Project
Thanks! I'm really liking the patina on it, I may change my mind and never paint it.eastbaysolo_73 wrote: ↑14 Dec 2021 11:04 Those are some nice looking LED taillights you made there. Great looking car. Patina!
You are correct. My turn signals not working is unrelated to the LED's though, it's a wiring or switch problem, I just haven't dug into it yet.jeffball610 wrote: ↑15 Dec 2021 10:11 I'm not sure what you're referring to with your turn signals, but be aware that since LEDs take less current to illuminate that incandescent bulbs, you need a resistor for the stock turn flasher to work or an aftermarket flasher made for LEDs.
I'm sure you knew that, but just letting others know before diving into a mod like this.
Chris
'71 510 4-Door Sedan
'76 280z
'71 510 4-Door Sedan
'76 280z
Re: Blue '71 Project
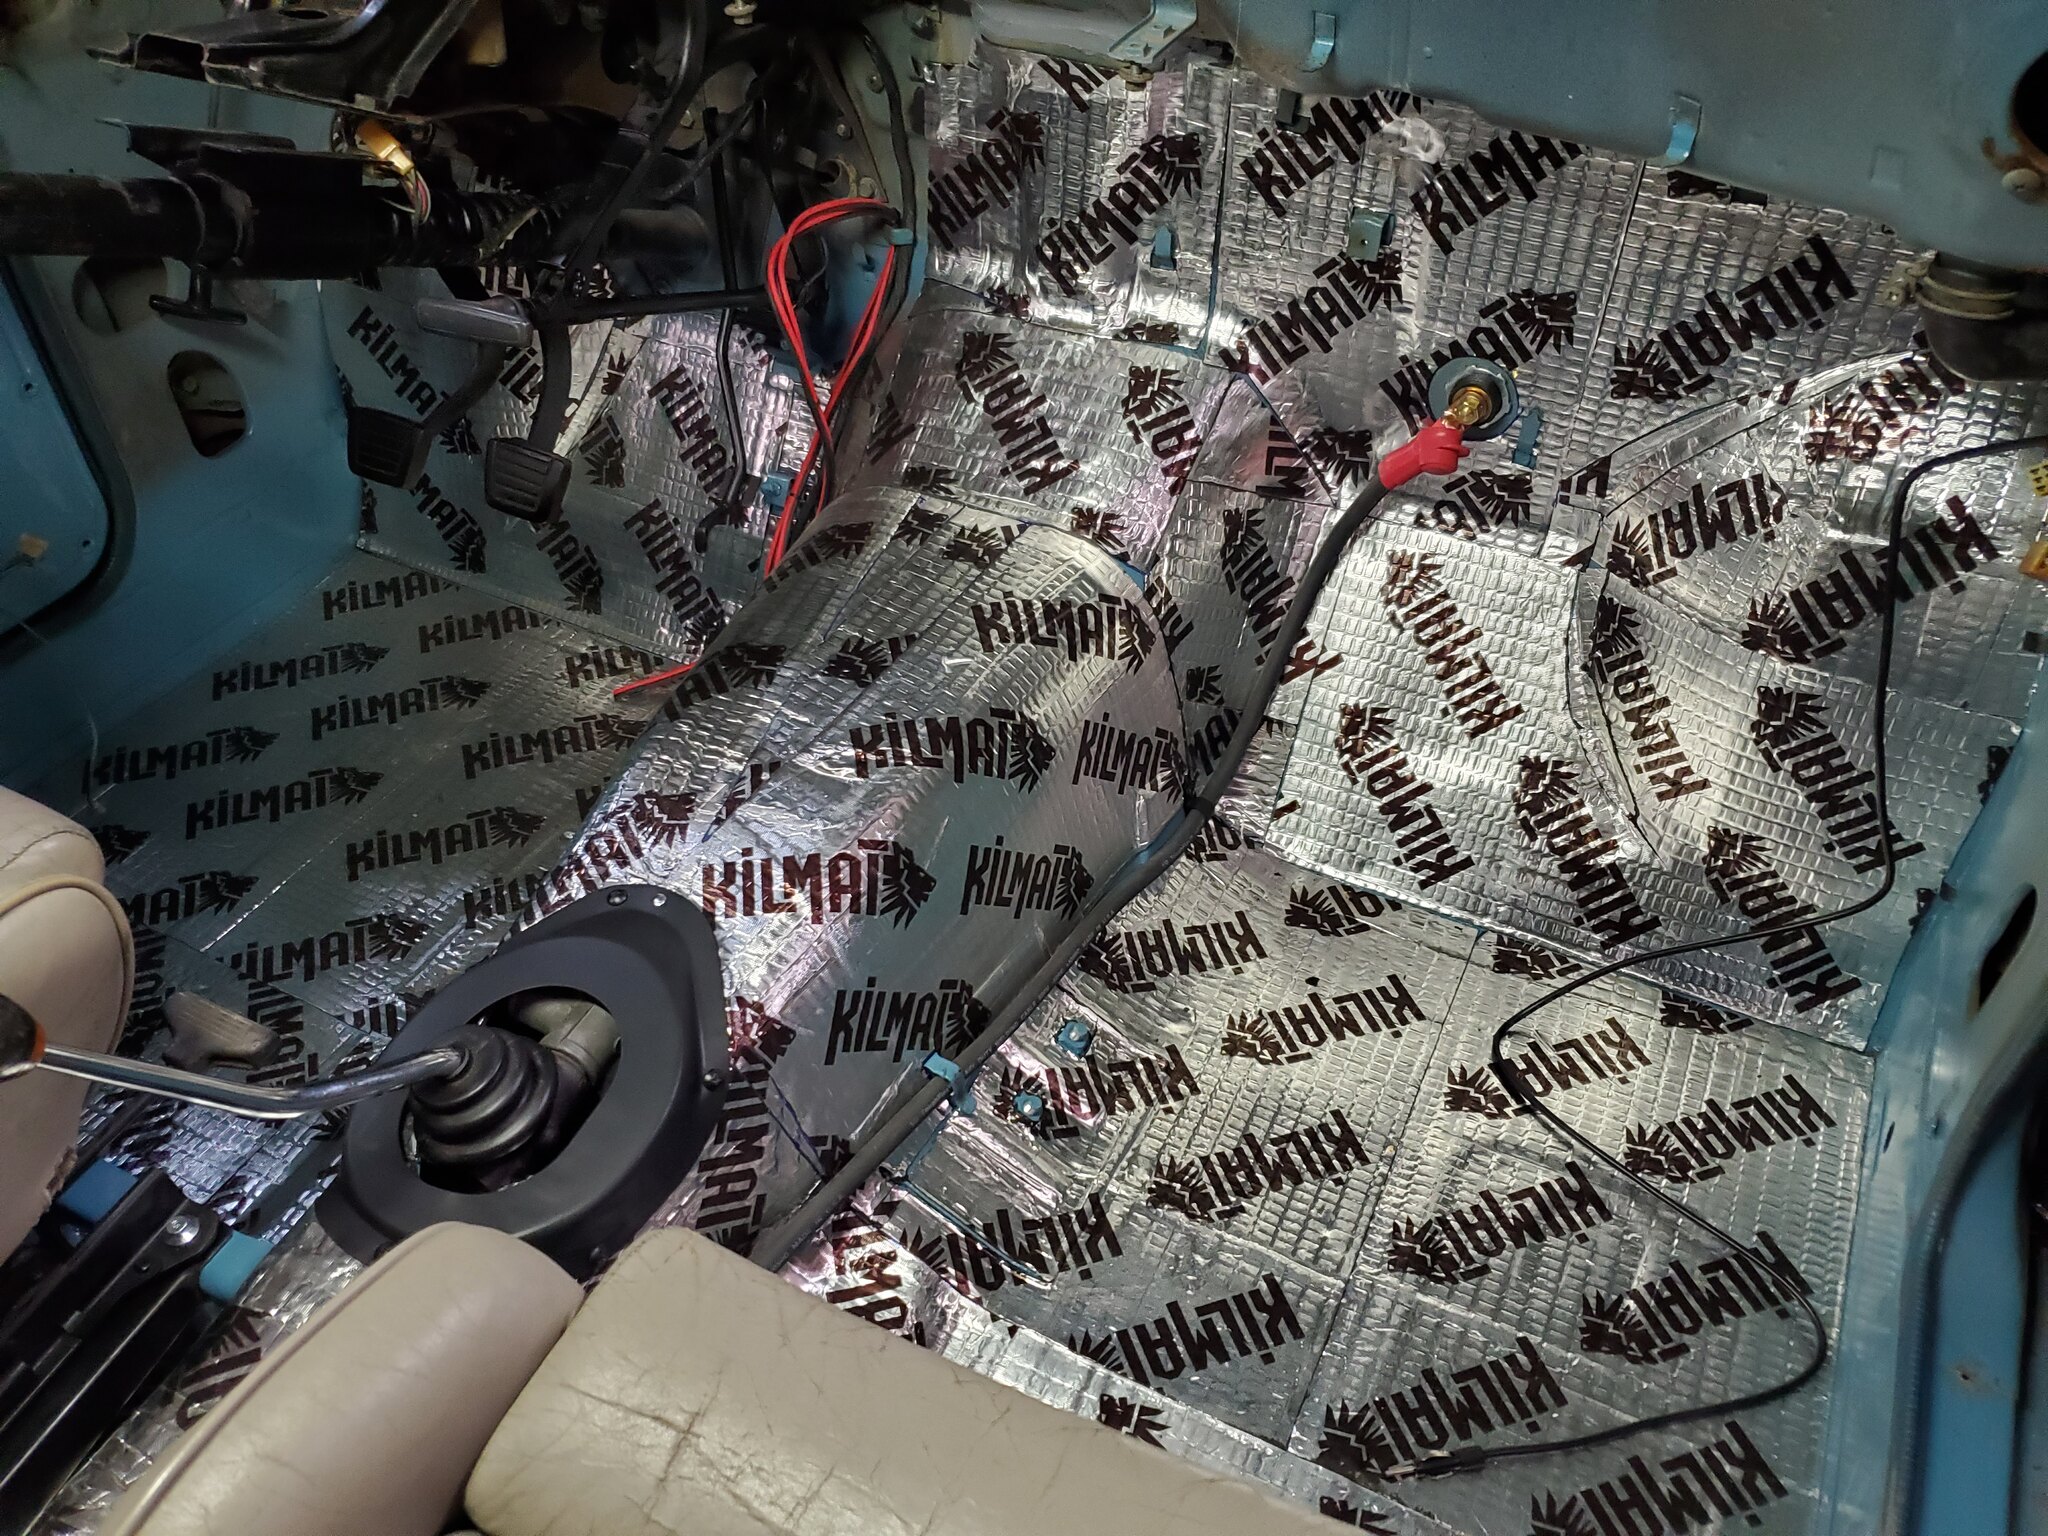
I installed some sound deadening on the entire floor and up the firewall. Also removed the entire dash to take apart and clean up. While that was out, I took out the old windshield. The lamination in it had deteriorated and was terrible to look through. When I ordered a windshield a while back, it showed up with a crack on one of the corners. So I ended up with 2 windshields, one just had a crack in it. So I figured rather than throw it out, I could at least use it for a little while until I take it back out to paint the car. So I bought a "cheap" windshield seal and installed that one for the time being.
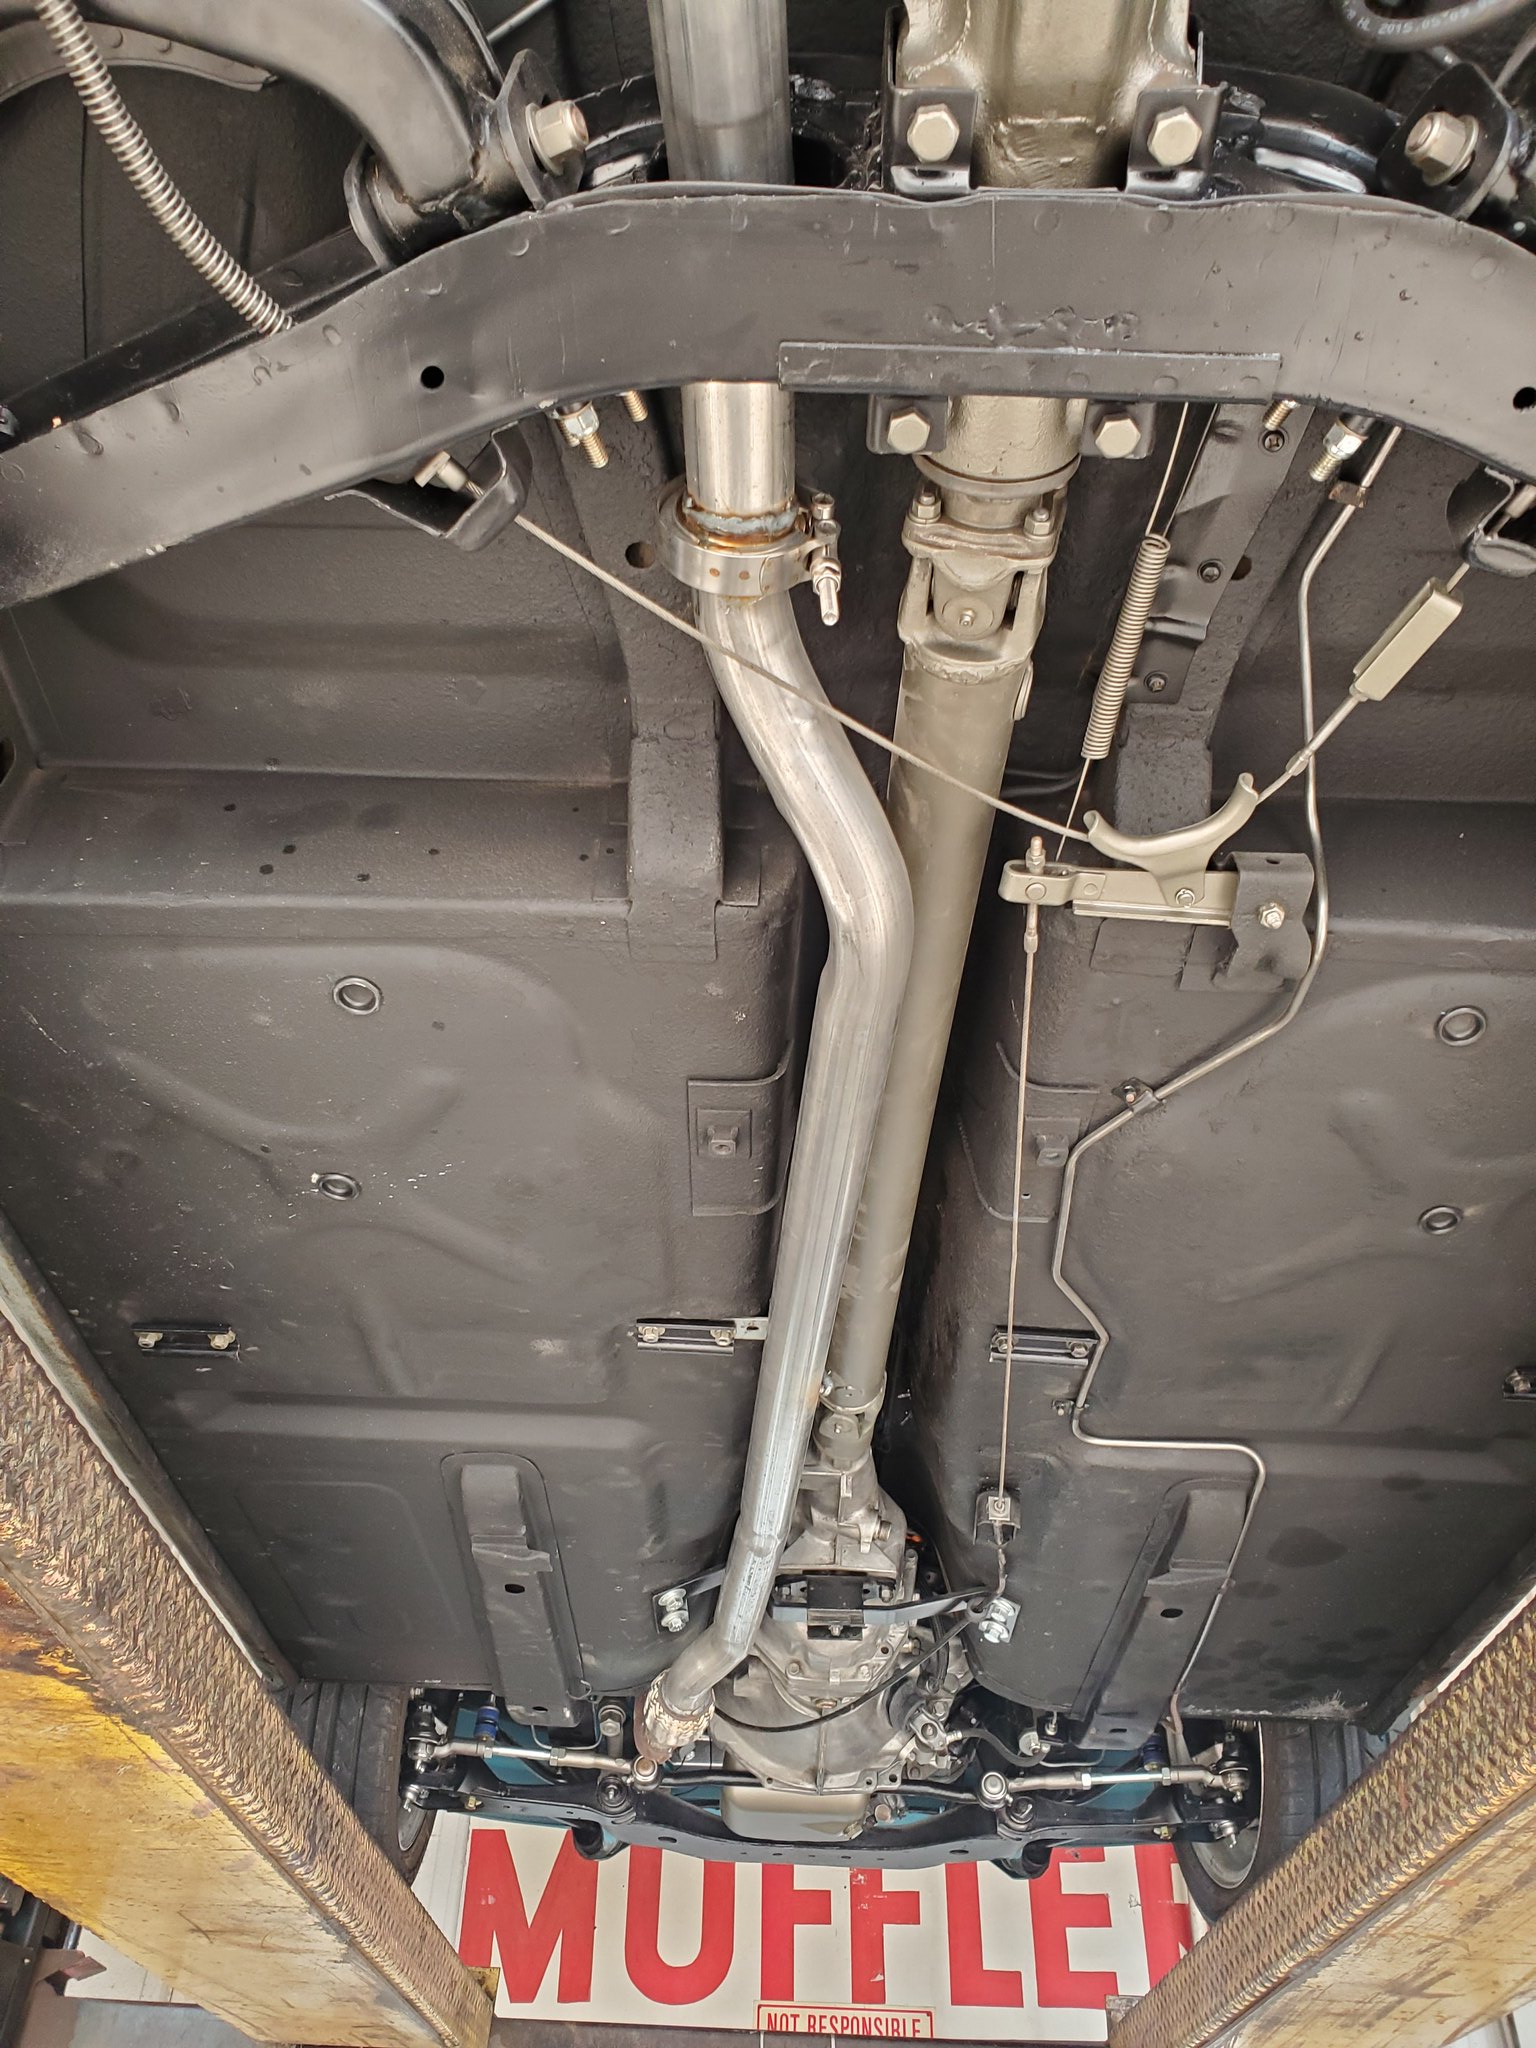
Then I drove it down to the exhaust shop and had the exhaust built for it.


Then I drove it down to the exhaust shop and had the exhaust built for it.
Chris
'71 510 4-Door Sedan
'76 280z
'71 510 4-Door Sedan
'76 280z

Re: Blue '71 Project
Looking great!
When I saw the circuit board I thought you had sequential lights
When I saw the circuit board I thought you had sequential lights
Re: Blue '71 Project
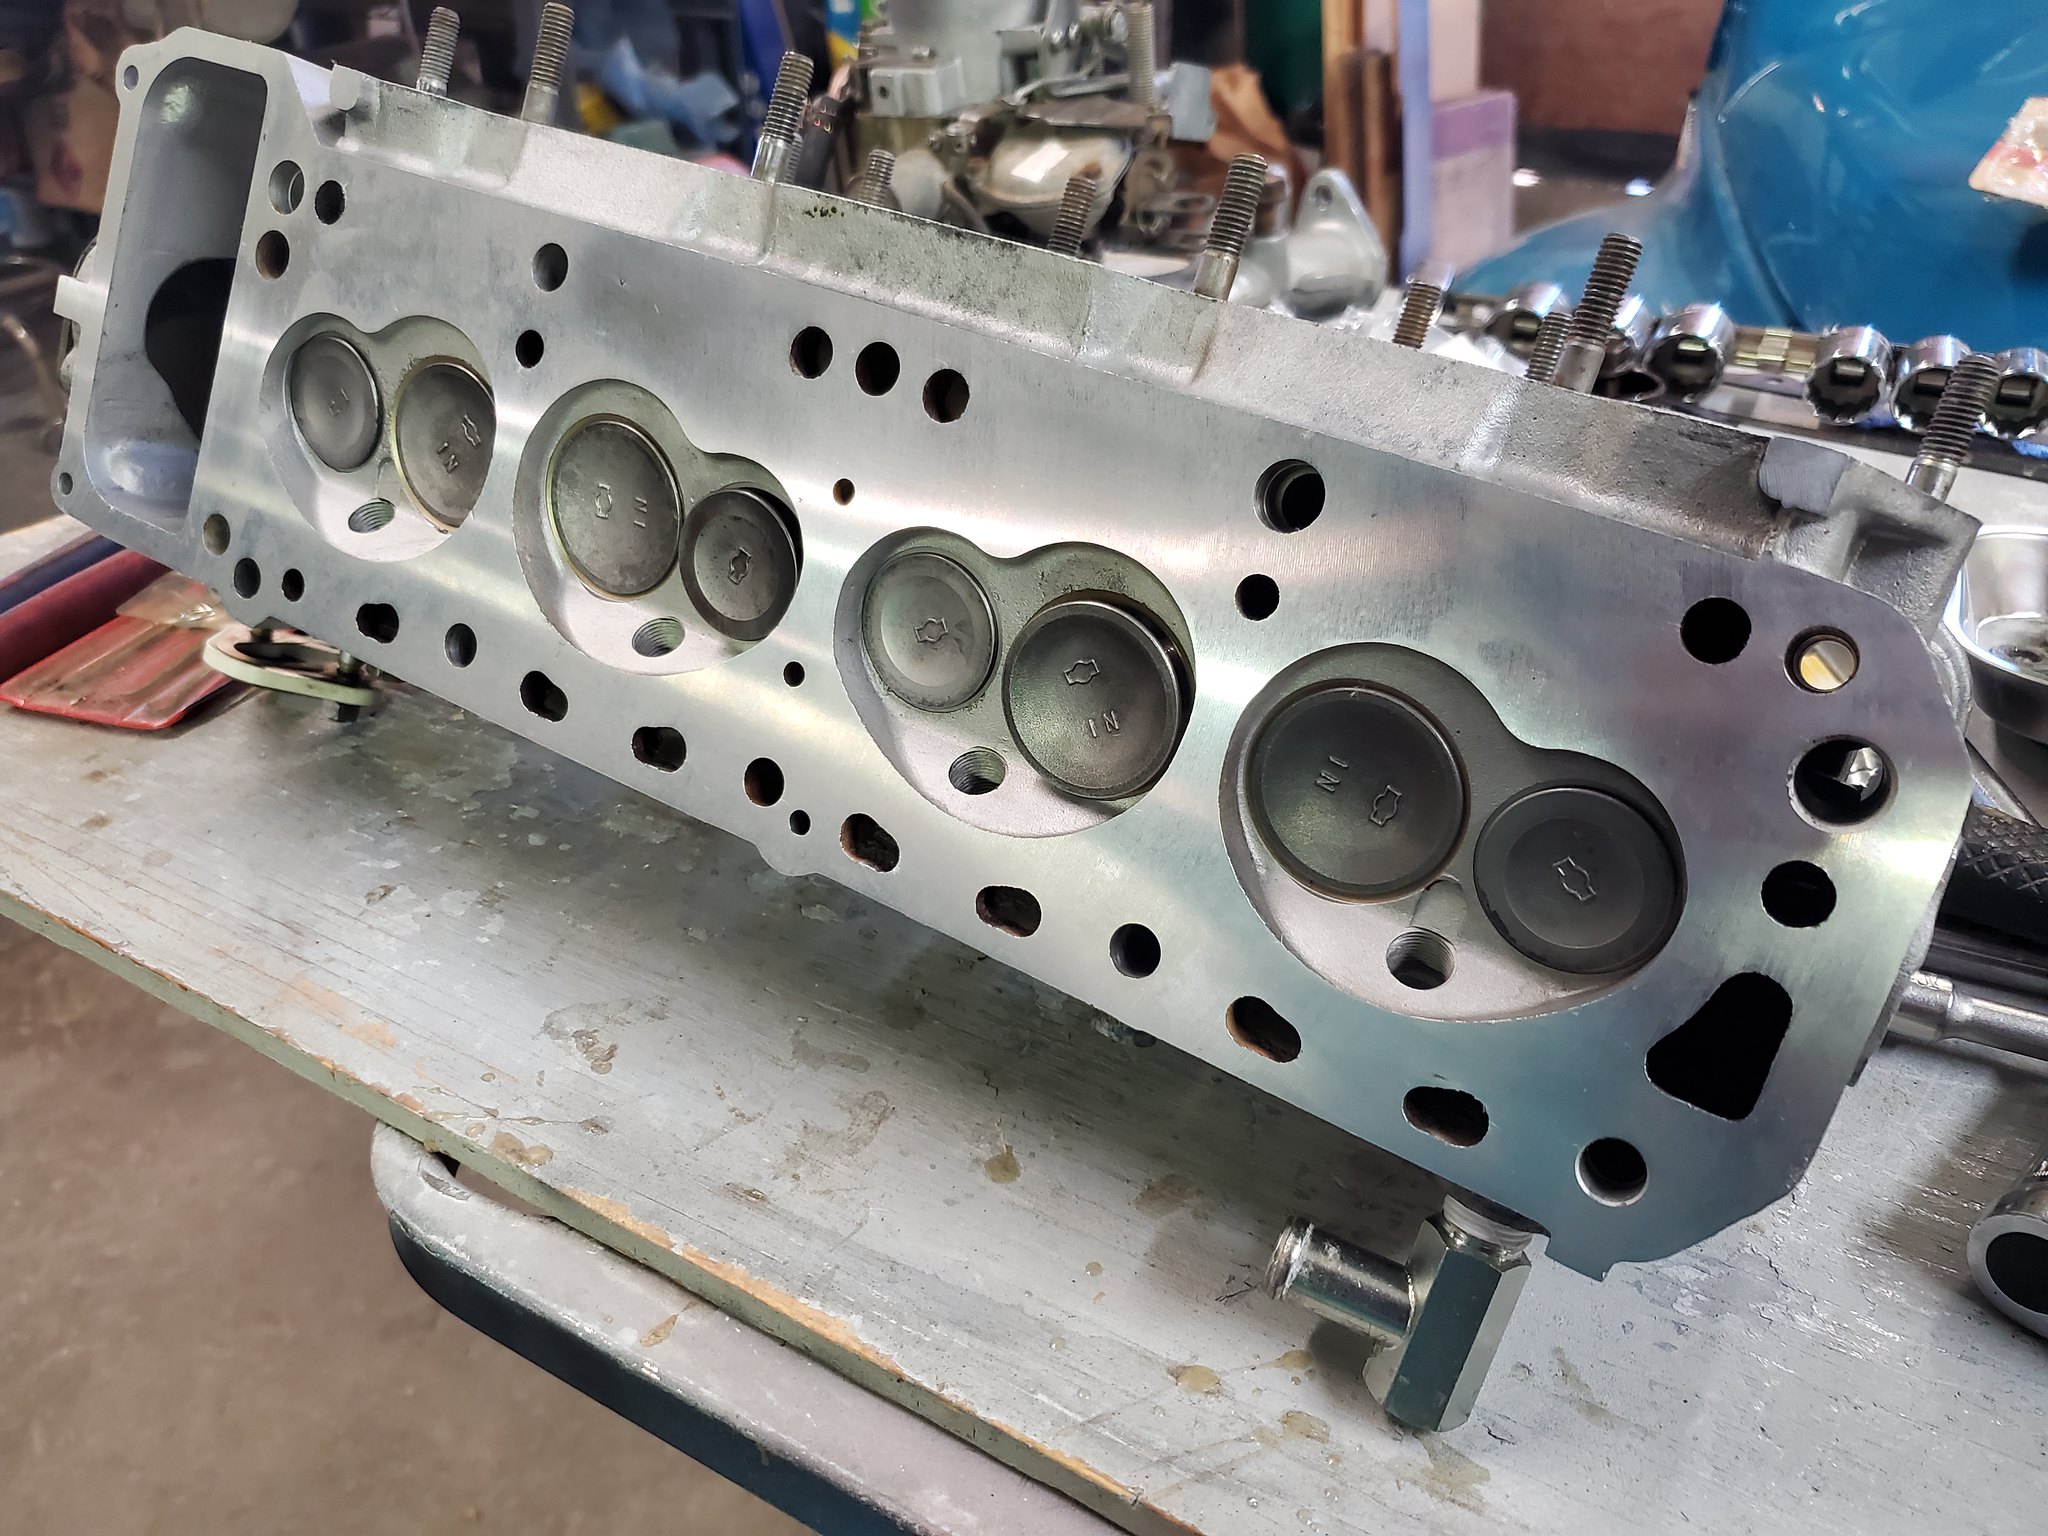
Turns out the #2 spark plug threads were pretty chewed up in my cylinder head, and it shot the plug out a couple weeks ago while it was idling. I could've installed a helicoil, and I might still do it just to repair it and have it as a spare, but I went ahead and looked around for another cylinder head. I ended up getting a pair of A87 heads, one closed chamber and one open chamber. I took the closed chamber head to the machine shop to have it reconditioned. It should provide a little better performance than the stock head, especially once I install the other set of carburetors I have on it.

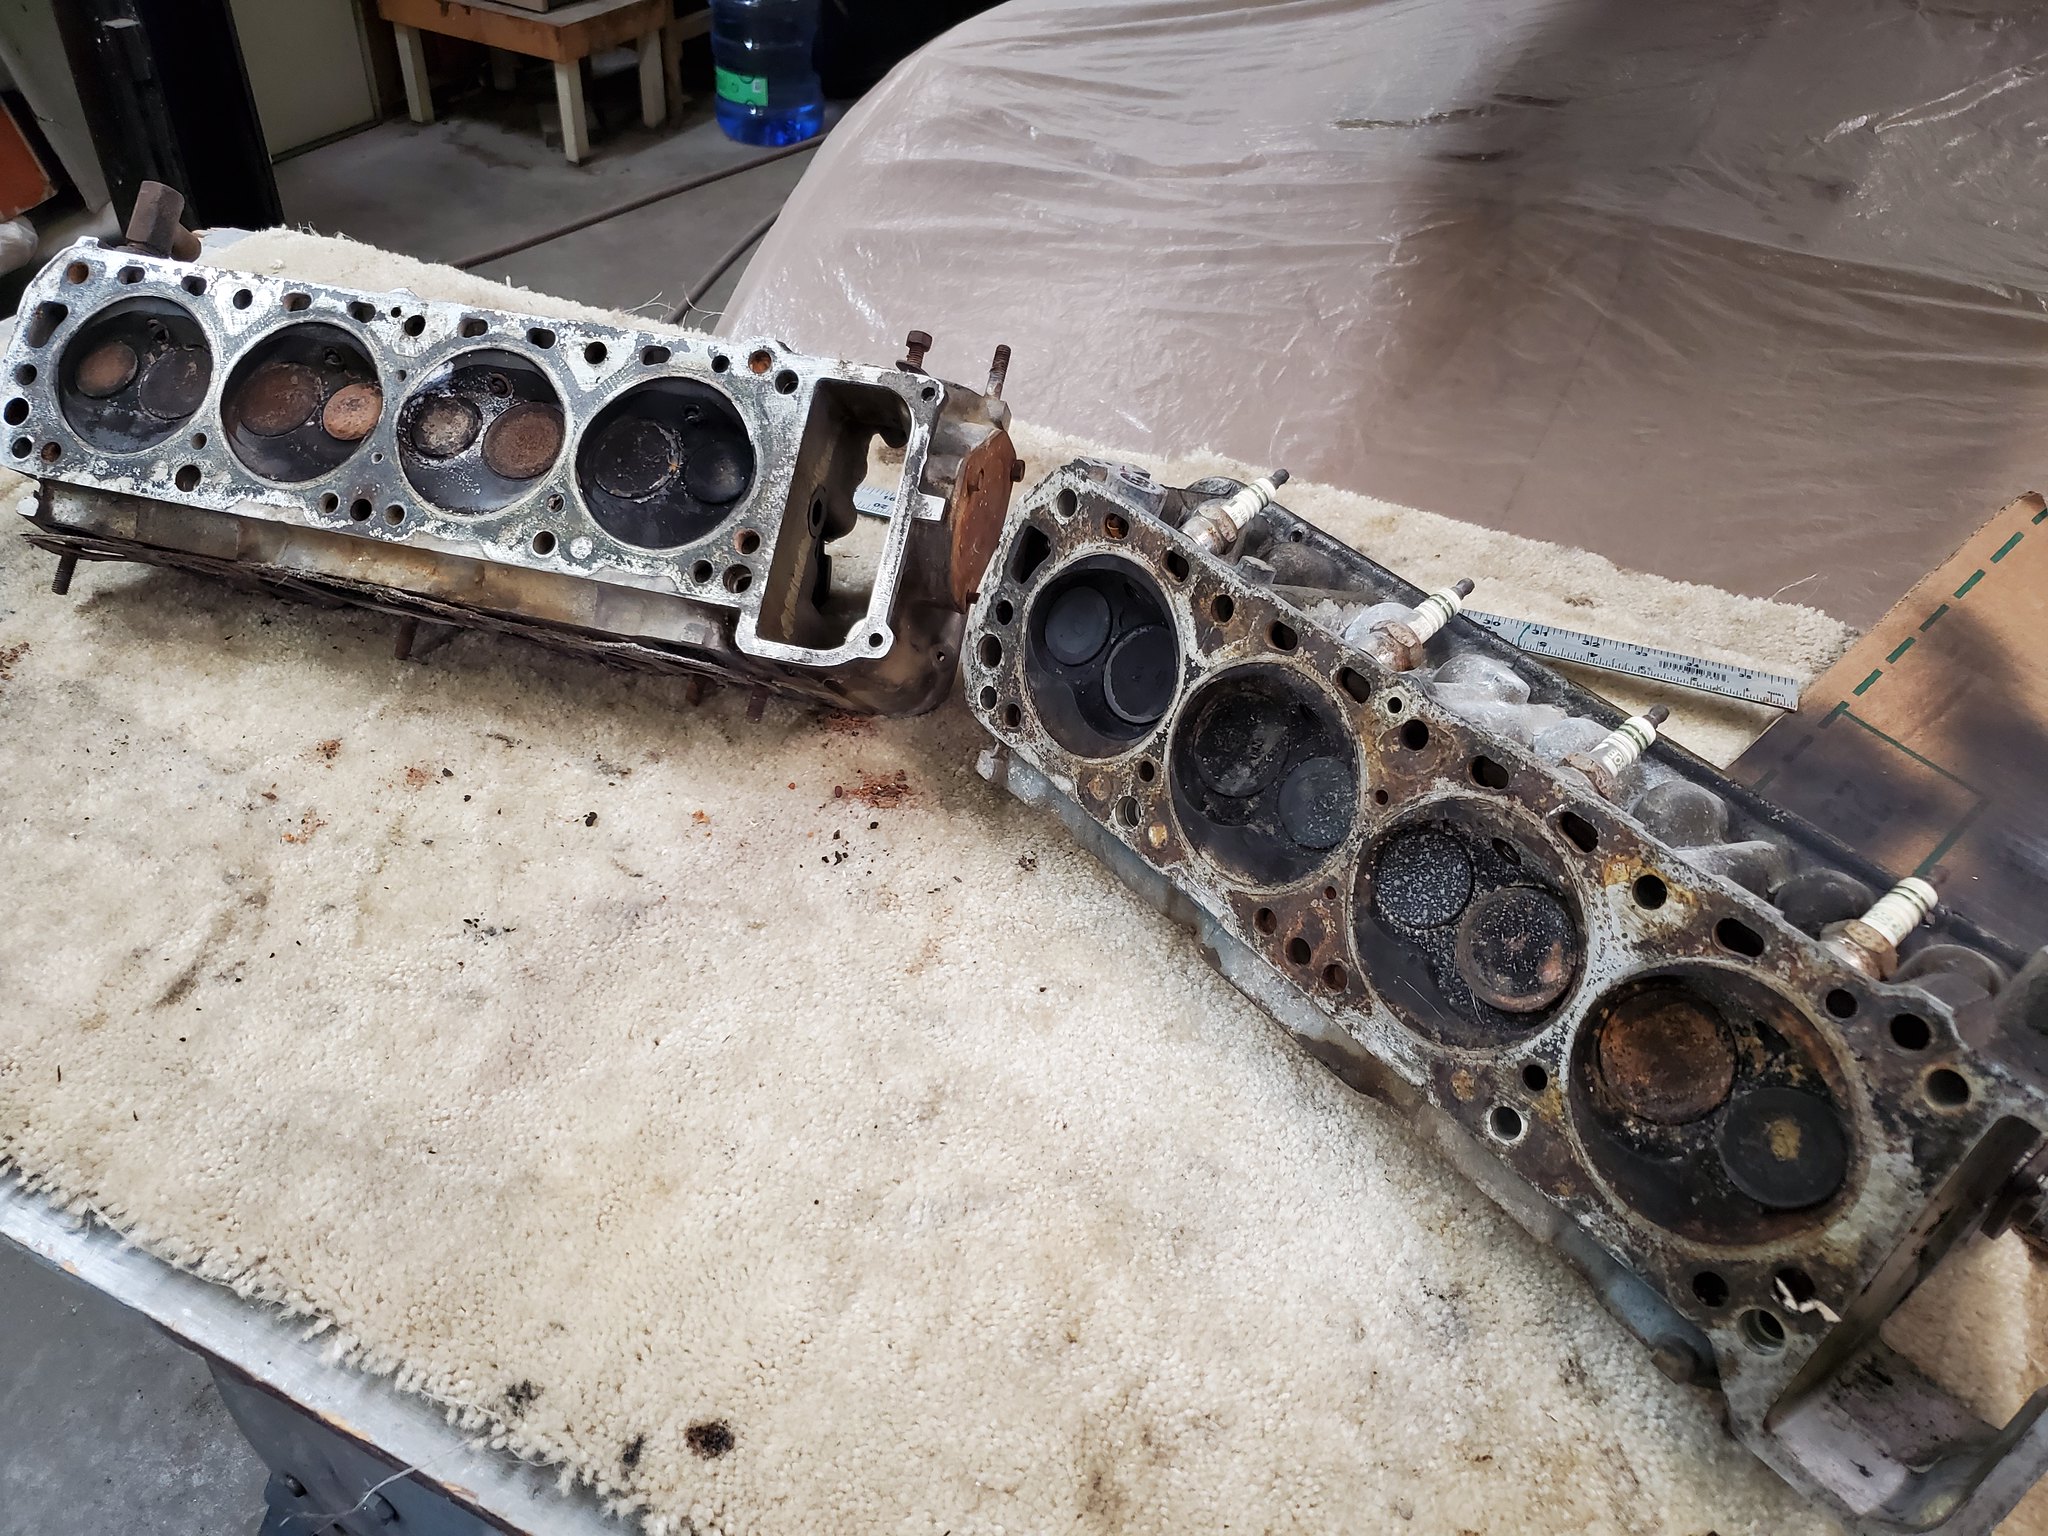
Old cylinder head removed

New head gasket and head ready to be installed


Old cylinder head removed
New head gasket and head ready to be installed
Chris
'71 510 4-Door Sedan
'76 280z
'71 510 4-Door Sedan
'76 280z